Sewing with Knits: Peplum Top and Dress

2015-04-261

We got a teaser of rain last week and it seems we are jumping right into summer temperatures with most of this week’s forecast in the 80’s.  Quite unfortunate given the drought we are having here in California, but it is another reason to make some pretty tops and dresses for the warmer weather.  Oh, did I mention this time I will be sewing for me!?  I can’t recall the last time I cut out fabric pieces to make something for myself.  It might have been when I tried to make a coral-colored dress for my cousin’s wedding a few years ago, failed miserably after I read the sizing incorrectly for one of the Simplicity patterns, and ended up rushing to the mall and ransacking every store for a coral dress that had sleeves.  I couldn’t bring myself to throw away the hours of work I had put into the dress and it is still sitting in the back of one of my fabric stash bins.  I still feel a twinge of frustration every time I lay eyes on that dress… I should toss it. It’s not healthy.

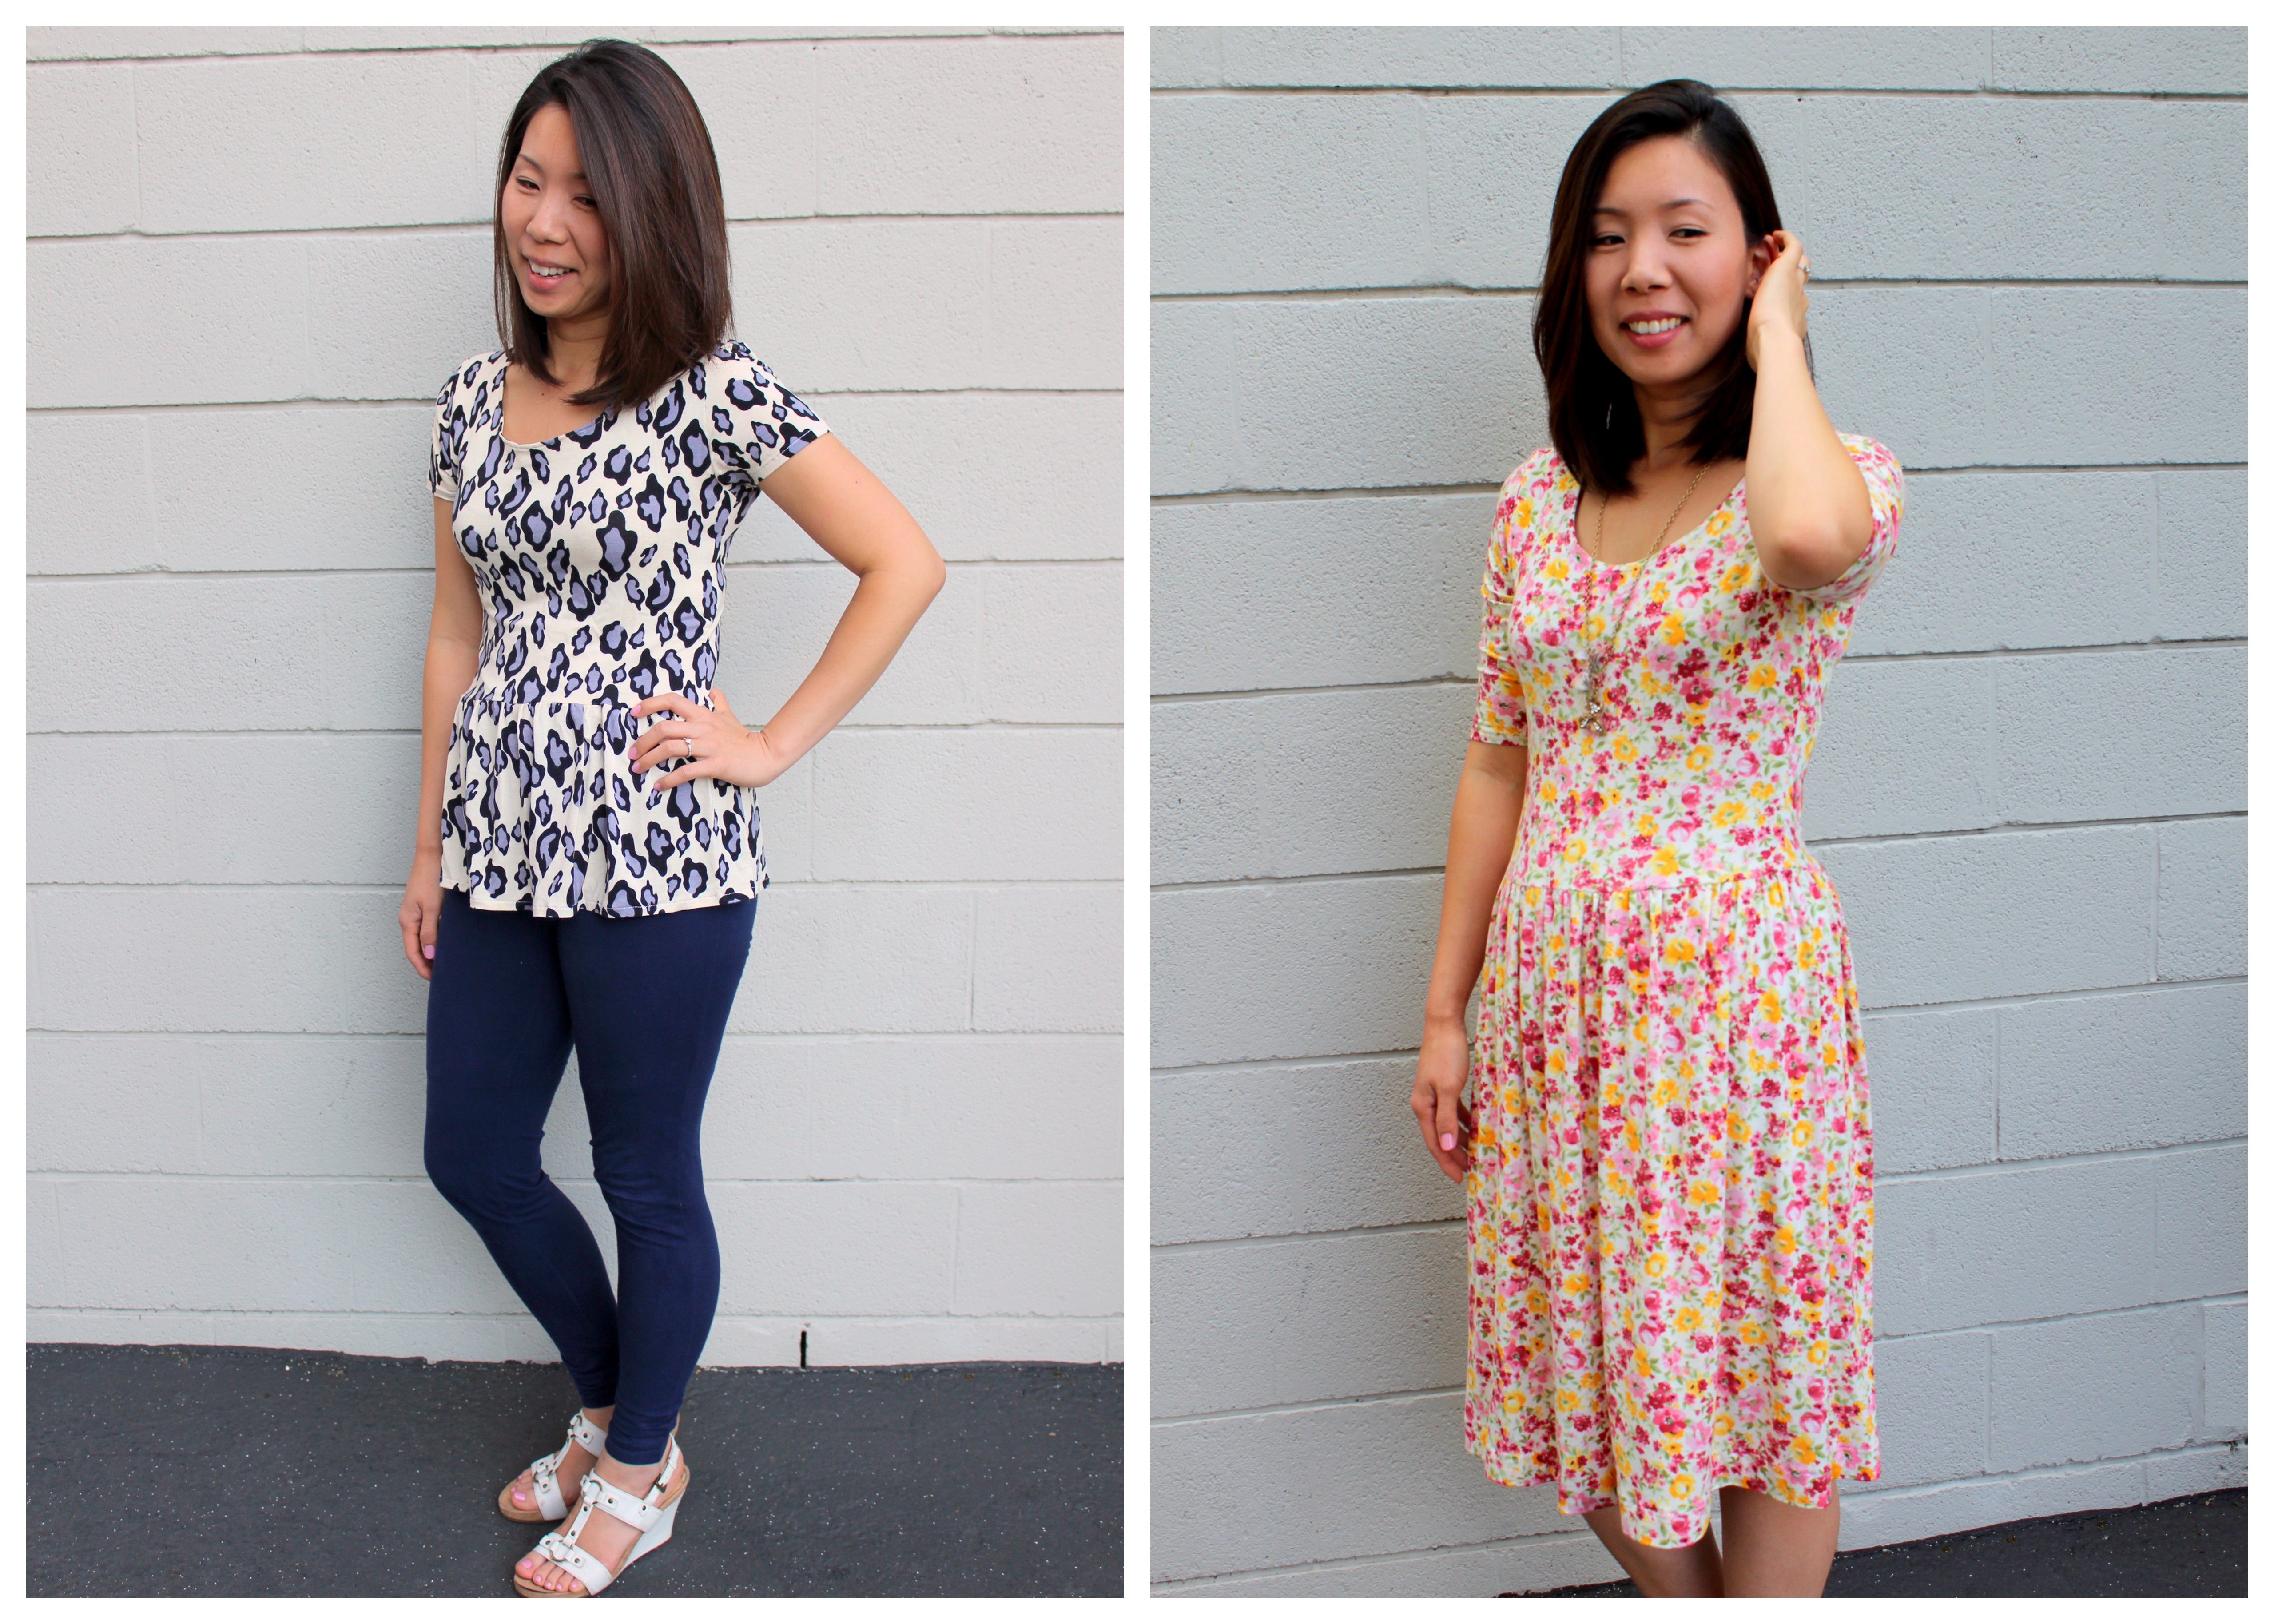
Pretty fabric is one of my many weaknesses.  I had been eyeing and waiting for the Girl Charlee Knitfix to go on sale for weeks and even set an alarm on my phone so I wouldn’t miss it.  And of course, that morning I had a Kindergarten “Get-to-Know-You” for my A right when they went on sale, but what’s your smartphone for if you don’t use it in these emergency situations? I lucked out too because I had already done the volunteer clearance (for my B), which they were getting the parents to do while the teachers were meeting with my future Kindergartener.  When my precious fabric cargo finally arrived, I rushed it through the washer/dryer and made my first project using the Penelope Peplum pattern by See Kate Sew, soon followed by a dress using the same pattern but tweaking it a bit to make it a dress.

CYMERA_20150421_180029

Initially, I wasn’t sure about this “Lavender Animal Spot” fabric I saw in my fabric bundle; I’m not a huge animal print person. But I have definitely fallen in love with this top. I still can’t say I like animal print, but this one I do love.

IMG_0495

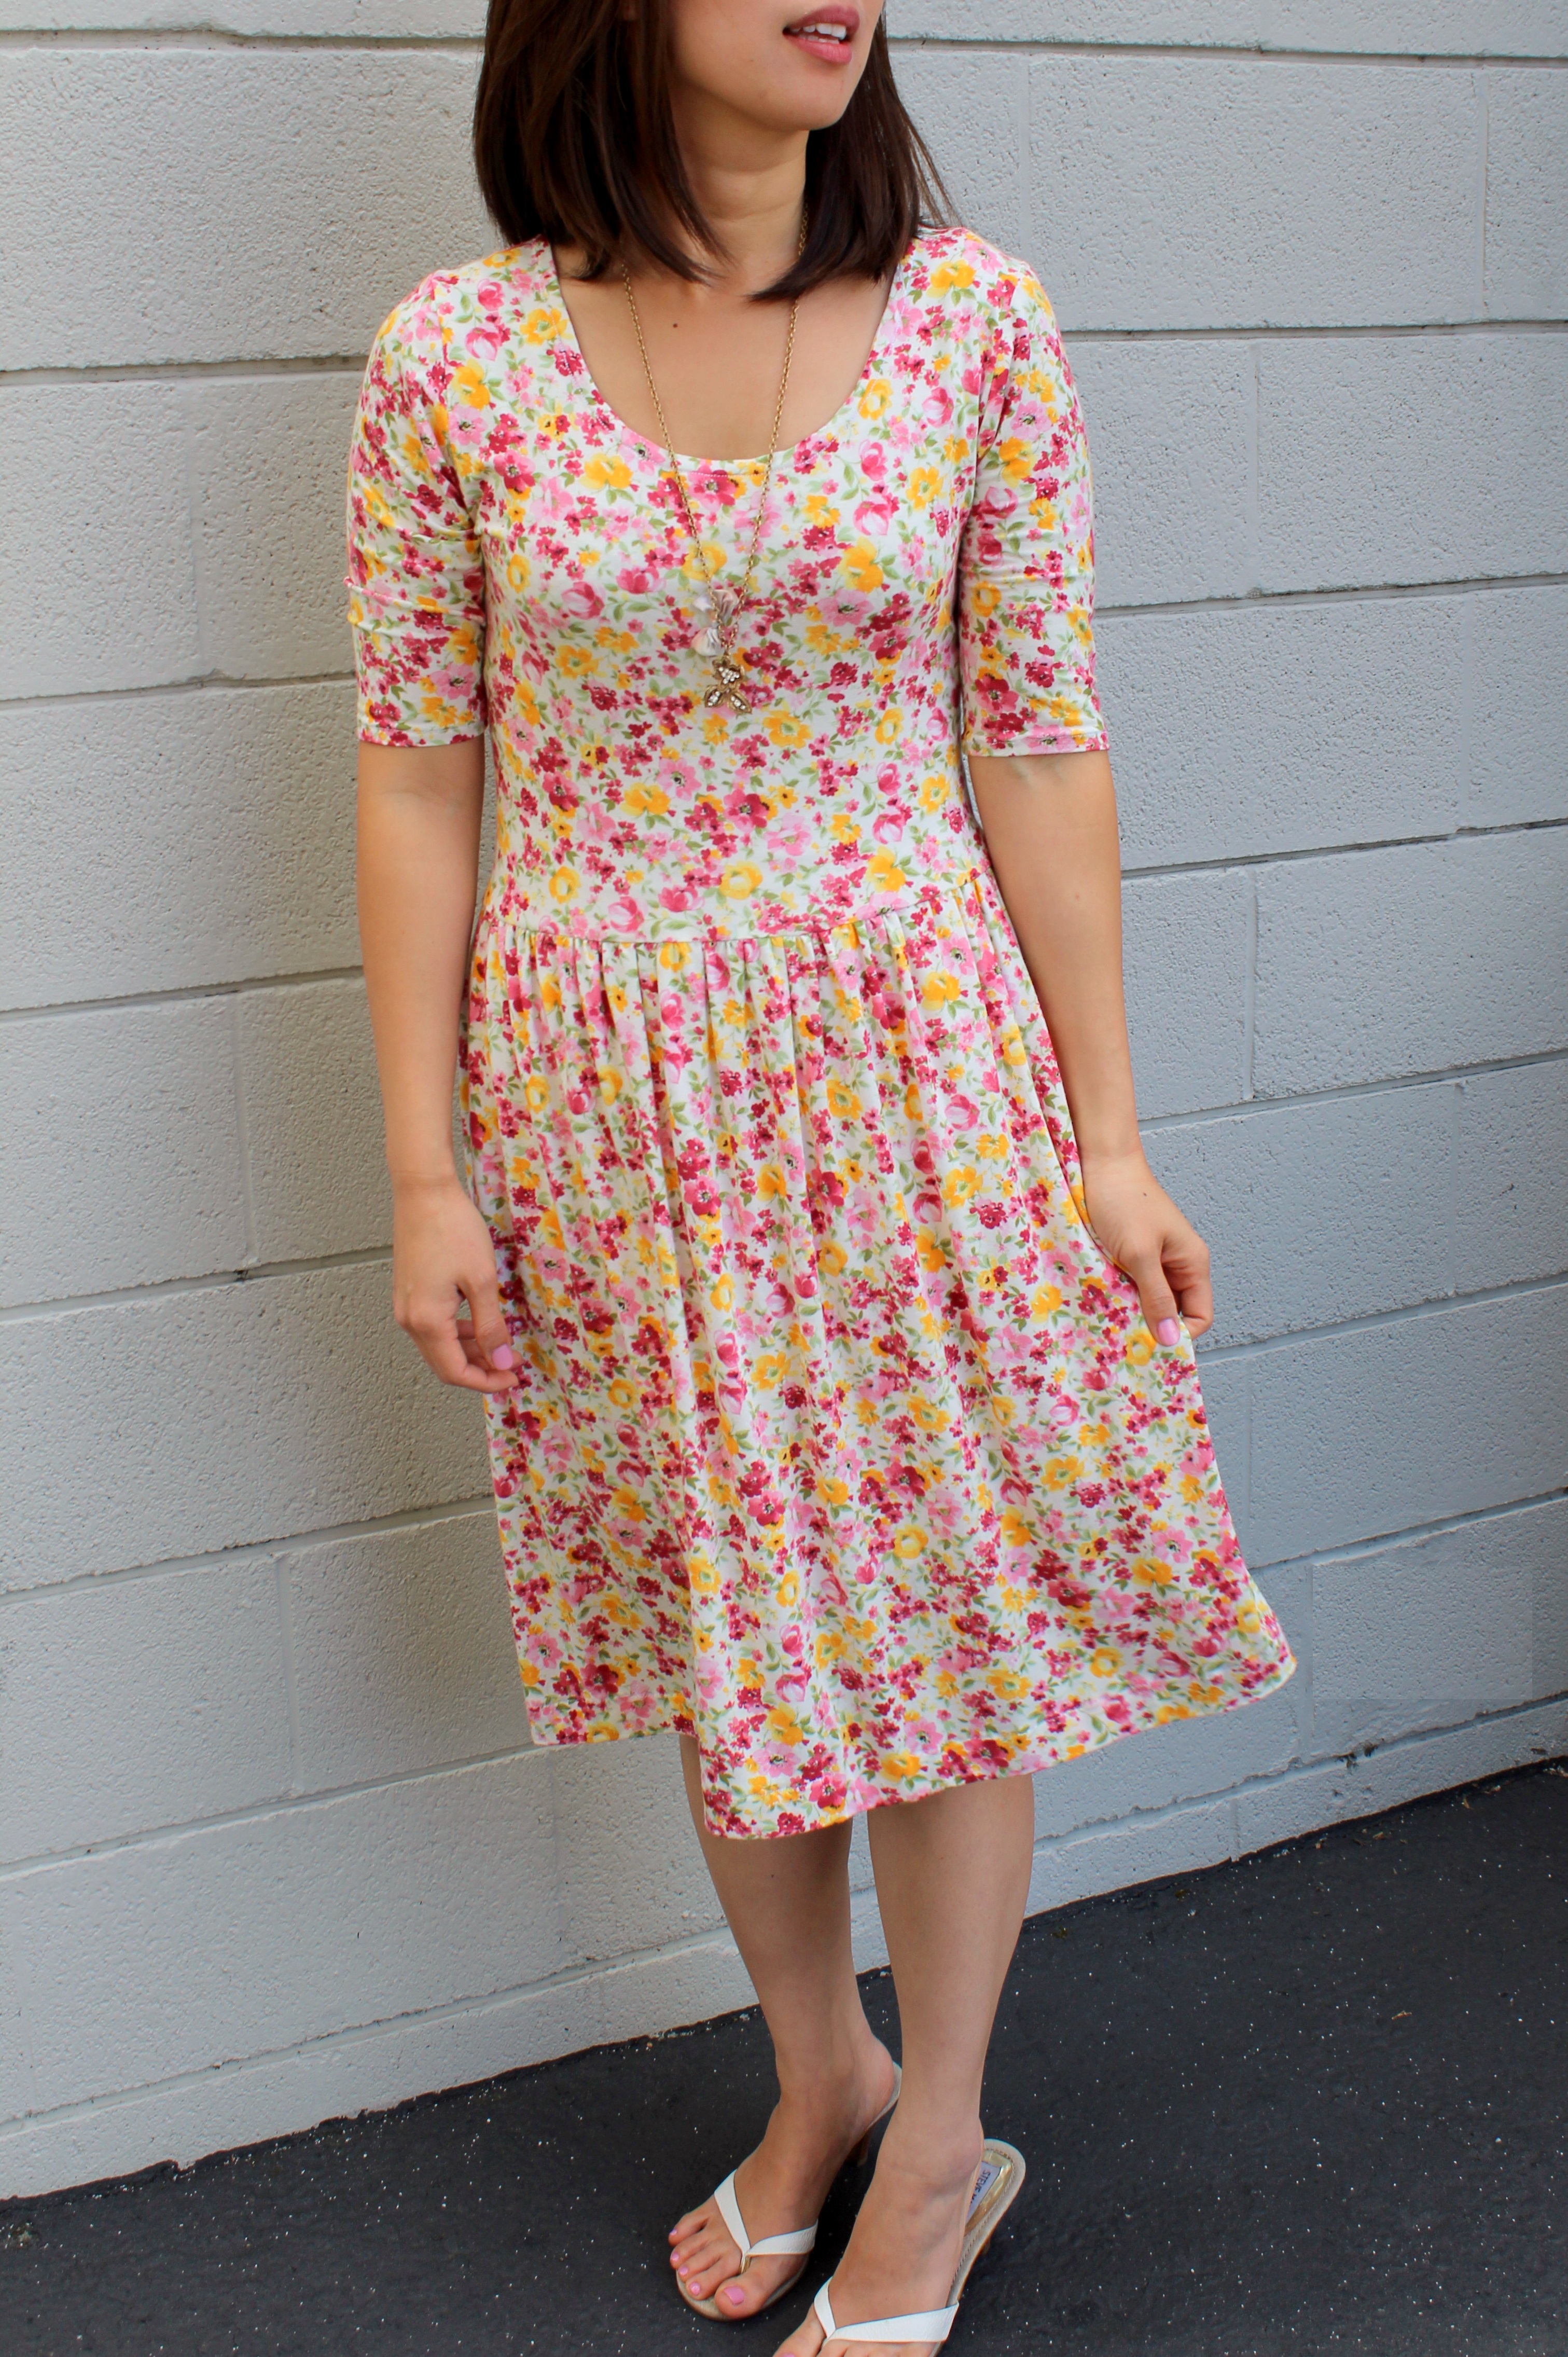
I thought this dress looked ‘frumpy’ when I first completed it, but I’ve since changed my mind.

Peplums, peplums!  I love peplums!  They are flattering and made in a knit, it becomes an everyday wear.  I may be making a peplum shirt out of each one of my knits for each day of the week. 🙂   I’m not usually a dress-wearer (aside from church), but knit dresses are definitely an exception.  I mean, it’s so easy to wear and what’s better than a nice cool breeze flowing through your skirt on an exceptionally warm day when our male counterparts are (usually) confined to shorts that don’t allow them this luxury.

The only thing I changed to turn the peplum top into a dress, was to change the length and width of the “peplum” portion of the pattern.  I had 62″ width of the flower pattern fabric and used that width with 25″ for the length of the skirt.  I think I may shorten the width next time so there aren’t so many gathers around the midsection, which can end up widening your waistline.  The skirt portion ended up hitting me right below the knee, although I was aiming more for right above the knee, but it works.  And of course you can make it even longer and turn it into a maxi dress.

IMG_0433

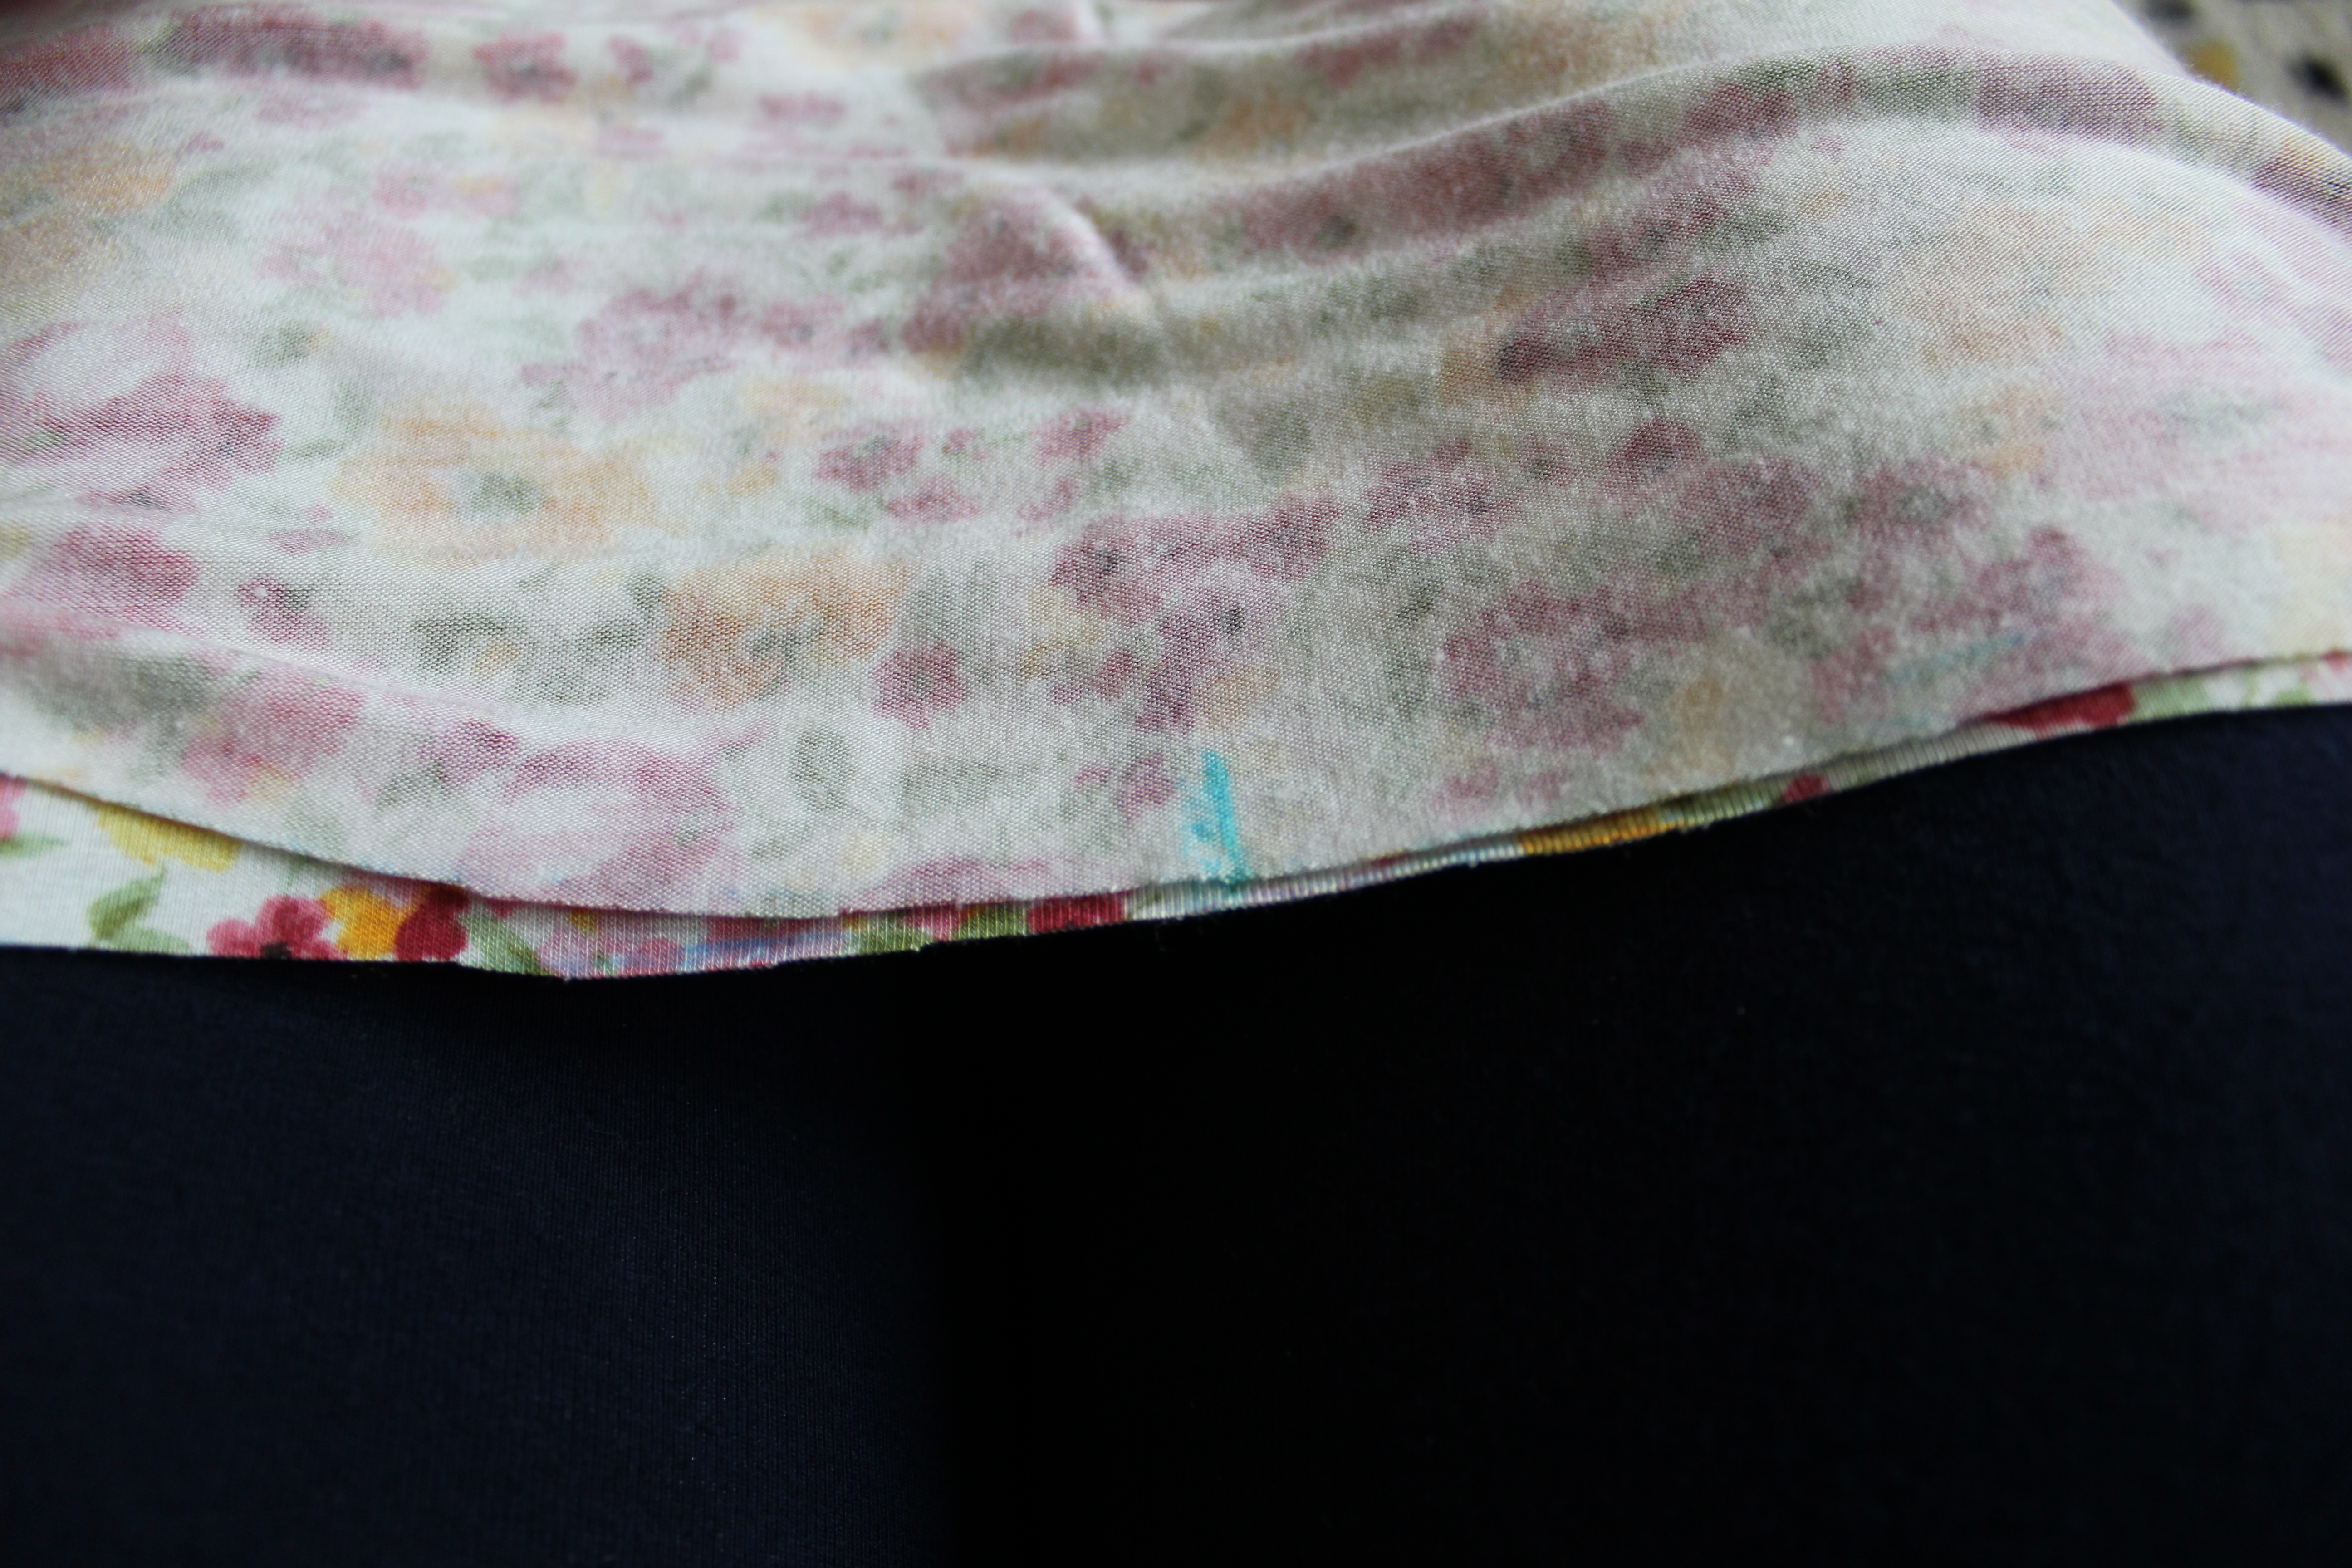
I laid out the fabric and went across marking (every 2 inches or so) 25″ up from the bottom of the fabric

IMG_0435

Made a bunch of those blue lines to mark 25″

IMG_0437

Then I connected the dots to make a skirt piece that was 62″x25″

IMG_0439

I have all my pieces cut!!! Ready to start sewing them together.

IMG_0441

I like to make marks at the halfway point between side seams on the bodice and the skirt to help me pin them so the gathers are evenly distributed.

IMG_0463

Matching the marks I made to the side seams

IMG_0464

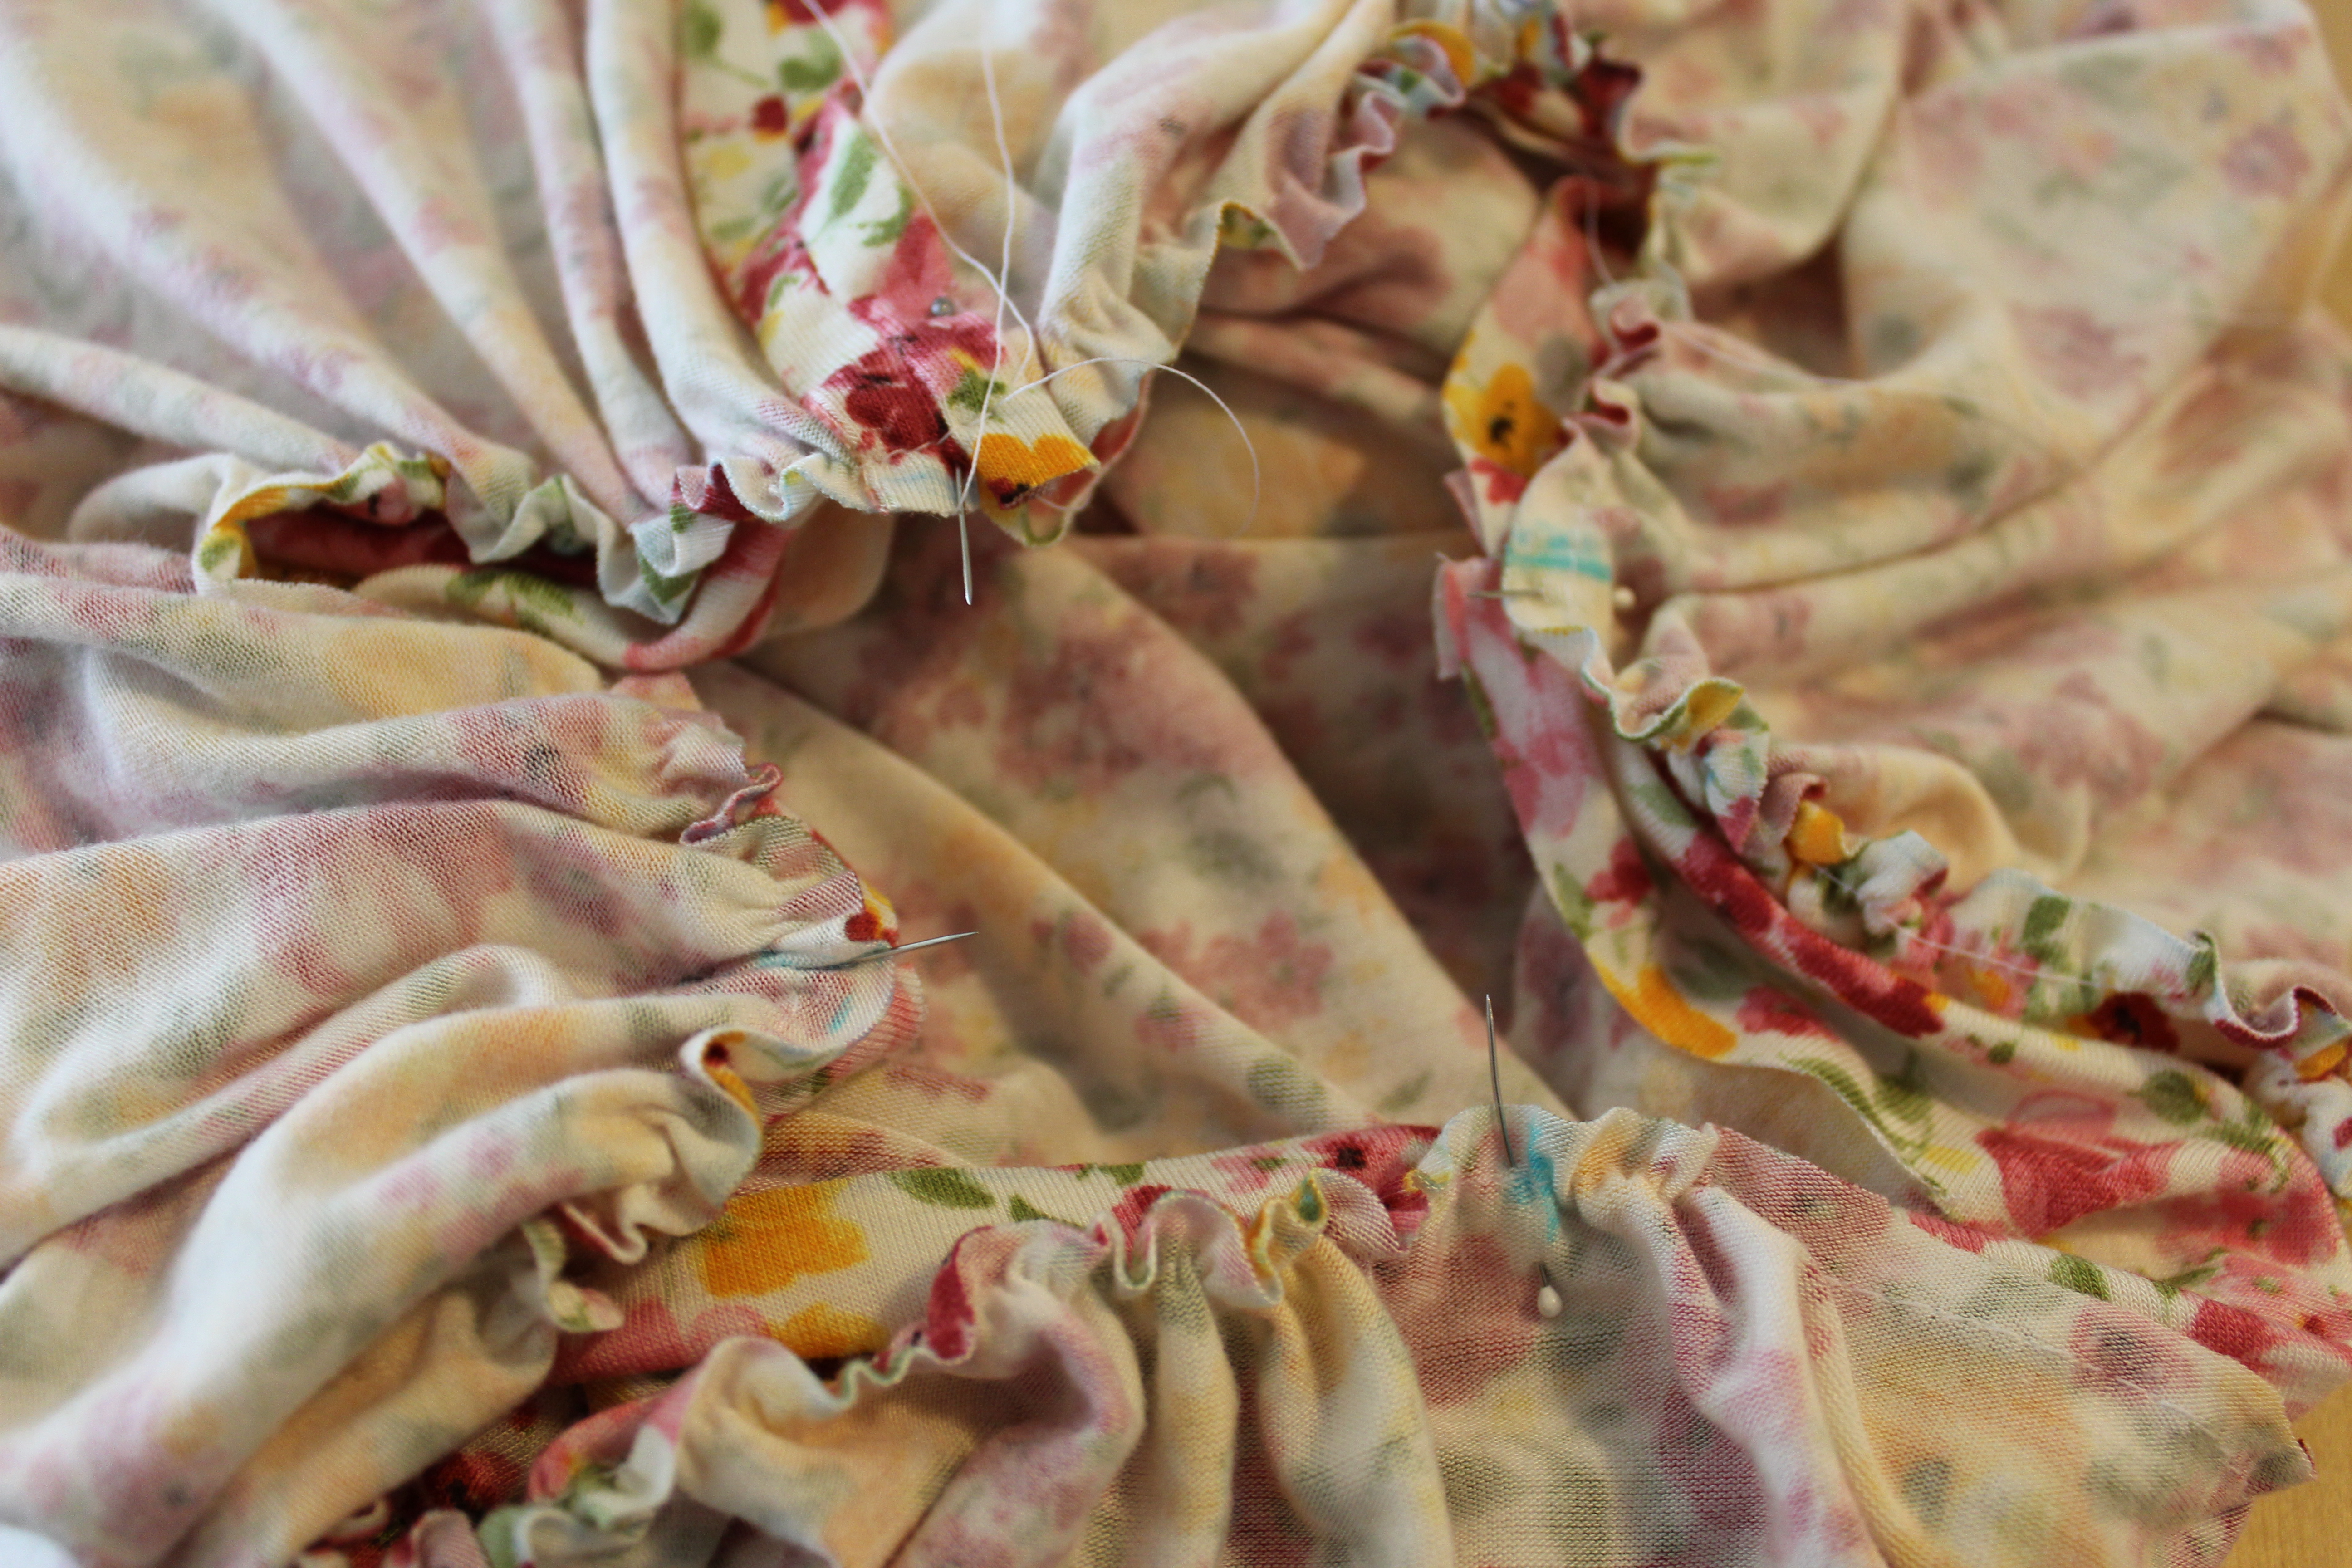
All pinned together with marks matching the seams and halfway marks.  Sew it and hem the skirt.

IMG_0472

All done!

To Blog About

Now, what to make with the rest of my knitfix bundle of fabric…

IMG_20150420_144655

Thanks for reading and have an awesome week!

-Flora 🙂

Tonkatsu 돈까스: Japanese Breaded Pork Cutlets

IMG_0392

Another weekend gone!  We packed in our Saturday with dental appointments, T-ball game, ballet class, friend’s birthday party, and cleared out our little patio to make some extra room for the kiddos to hang out in.  We are planning to be adventurous and TRY to make our own DIY teepees in the near future so the kids don’t burn outside since we don’t have any good trees for shade.  But in the meantime, I made A and B’s favorite dish: Tonkatsu!  We like to serve it up with cabbage slaw, white rice, and the special tonkatsu dipping sauce.

Back in March, I asked A what dish she wanted for her birthday dinner and she asked for Tonkatsu! She loves the crunchy breaded pork dipped in the sauce with the slightly sweet and tangy cabbage slaw on the side.  I think it’s safe to say it’s a family favorite.  My kids have never been huge meat eaters but I can always count on them to clean their plate when I serve them Katsu.  C likes to lick her dipping sauce bowl clean… … …

CYMERA_20150419_184004

Before you start on anything, you want to make your rice since it takes a good 40 mins in my rice cooker.  I used my handy dandy electric rice cooker and made 3 cups of white rice (we like to have rice leftover for making rice balls or fried rice for lunch the following day).  After you cook your rice, you want to make the cabbage slaw, the tonkatsu sauce, and the tonkatsu (pork) last.

Tonkatsu is a Japanese dish, but is quite popular with Koreans and was a favorite of mine growing up (now you know why my kids love it).  I like adding some garlic into my egg to help offset any “pork smell” and I think it makes it taste better.   You could “hammer” down the pork to make it more tender, but I don’t find it necessary.  Feel free to substitute pork with chicken or beef, too. And you can add tonkatsu to curry, ramen, and other dishes. How can you go wrong with crunchy, fried pork?

IMG_0355

Look how pretty and green the cabbage is!

IMG_0356

I used half a head of cabbage and sliced it nice and thin.

IMG_0358

Make your cabbage slaw sauce by mixing the mayo, vinegar, and sugar.

IMG_0359

Then mix the sauce with your sliced cabbage and add some shredded carrots. I usually have a bag of shredded carrots on hand from Trader Joe’s.

IMG_0360

Make the Tonkatsu sauce by mixing all the ingredients together.

Before you touch the pork, you want to get all the prep ready.

IMG_0364

Heat the oil on medium heat in a pan deep enough and wide enough to fry about 4 cutlets at a time.

IMG_0363

Prepare the flour mixture by mixing in the salt and pepper.

IMG_0365

Start with 1 cup of panko bread crumbs in a wide dish. I ended up using 2 cups total.

IMG_0366

Lightly beat the egg (I used a fork) with 1 TB of milk and a cube of frozen crushed garlic (from Trader Joe’s)

IMG_0367

Get your assembly line ready! 1.Flour 2.Egg 3.Panko

IMG_0368

Now time to handle the meat!

IMG_0369

You can buy the thin cut pork, or if it’s thicker, just slice it in half, horizontally.

IMG_0370

All sliced and ready to “bread”

IMG_0371

Coat in flour mixture

IMG_0377

Dunk it in the egg mixture

IMG_0379

Press it into the Panko bread crumbs until coated

IMG_0382

Bread half (4) of the cutlets then carefully place into hot oil to fry before breading the rest

IMG_0383

Gently and carefully place the pork into the hot oil and fry

IMG_0384

It should be hot enough that it bubbles. I had my heat on Med high heat. Raise or lower the temperature as needed.

IMG_0385

Flip it and fry until nice and golden.

IMG_0388

You can cut one in half to see if it’s ready.

Now for the recipes.  The ingredients are all easy to find.  Mirin is a sweet rice wine and can be replaced with these and they can be found in the Asian aisle at most grocery stores.  And I can’t imagine any grocery store that doesn’t stock Panko Bread crumbs in this day and age.  🙂  And you know where to find all the other ingredients.

IMG_0391

Cabbage Slaw Recipe
  • 1/2 head of cabbage, thinly sliced
  • 1/4 cup shredded carrots
  • 3/4 cup mayonnaise
  • 2 TB vinegar
  • 1 TB granulated sugar
  • 1/4 tsp salt

Mix mayo, vinegar, sugar, and salt together in a small bowl then add it to the cabbage and carrots and mix.  You can add more or less vinegar and sugar to taste.  Cover and refrigerate until ready to serve.

IMG_0393

Tonkatsu Sauce Recipe
  • 1/2 cup ketchup
  • 2-3 TB worchestershire sauce
  • 1 TB light soy sauce
  • 1-2 tsp Mirin
  • 1-2 tsp sugar
  • 1/4 tsp garlic powder

Mix all the ingredients together in a small bowl.  Adjust worchestershire, mirin, and sugar to taste.  (If you like a stronger kick, then add 3 TB worchester, otherwise, just 2 TB) You can also omit the Mirin and add another 1/2 tsp of sugar, if desired.

IMG_0389

Tonkatsu (Breaded Pork) Recipe
  • 1.5 lb bonless pork loin chop (thin cut preferred)
  • 1/3 cup all-purpose flour
  • 1 TB salt
  • 2 tsp ground black pepper
  • 2 eggs, lightly beaten
  • 1 TB milk
  • 1 clove garlic, minced (1 cube frozen crushed garlic from Trader Joe’s)
  • 2 cups Panko bread crumbs
  • Canola or Vegetable Oil (approximately 4 cups, enough to fry the pork)
  1. Heat the oil over medium to medium-high heat in a saucepan or pot that is wide and deep enough to fry the pork (4 at a time).
  2. Prepare the flour mixture by placing 1/3 cup of flour into a wide plate and mixing in the 1 TB salt and 2 tsp ground pepper
  3. Lightly beat 2 eggs and add in 1 TB milk and garlic and mix.  Place in a wide plate deep enough to hold the egg mixture.
  4. Place 1 cup of bread crumbs into a wide plate and add more as needed.
  5. Prepare the pork by coating it in the flour mixture, dipping it completely in the egg mixture, then coating it with the panko bread crumbs.  Lightly press the pork into the bread crumbs to ensure a full and even coating.  Set aside and repeat for half of the pork.
  6. Check that the oil is hot, then carefully slide the breaded pork into the oil.  Fry about 2 mins on each side.
  7. Meanwhile, bread the remaining pork following the same order: flour, egg, panko.
  8. Fry the remaining pork cutlets in the hot oil and place the fried cutlets on a plate lined with paper towels.
  9. Cut and serve immediately with the dipping sauce, the rice, and cabbage slaw.

IMG_0390

If you’ve never tried Tonkatsu, then TRY IT!  L&L Hawaiian BBQ’s Chicken Katsu is sort of a spin-off of the Japanese Tonkatsu if you’ve tried that before.  I used to frequent L&L for their chicken katsu many times during my college years (I lived right behind it). Now I just make my own.  🙂

Thanks for reading and have a wonderful week!

-Flora

Upcycle: Men’s Dress Pants to Simple Boy’s Dress Pants

IMG_0334

Finally, something for my only boy!  If you haven’t noticed, my sewing projects usually consist of cute dresses or tops for my two beauties and the last time I sewed something for my son was… … … I’m ashamed.  My boy’s go-to wardrobe consists of two pairs of jeans (that he NEVER wears), sweatpants, a few “dress” pants (more like chinos and khakis), “comfortable” shorts (that he ALWAYS wears), graphic T-shirts, long-sleeved graphic shirts, some sweaters, a jacket, and a coat.  Throw in some baseball pants, caps, and jerseys and he’s all set for the year.  I’ve been wanting to add some handmade items to his wardrobe but when given the choice of making basketball shorts vs. a cute dress… well… the dress would call my name.

Recently Updated1

When my friend’s hubby fell off his bike and ripped his pants (no one was hurt in the process of acquiring these pants), she gave them to me and challenged me to give it new life.  I guess it’s happened more than once 😉 since she gave me 3 pants with holes in them.  I’ve never made pants with a zipper and fly and I wasn’t going to attempt to try just yet, so I used a shorts pattern from My Child’s Closet and made pants with a flat front and gathered, elastic-back waistband.  The back of the pants don’t look very sleek and tailored, but it’s acceptable for a 6 yr old boy to wear to church.  For those of you who don’t speak Korean, that sewing pattern book may be a challenge (to say the least), but I remember Dana from MADE has shorts patterns like the one I used, just make them longer to make pants.  You could also make your own pattern by using a pair of pants your child fits, trace it on freezer paper, and add a seam allowance.  Here’s a good tutorial on how to make your own pants pattern.

With the remaining two pairs of holey pants, I plan to make summer-dress-pants (aka: church shorts).  I know my boy will be thrilled to be able to wear “shorts” to church.

IMG_0330

Flat FRONT gives it a nice tailored look.


IMG_0344

The gathered BACK portion with elastic. See what I mean? Doesn’t look super sleek, but I pass it.

This pants/shorts pattern added a yoke to the back of the pants right under the waistband and I like the little detail that it adds.  The original pants had a lining halfway down the leg, which I kept and cut together with my pieces.  I zig-zag stitched the lining to the front leg pieces only and also zig-zag stitched all my pieces to keep the fabric from continuing to fray.  The pattern didn’t include belt loops around the waistband, but I just took a seam ripper to the belt loops on the original pants and snipped a little bit to fit a 6 yr. old’s 1-inch wide belt.

Recently Updated2

Click picture to see larger

  1. Use your pattern and cut out your pieces.  Remember to add seam allowance if it is not included in your pattern or if you are making your own pattern.
  2. Trace your pattern onto your fabric. Don’t forget to cut mirror images of your pattern pieces so you don’t have two front pieces for your left leg.
  3. My pattern added a little yoke to the back pieces which added a nice detail. Iron seam towards yoke then top-stitch the yoke.
  4. With ride sides together, pin your front and back piece together and sew along the non-curved, outside edge of the piece.  Iron seam open. Repeat for the other leg.
  5. With ride sides together, pin the curved, inside edge of the pieces and sew. Iron open seams.
  6. Turn one leg piece right-side out and tuck it into the other leg piece so right sides are together and the curved edges are matching.  Double-check to make sure your fronts and backs are matching.
  7. Pin the curved edges of the pieces together and sew only along the curved edge, not the waist!
  8. Turn right-side out and admire what’s starting to look like pants!
  9. Add a strip of interfacing to the waistband (looking back, I may not add it next time to the gathered back portion of the waistband).  Fold and press in half then fold and press the raw, long edges, about 1 cm, for seam.
  10. Pin the waistband, right sides together, to the waist of the pants with interfacing portion of the waistband closer to the pants.
  11. Sew along the seam fold right below the interfacing of the waistband.
  12. Measure your child’s waist and add elastic accordingly.  (I used about 9 inches of elastic for my 6 yr old).  The elastic only goes in the back half of the waist.
  13. Sew the elastic on one end of the back half, then stretch it across and sew the other end of the elastic to the opposite back, half of the waistband.
  14. Fold 1 cm seam under to conceal the elastic and make a casing then carefully sew across the back and front of the waistband without catching the elastic.
  15. You will have to pull the elastic while you sew the back half of the waistband.
  16. Hem the pants by pressing in onto the wrong side about 1 cm
  17. Fold and press again to get desired length of pants.
  18. Machine stitch hem or to get a more tailored look, hem by hand.
  19. I think it looks fine with machine stitching.
  20. You are done, unless you want to add belt loops, which I decided to do as an afterthought.
  21. I salvaged the belt loops from the original pants then snipped it to the right size and used fray check to prevent fraying.
  22. Pin it to the waistband with right sides together and spacing (5 loops) around the waistband.  Two in the front, three in the back with one centered in back. Sew.
  23. Fold the other edge of the belt loop under and pin
  24. Carefully sew as close to the edge with a machine or hand stitch.

IMG_0343

He’s a natural model.  🙂  I love my B and I plan to make more handmade items for this little boy.  They grow so fast…

Thank you for reading,

-Flora

Easy Seafood Soon Tofu (해물 순두부)

tofusoup

Friday nights = I don’t cook nights.  With the exception of this past Friday night, that equation proves true.  We made a trip out to the Korean Market in Oakland a couple Saturdays ago and bought all the ingredients to make this Tofu Soup but for whatever reason, never got around to making Ken’s favorite soup.  Friday nights are always pizza and a movie night with the family and last Friday was going to be no exception, but I got a text message from Ken asking if we could have the Seafood Tofu Soup for dinner that night… I immediately thought to reply “of course not!  I don’t cook dinner on Fridays!” but then thought… well… I guess I could.  And that, my friends, is because this soup so easy and quick!

I already mentioned this soup is Ken’s favorite soup, and it’s also high up on the list for my kids as well.  They love Korean soups and like to dump their bowl of rice into their soup and eat it together, which is exactly what I did growing up, and is exactly what Korean moms feed their little toddlers after they start solids.  This tofu soup is a bit spicy but the kids didn’t have a problem finishing their food with a cup of water on hand.

Easy Seafood Soon Tofu (Korean Soft Tofu Soup)

  • 2 cups kimchi, finely chopped
  • 1 pack frozen seafood mix, 12 oz (or canned chopped clams, about 3 cans)
  • 3-4 cups chicken stock or chicken broth
  • 5 packs silken tofu, 11oz each
  • 2-3 eggs, lightly beaten
  • 3 green onions, chopped
  • vegetable or canola oil
  • finely ground red pepper flakes
  • 1 tsp sesame oil
  • salt & pepper

Optional step: Add a teaspoon of vegetable oil to hot, large pot and add 1/2 teaspoon of red pepper flakes to make the spicy oil, then add the kimchi.

  1. Heat a large pot and add a teaspoon of oil.  Add the kimchi and cook the kimchi on med-high heat until it starts to become translucent, about 3-4 mins.
  2. Increase heat to high, add the frozen seafood and stir-fry until it is almost cooked. Or add the canned clams with the clam juice.
  3. Add the chicken broth and bring it to a boil.
  4. When the soup is boiling, add the silken tofu and break it up into big chunks with a spatula and bring to a boil.  Add the eggs and again bring to boil.
  5. Add a teaspoon of sesame oil and the green onions then season with salt and pepper.

Done!

Recently Updated

Super quick and easy. The only prep you need to do is to chop the kimchi and the green onions.  Tip: I like to wear food service gloves when handling kimchi so I don’t end up with orangey-red fingertips and a lovely kimchi smelling hand.

The soup tastes great with canned clams as well!  The clam juice in the canned clams make the broth really flavorful and gives it a stronger seafood taste.  Just add less chicken stock if you are using canned clams since the juice in the cans will count towards the liquid you are adding to make the soup.

Korean Soon Tofu is closer to a stew in the sense that your tofu chunks should not be swimming around in a lot of liquid, but if you like it with more soup then add more of the chicken stock, just don’t drown your tofu.

tofusoup9

The only “exotic” ingredient I used for this dish is the kimchi, and even that can be found at your local grocery store around the Bay Area.  I must confess, I buy my kimchi from the Korean market and don’t make my own.  But I have tried once!  Fun Fact: Did you know many Koreans have a separate Kimchi refrigerator that keeps their kimchi at their perfectly fermented state for months?  They actually sell these little (and sometimes, not so little) kimchi fridges.

Next time you’re at the grocery store, see if you can’t spot a little jar of kimchi! I bet you’ll see it, if you haven’t already.

As always, thank you for reading and hope you have a great week!

-Flora

Weekend Mashup: Cherry Blossoms, Cupcakes & Egg Hunt

IMG_0238

Spring and Easter season have the best colors!  The pretty pastels in pink, yellow, blue, the cute little bunnies, eggs, and chicks; flowers blooming, and the world waking from a winter slumber.  It’s definitely one of my favorite time of year.  I had heard there were pretty cherry blossoms at the Japanese Tea Garden in Golden Gate Park during March and April and I had been wanting to see them.  So our family took a trip out to see some pretty cherry blossoms Saturday morning, but I was disappointed.  I saw one fully bloomed, beautiful cherry blossom tree at the entrance of the garden and didn’t see any more inside.  The garden is really beautifully landscaped and we still had a good time taking photos, walking around the garden and watching the Koi in the pond, but I had envisioned paths strewn with cherry blossom petals that fluttered down from the branches throughout the garden.  Perhaps I need to go later in April or take a trip out to Japan!  (or a reality check)

IMG_0201

I had the privilege of taking dessert to a friend’s Easter egg hunt at her beautiful home over the weekend.  Her home had the perfect layout for hiding eggs and a nice size grass lot for the kids to run off all their sugar and play games like egg toss, egg-on-a-spoon-race, and more.  I know my kids had a blast and my youngest, C, who is not yet 3, participated in all the games.  It was fun watching her balance an egg on her spoon.

As you probably know, I enjoy baking and constructing layered cakes (eating them too!) but there’s something about pretty cupcakes, frosted and decorated in soft pastels that really make me happy.  I can’t look at one without eating them, which is why I get into trouble whenever I bake these little morsels of heaven.  I had been wanting to eat coconut cake, given it’s Easter season, so of course I thought I would make coconut cupcakes!  I love coconut, but I know not everyone is a fan, like my daughter A, who can’t stand anything coconut and banana.  Still can’t figure out why… they’re so tasty.  To make her happy, I added sprinkles on some cupcakes and only added shredded coconut on half of the batch.  I tried to make bunny ears with marshmallows like I’d seen on Pinterest, but they looked a bit awkward on the mini cupcakes.  I had recruited help from B and A to make the marshmallow bunny ears, but I didn’t use most of them.  Now they’re sitting in a container on my counter and getting snacked on every time I enter the kitchen.  I should probably move them to the back of my highest cabinet.

IMG_0221 Awkward on the mini cupcakes…

I used my go-to yellow cupcake recipe which uses cake flour and sour cream and replaces half of the vanilla extract called for in the original recipe with almond extract.  I did the same to the cream cheese frosting recipe and added almond extract so it would compliment the coconut nicely.  Perhaps it’s the cake flour or perhaps it’s the sour cream, but this recipe produces soft, moist, almost melt in your mouth cupcakes.

Yield: a dozen regular cupcakes or 40+ mini cupcakes

IMG_0236

Vanilla Almond Cupcakes
  • 2 cups cake flour
  • 2 tsp baking powder
  • 1/2 tsp salt
  • 1/2 cup (1 stick) unsalted butter, room temp
  • 1 cup sugar (I usually add 2/3 cup)
  • 2 eggs
  • 1/2 tsp vanilla extract
  • 1/2 tsp almond extract
  • 2/3 cup sour cream
  1. Preheat the oven to 350°F.  Prepare a mini muffin pan by greasing the cavities or inserting cupcake liners. (You may also use regular size muffin pans, see below for longer baking time)
  2. In a small bowl, whisk together the flour, baking powder, and salt.  In a separate bowl, beat together butter and sugar until light.  Add one egg at a time and then add vanilla and almond extract.
  3. Add half of the dry ingredients into the butter mixture, then half of the sour cream and repeat with the remaining dry ingredients and sour cream.
  4. Spoon the batter into the prepared muffin cups and bake mini cupcakes for 12-14 mins.  Bake regular size cupcakes for 20-25 mins.
  5. Let cool completely before frosting.
Cream Cheese Almond Frosting
  • 1/2 cup (1 stick) unsalted butter, room temp
  • 8 oz cream cheese, room temp
  • 3 cups powdered sugar
  • 1/2 tsp vanilla extract
  • 1/2 tsp almond extract
  1. Beat the butter and cream cheese together in a stand mixer  or a handheld mixer until smooth.
  2. Add the sugar, vanilla, and almond extracts and beat until smooth.
  • Sweetened shredded coconut
  • pastel colored sprinkles

After the cupcakes have cooled, use a butter knife or a small spatula to frost the cupcakes (or you can pipe) then top with shredded coconut or sprinkles.  I like using the shredded coconut for this rather than the flaked ones.  (They look better)

IMG_0229

Happy Baking and thank you for reading!

-Flora