
This week, perhaps due to the Memorial Day holiday, has just flown by and I can’t recall anything particularly special about it (aside from remembering our Soldiers and Veterans), what with it being jumbled together with the repetitious motions of LIFE and having a husband MIA for most of it due to a business trip. Oh yes, there was a “memorable” incident that will be, I only hypothesize, the first of many more to come, and I chuckle now, but I do dread the days when drama will set up house in my home. Of course my house is filled with drama now, but this is drama of a different sort of which I speak. My 6 year old decided he would run away and handed me a note which stated he no longer loved me and that he would leave and never return because I didn’t take him to Burger King after school. And the punchline is this: there was a girl from his class he wanted to go with. He would abandon mom for a girl! Too soon! Okay, maybe he just really wanted to eat a burger, but I admit I chuckled to think my son had so easily pushed aside me, his mom, for a girl and a burger. Then it dawned on me that this was a foreshadowing of events to come. He is my little momma’s boy now but I will have to move aside sooner of later… and so goes life. It definitely is a reminder to cherish this time of innocence and sweetness of my children before they all grow up and decide mom’s no longer cool. ha.

Now on to the swimsuit. Does this apple fabric look familiar to you? If you’ve browsed through my “DIY Tutorial” page, you might have seen this same fabric for another swimsuit I made several years ago for my now 5 yr old. It has recently been retired due to major wedgie issues so I wanted to try another swimsuit project for my C because it’s been in the 50’s/60’s here and that’s perfect weather for swimming in a “supposedly” heated pool! (sarcasm) Finally, today was the first day in weeks where I was able to take off my sweater and sit outside in the sun without freezing my butt off, so what better way to welcome the return of our sun than to make a swimsuit! I tried to find cute swim fabric at Joann, but was disappointed with how unappealing and boring all their active fabrics were and ended up getting some solid pink active fabric; because you can never go wrong with pink with my girls. I racked my brain and scoured the internet for some ideas for a solid colored swimsuit and was left unimpressed and uninspired. As luck would have it, I found the remnants of this apple swim fabric left over from my previous swimsuit venture and after some careful measuring, was able to use almost every inch of that scrap of fabric to make this cute swimsuit for my little C. The peplum idea came out of necessity because I wouldn’t have been able to cut one continuous piece for a tank with the scrap fabric, but cutting separate pieces for the peplum worked beautifully.
To make your girl’s swimsuit, you will need some swim (knit) fabric that has a a good amount of stretch in all directions. I probably made this swimsuit (3T) with about a quarter of a yard of fabric remnants, but I really had to cut and measure carefully. I didn’t use any elastic because the fabric has great stretch and fits her nice and snug and I used bias tape for binding the upper edges of the tank which extends into a ribbon to tie behind the neck.
Materials:
- about 1/2 yard of swim fabric (depends on the size of your child)
- bias tape
- coordinating thread

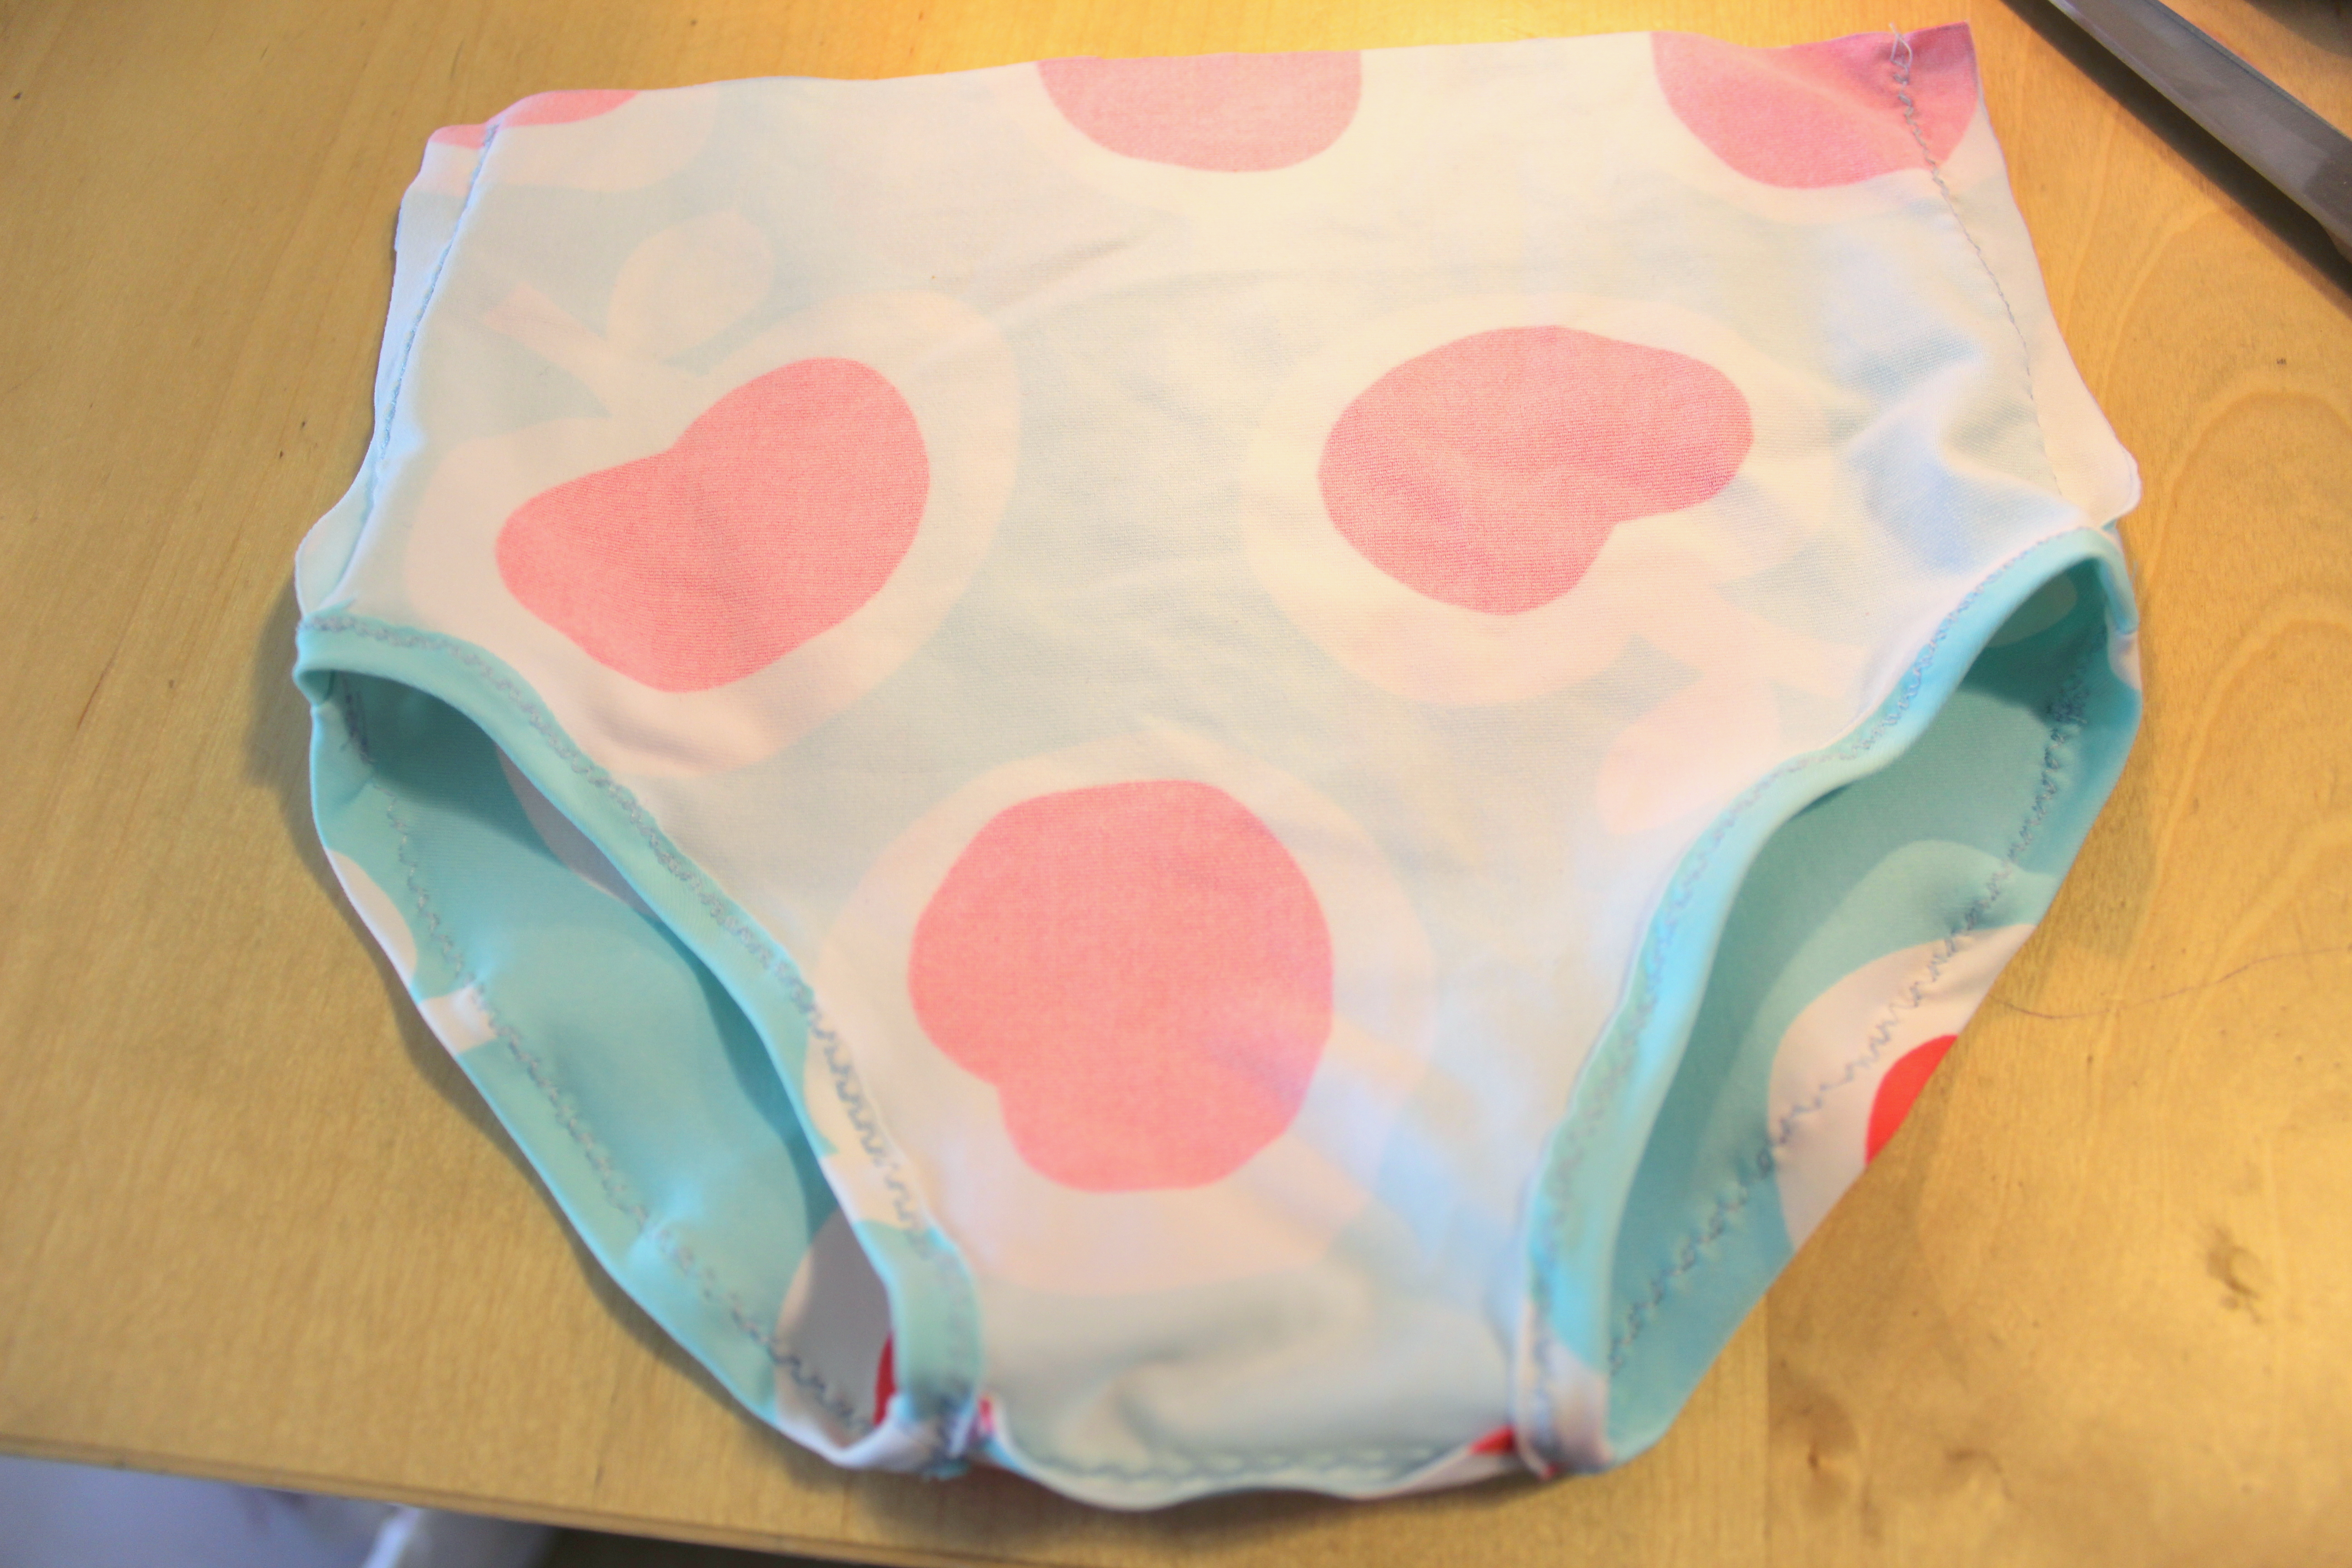
Please excuse C’s cute elephant undies, but this is what I used to make my pattern for the swim bottoms. Add seam allowance and trace around the undies, then cut out the pattern and fold it in half, vertically. Trim so both halves are identical; that way you have an even piece that’s not lopsided. This is the back piece for the swim bottom.
∗Pick a pair of undies that fit nice and not too loose, then you won’t have to add elastic to the leg opening and waist and your life will be a lot easier.

Trace your back bottom piece onto a new piece of freezer paper, then using the undies as a guide, draw a curve (like above) for the front bottom piece on one side of the leg opening.

Cut out the pattern piece, fold it in half vertically, then trace and cut the same curve on the other side of the leg opening to complete your front bottom pattern piece.
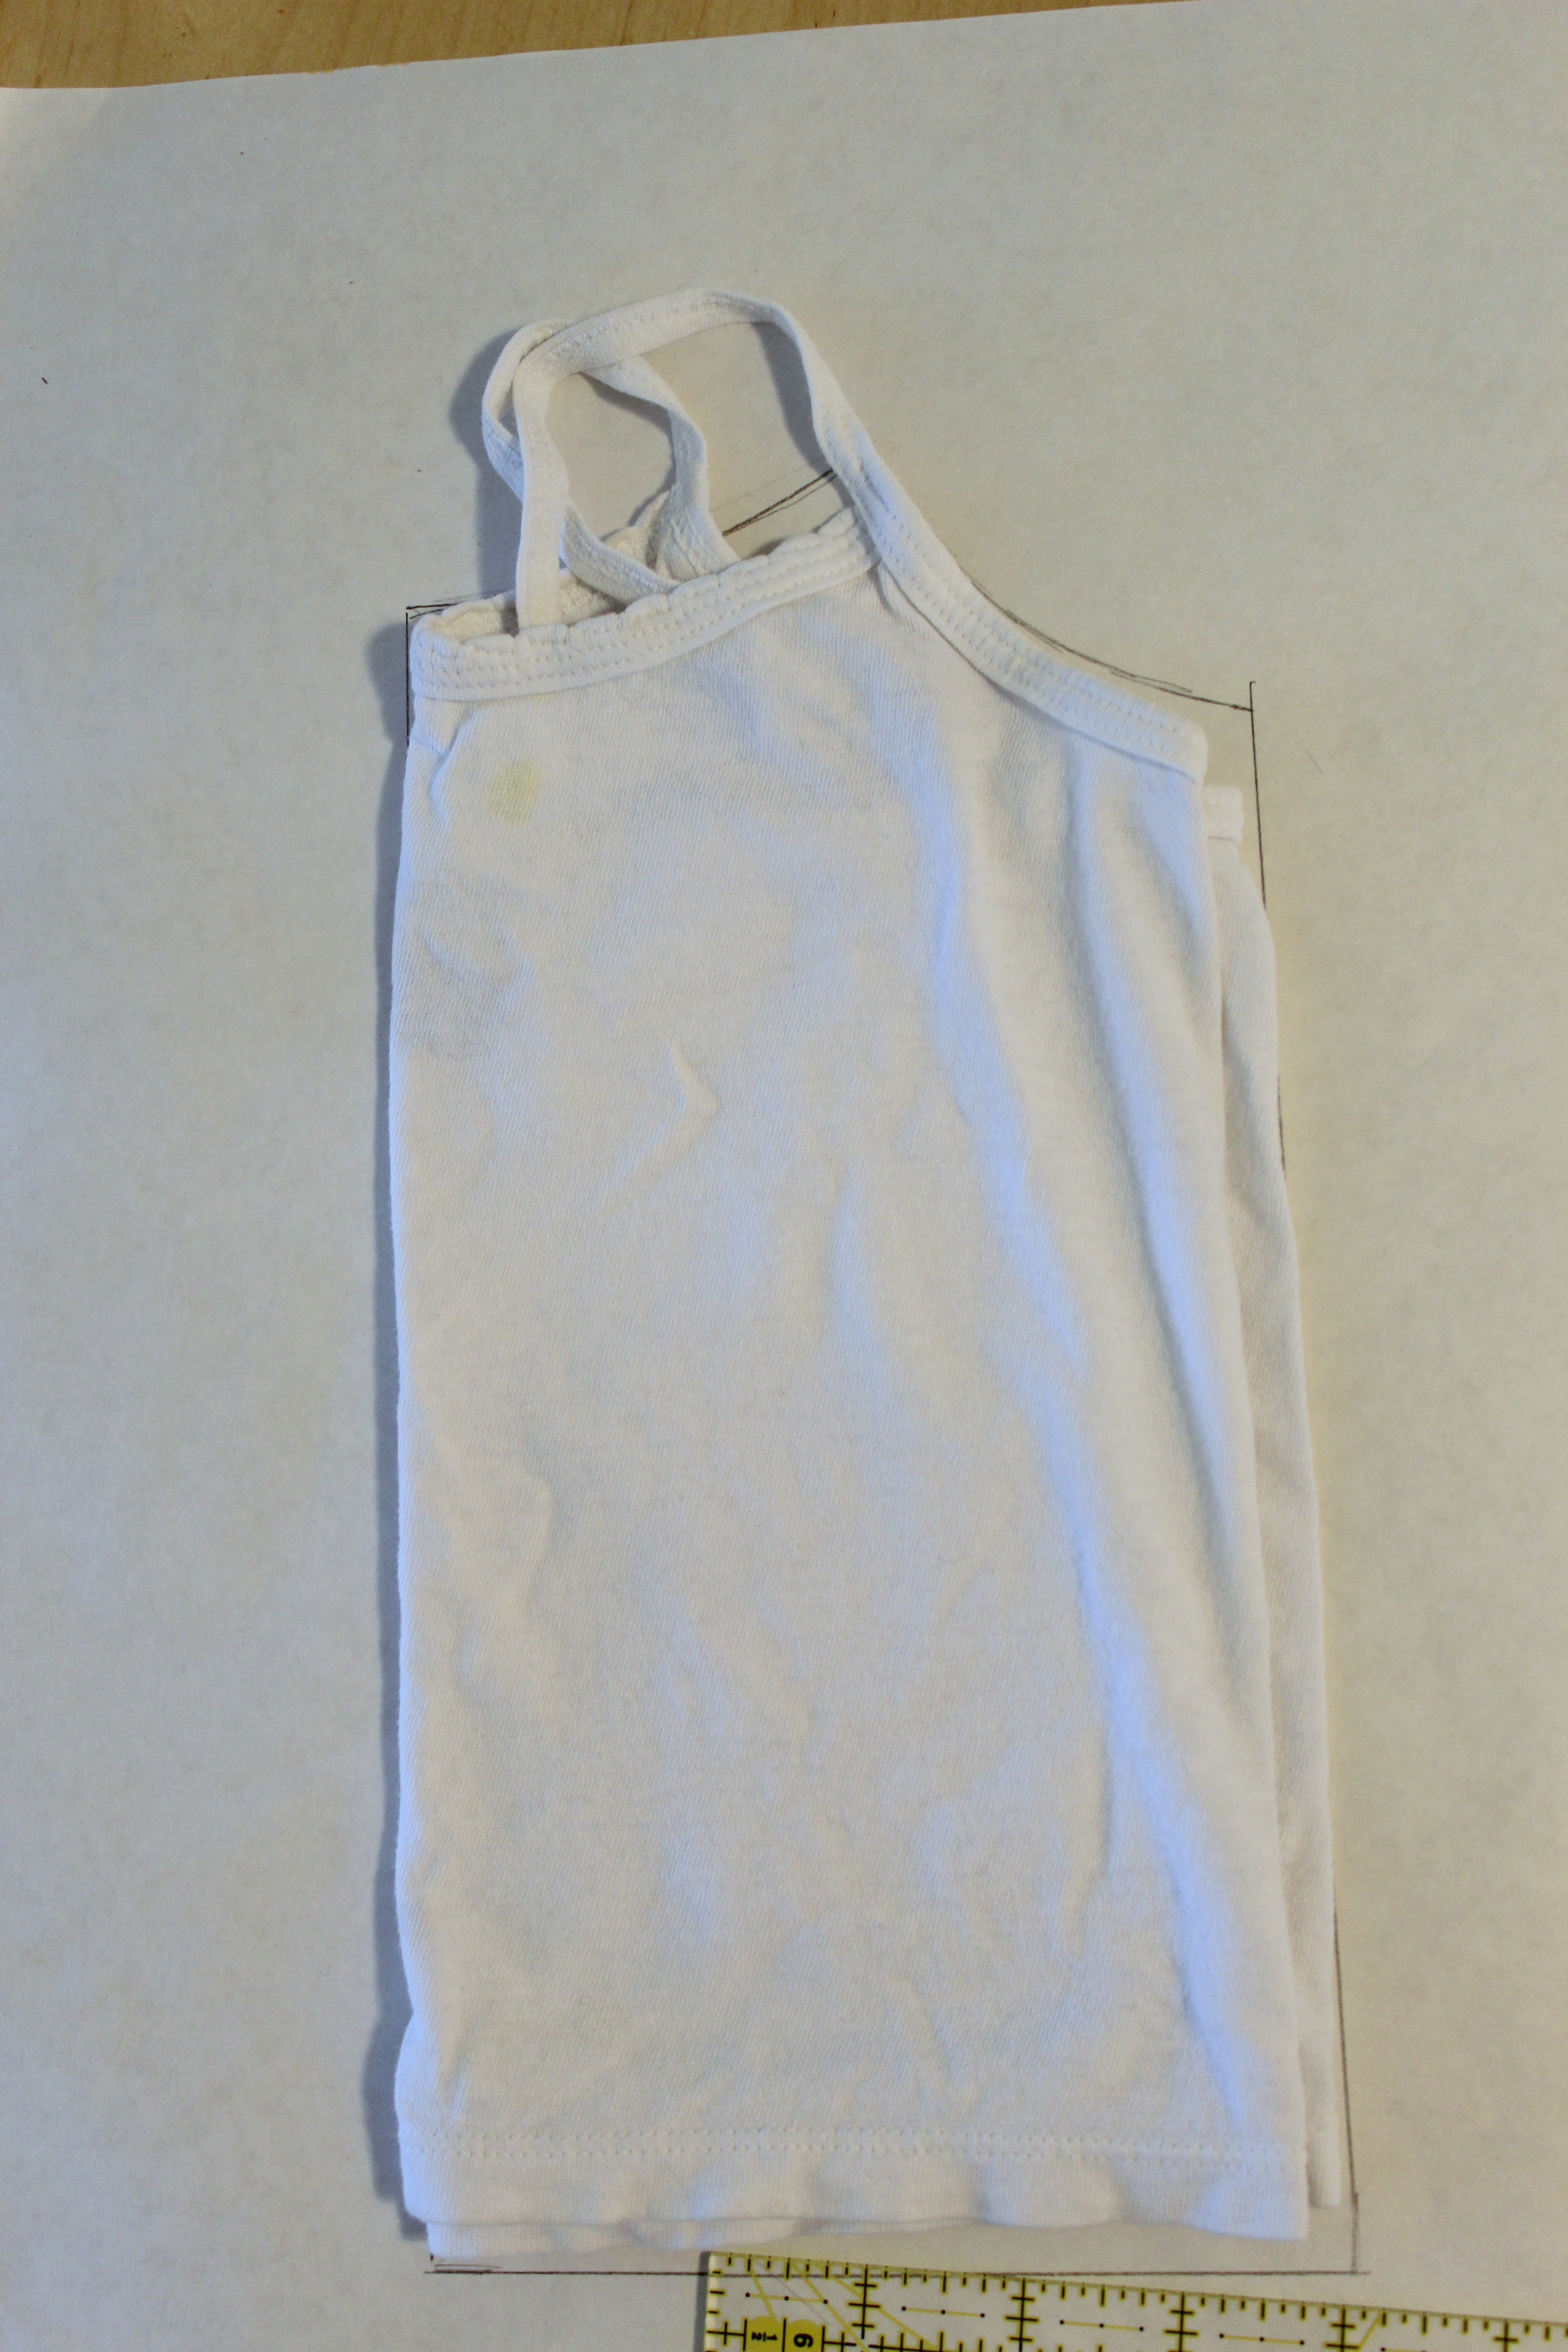
Now, please excuse C’s little undershirt. Use a tank top that fits nicely, not too tight and not too loose, fold it in half and trace, adding seam allowance. I traced right at the edge of the tank top and didn’t add extra seam allowance because this undershirt is a bit loose on C and I don’t want the tankini to be too loose.
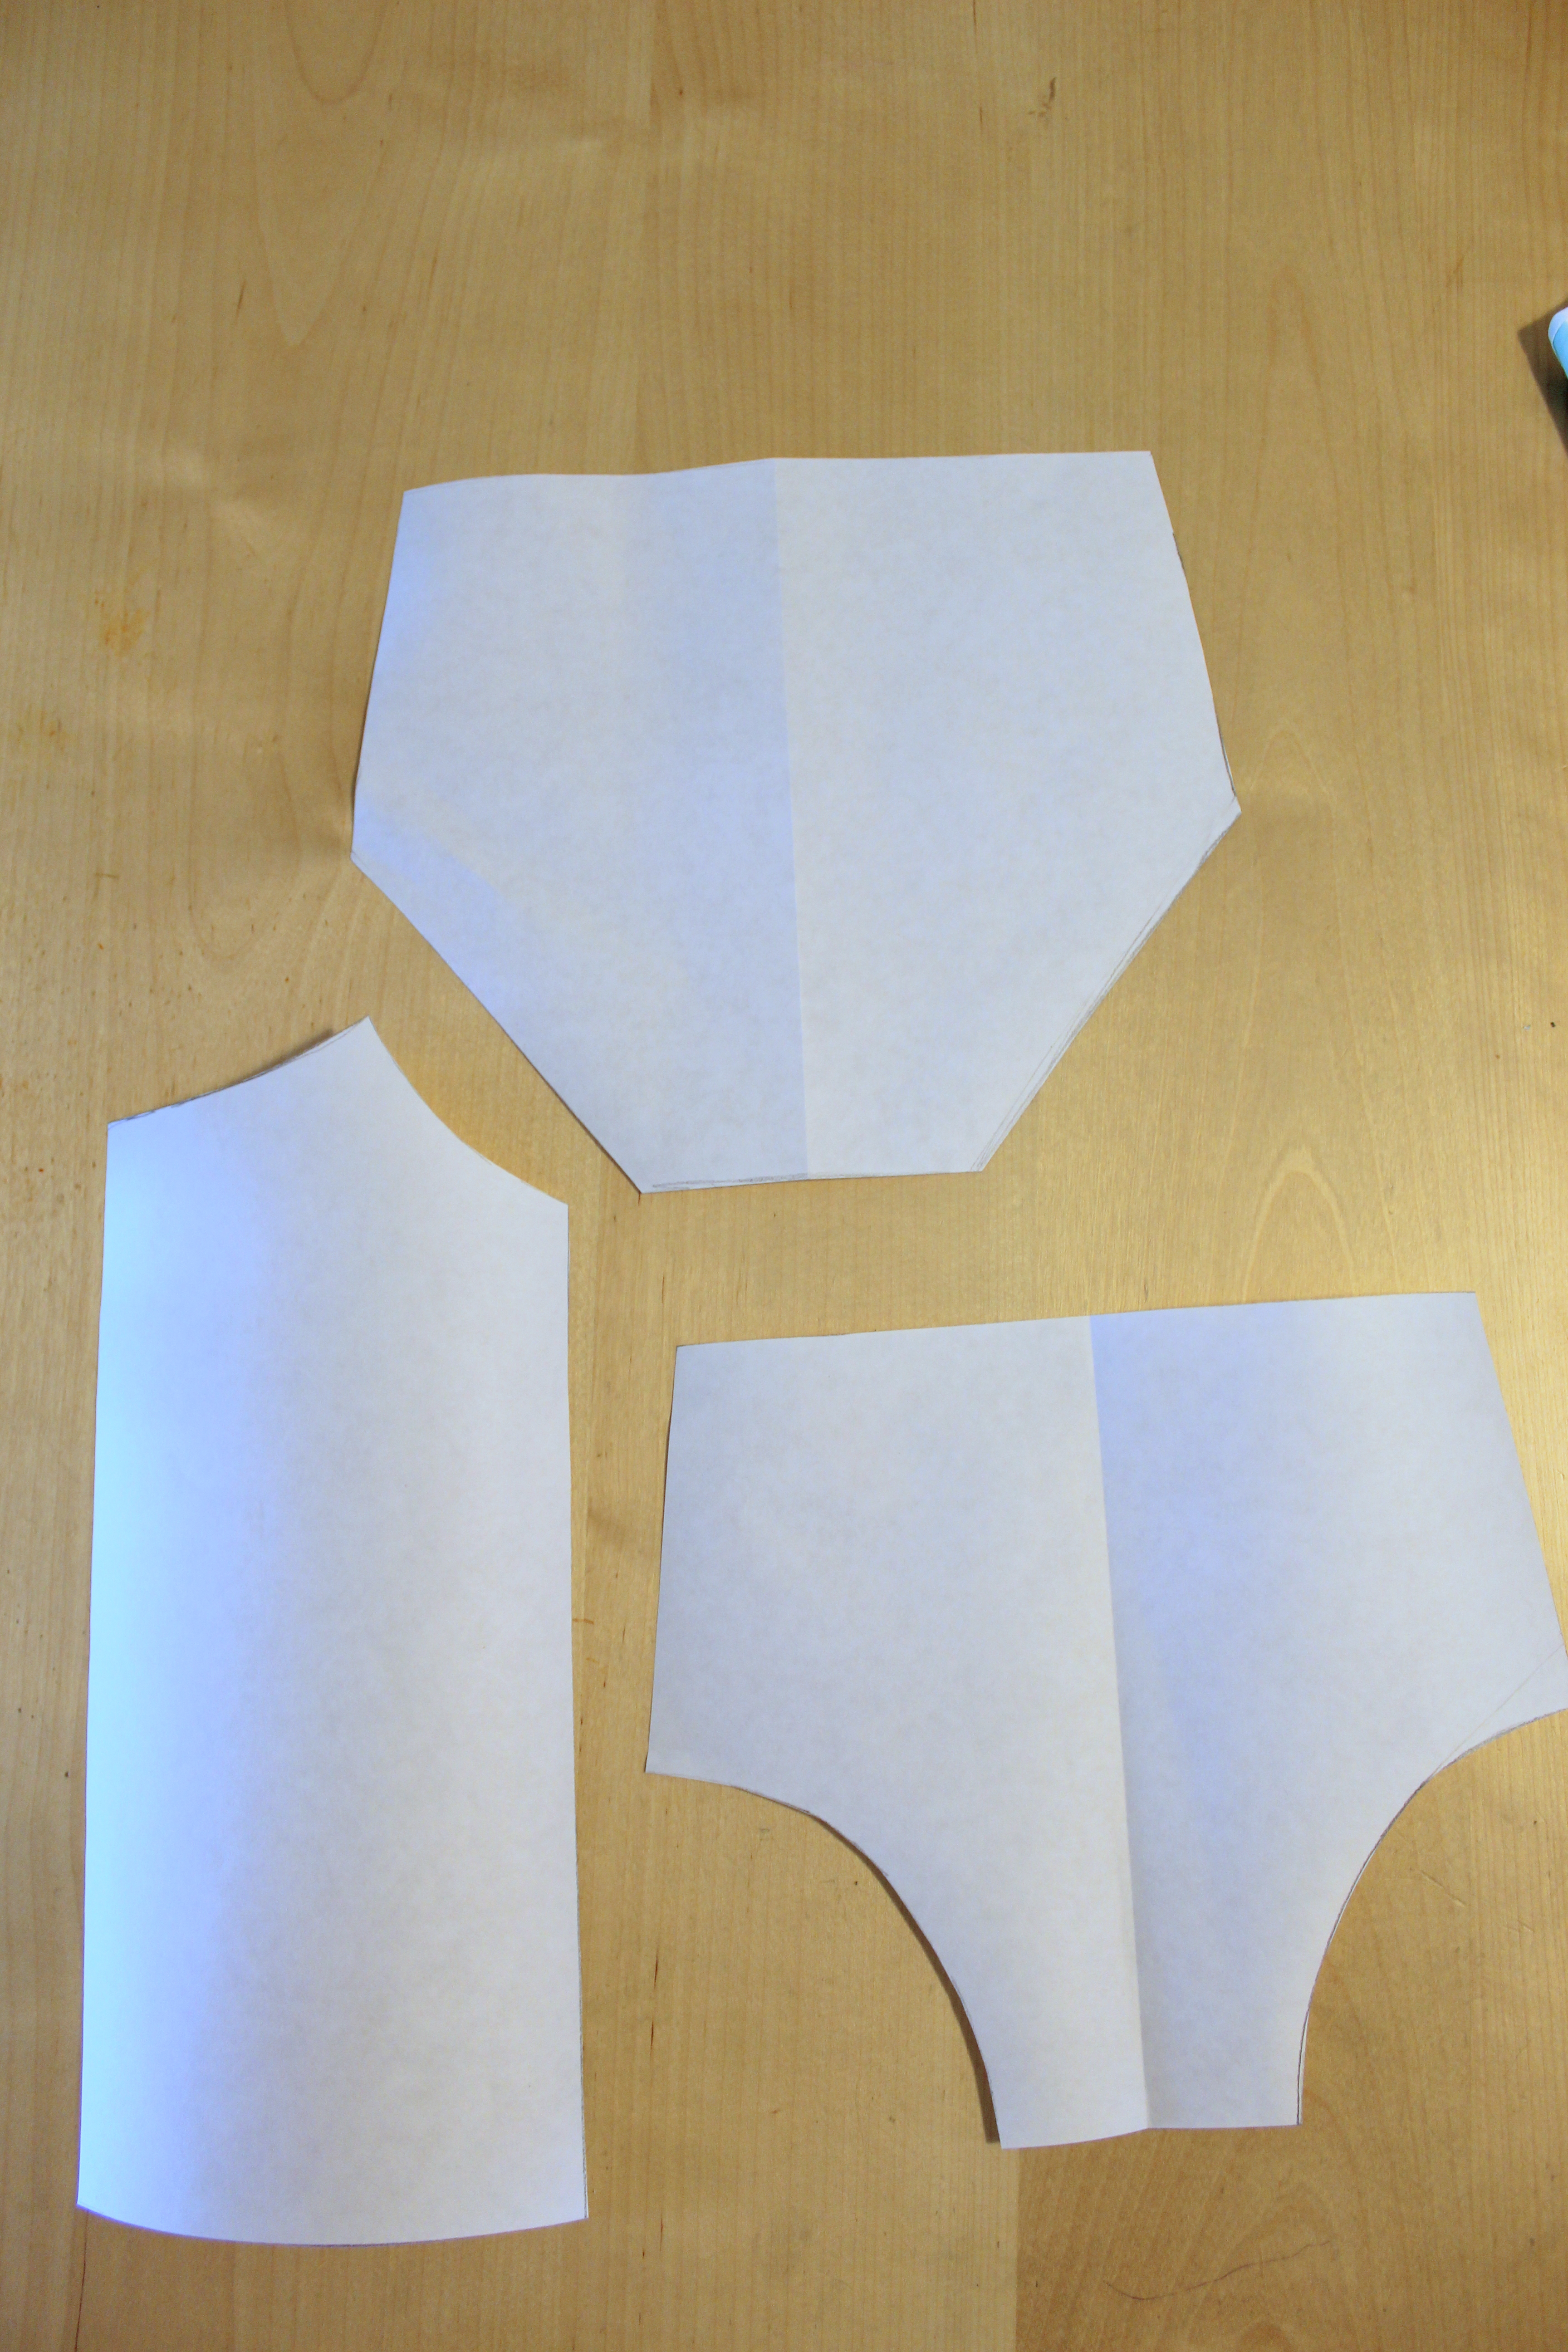
So you should now have pattern pieces that look like this. I used the same top pattern piece for both the front and the back and later ended up slashing the tank pattern piece across the waist to make a peplum.

Draw a straight, horizontal line across the top of the tank perpendicular to the armpit point of the tank, as shown above. That will be your pattern piece for the back of the tankini. Then figure out where the waist is on your tank piece and draw another horizontal line across so you have a tankini bodice and the lowest third of the pattern piece will be the peplum. Make sure to cut your upper bodice piece at the waistline (2nd line) that you drew. Your peplum skirt piece should be 1.5x the width of your entire bodice width and cut 2.
* just fold down the pattern piece at the lines when cutting out your back and Peplum pieces.

You should have a front bodice, back bodice, 2 peplum skirts, a front bottom, and a back bottom piece. Make a center mark on the bottom hem of your front and back bodice pieces and for the upper hem of your peplum skirts.

Take your peplum skirt and run a gather stitch (zero tension, longest stich 4) and pull the thread to make even gathers. Repeat for the other skirt piece.

With right sides together, pin one skirt piece to the front bodice piece, evenly distributing the gathers and matching the center marks. Repeat with the 2nd peplum skirt and the back bodice piece.
∗I used a zigzag stretch stitch and straight stretch stitch to allow the fabric to stretch throughout this project.
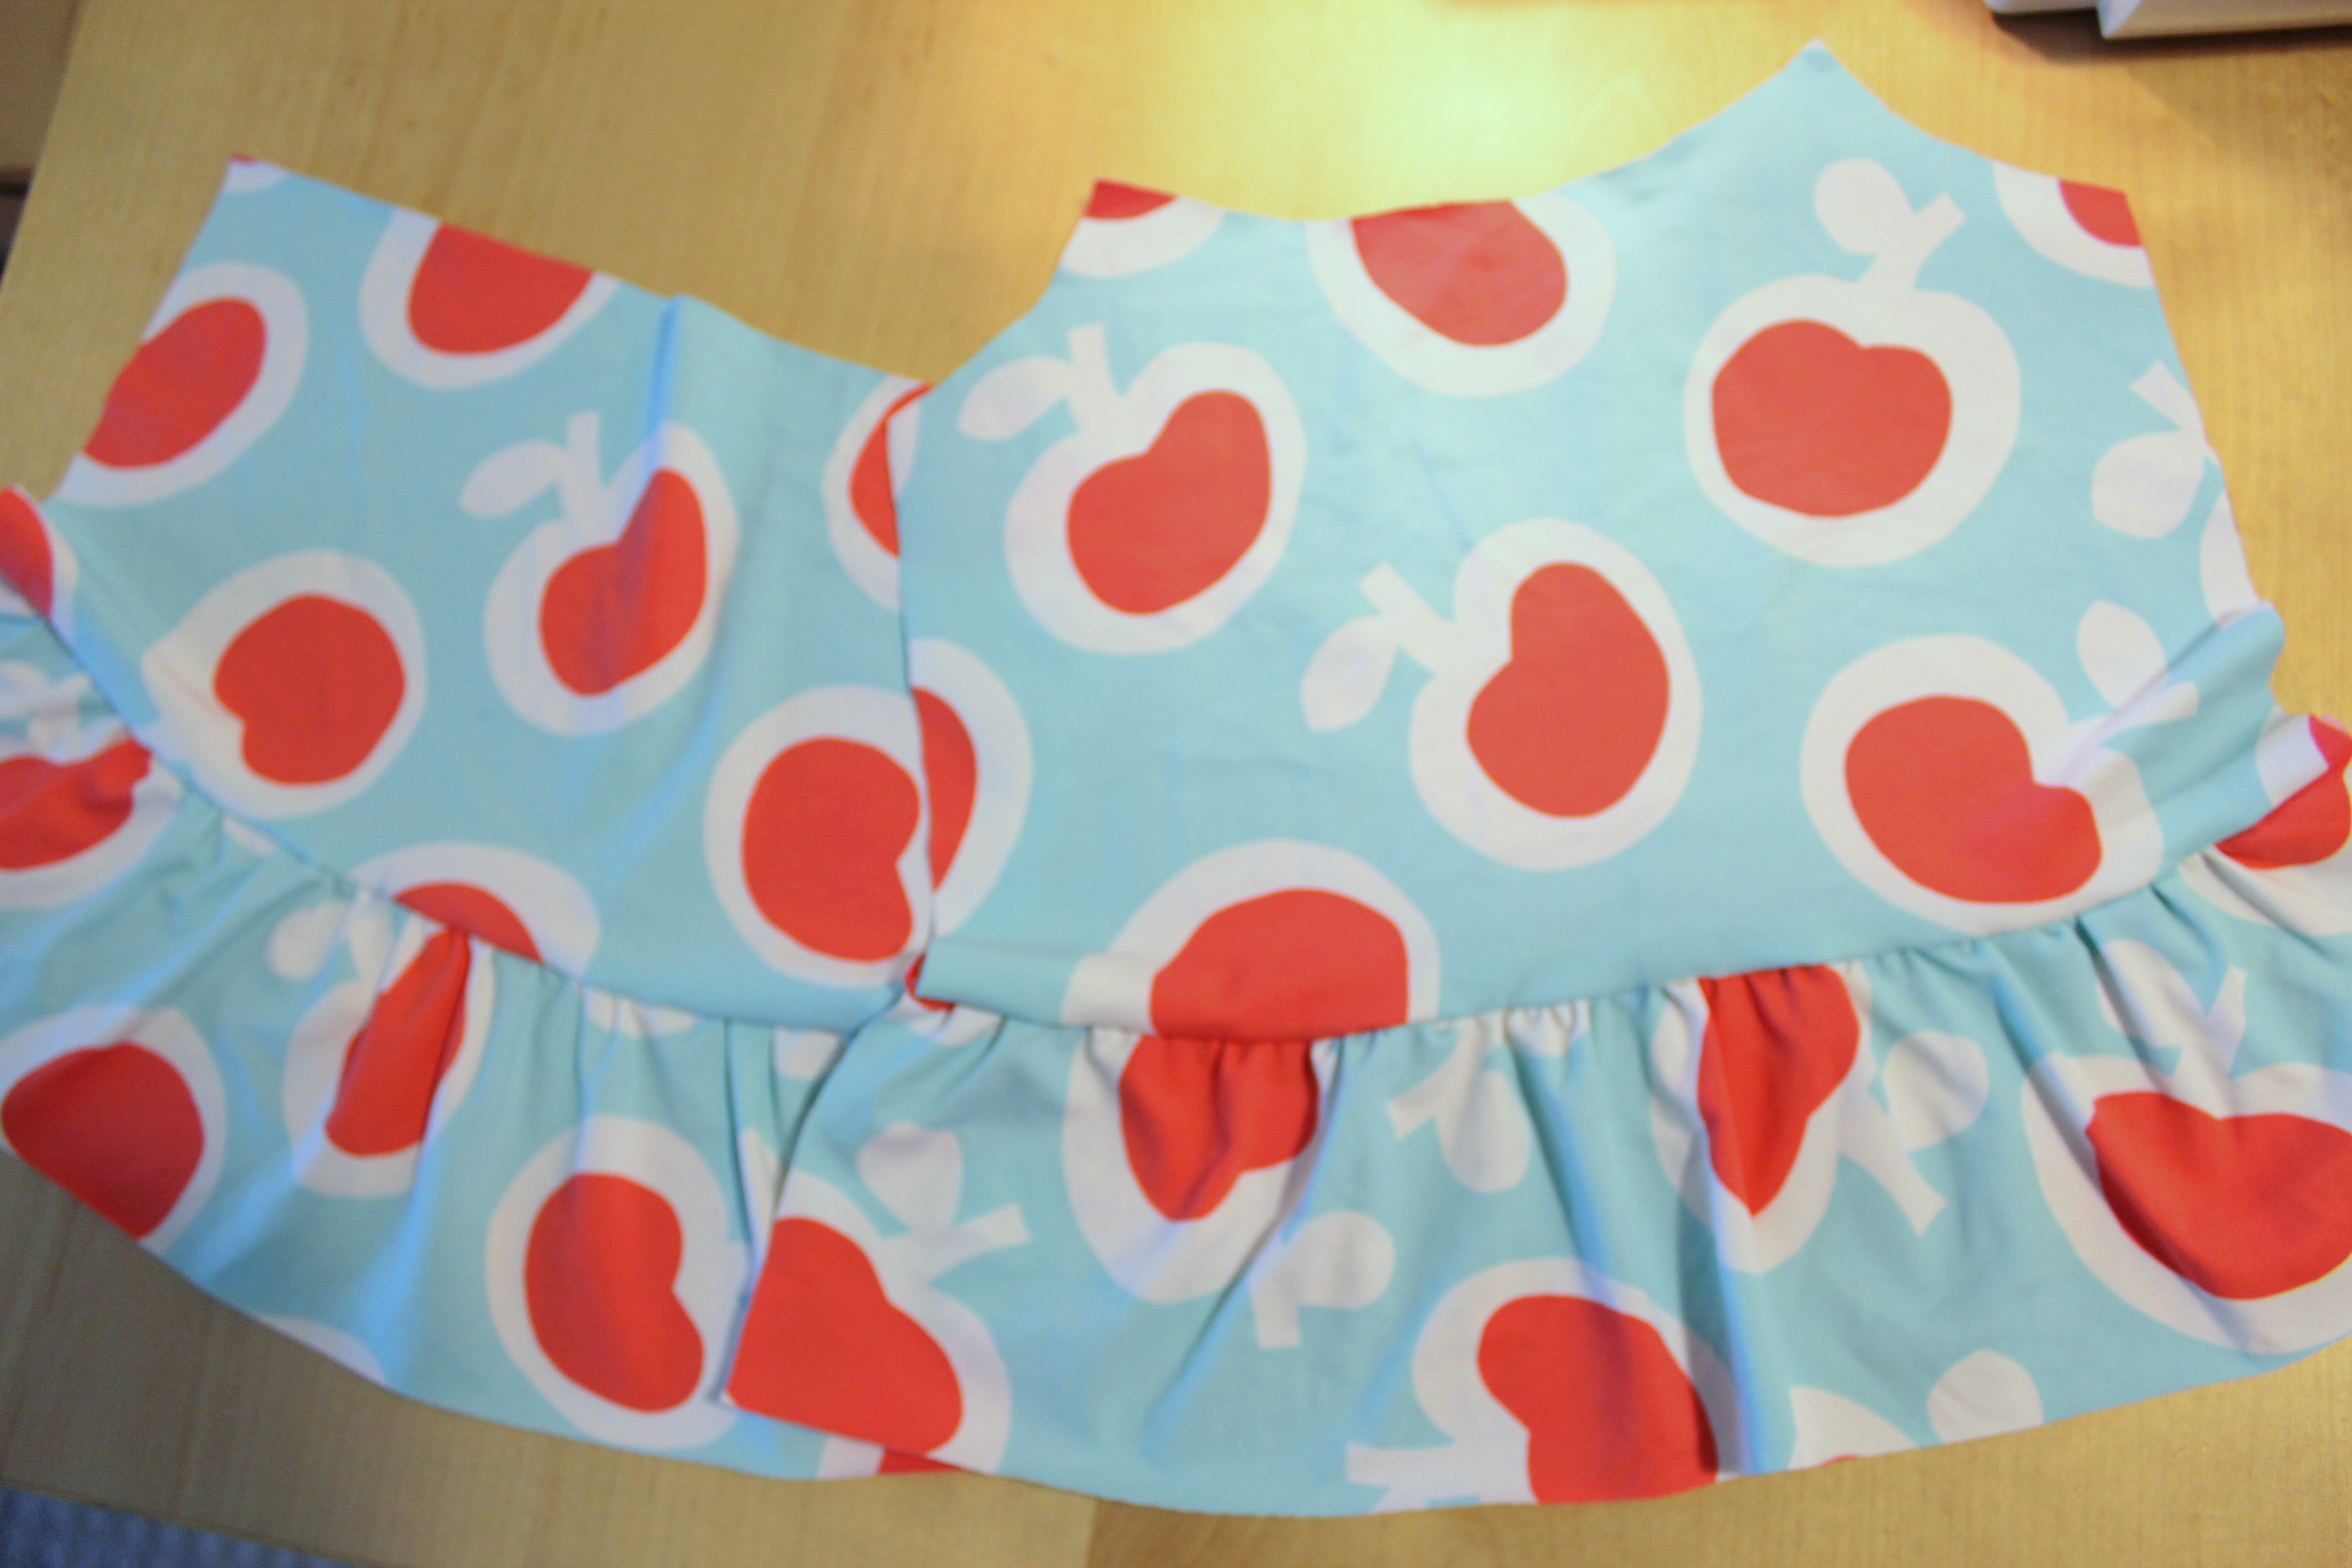
Sew the skirt and the bodice pieces together and you can already see it coming together nicely!

With right sides together, pin the sides of the front and back tankini pieces and stitch. Hem the peplum skirt piece if desired. I was indecisive but ended up hemming mine.
Pin bias tape to the raw edges of the back and underarms area but leave the neckline. Sew it together.
∗Upon completing the swimsuit, I would have the neck-tie extend from this strip of bias tape rather than the neckline binding, so the tie will naturally extend to the back of the neck.

Pin a long piece of bias tape to the neckline that extends beyond the neckline of the tank to create the tie.
∗In hindsight, I would have the tie extend from the back and underarm (in the previous step) bias tape instead, so the tie is not warped when tied behind the neck.

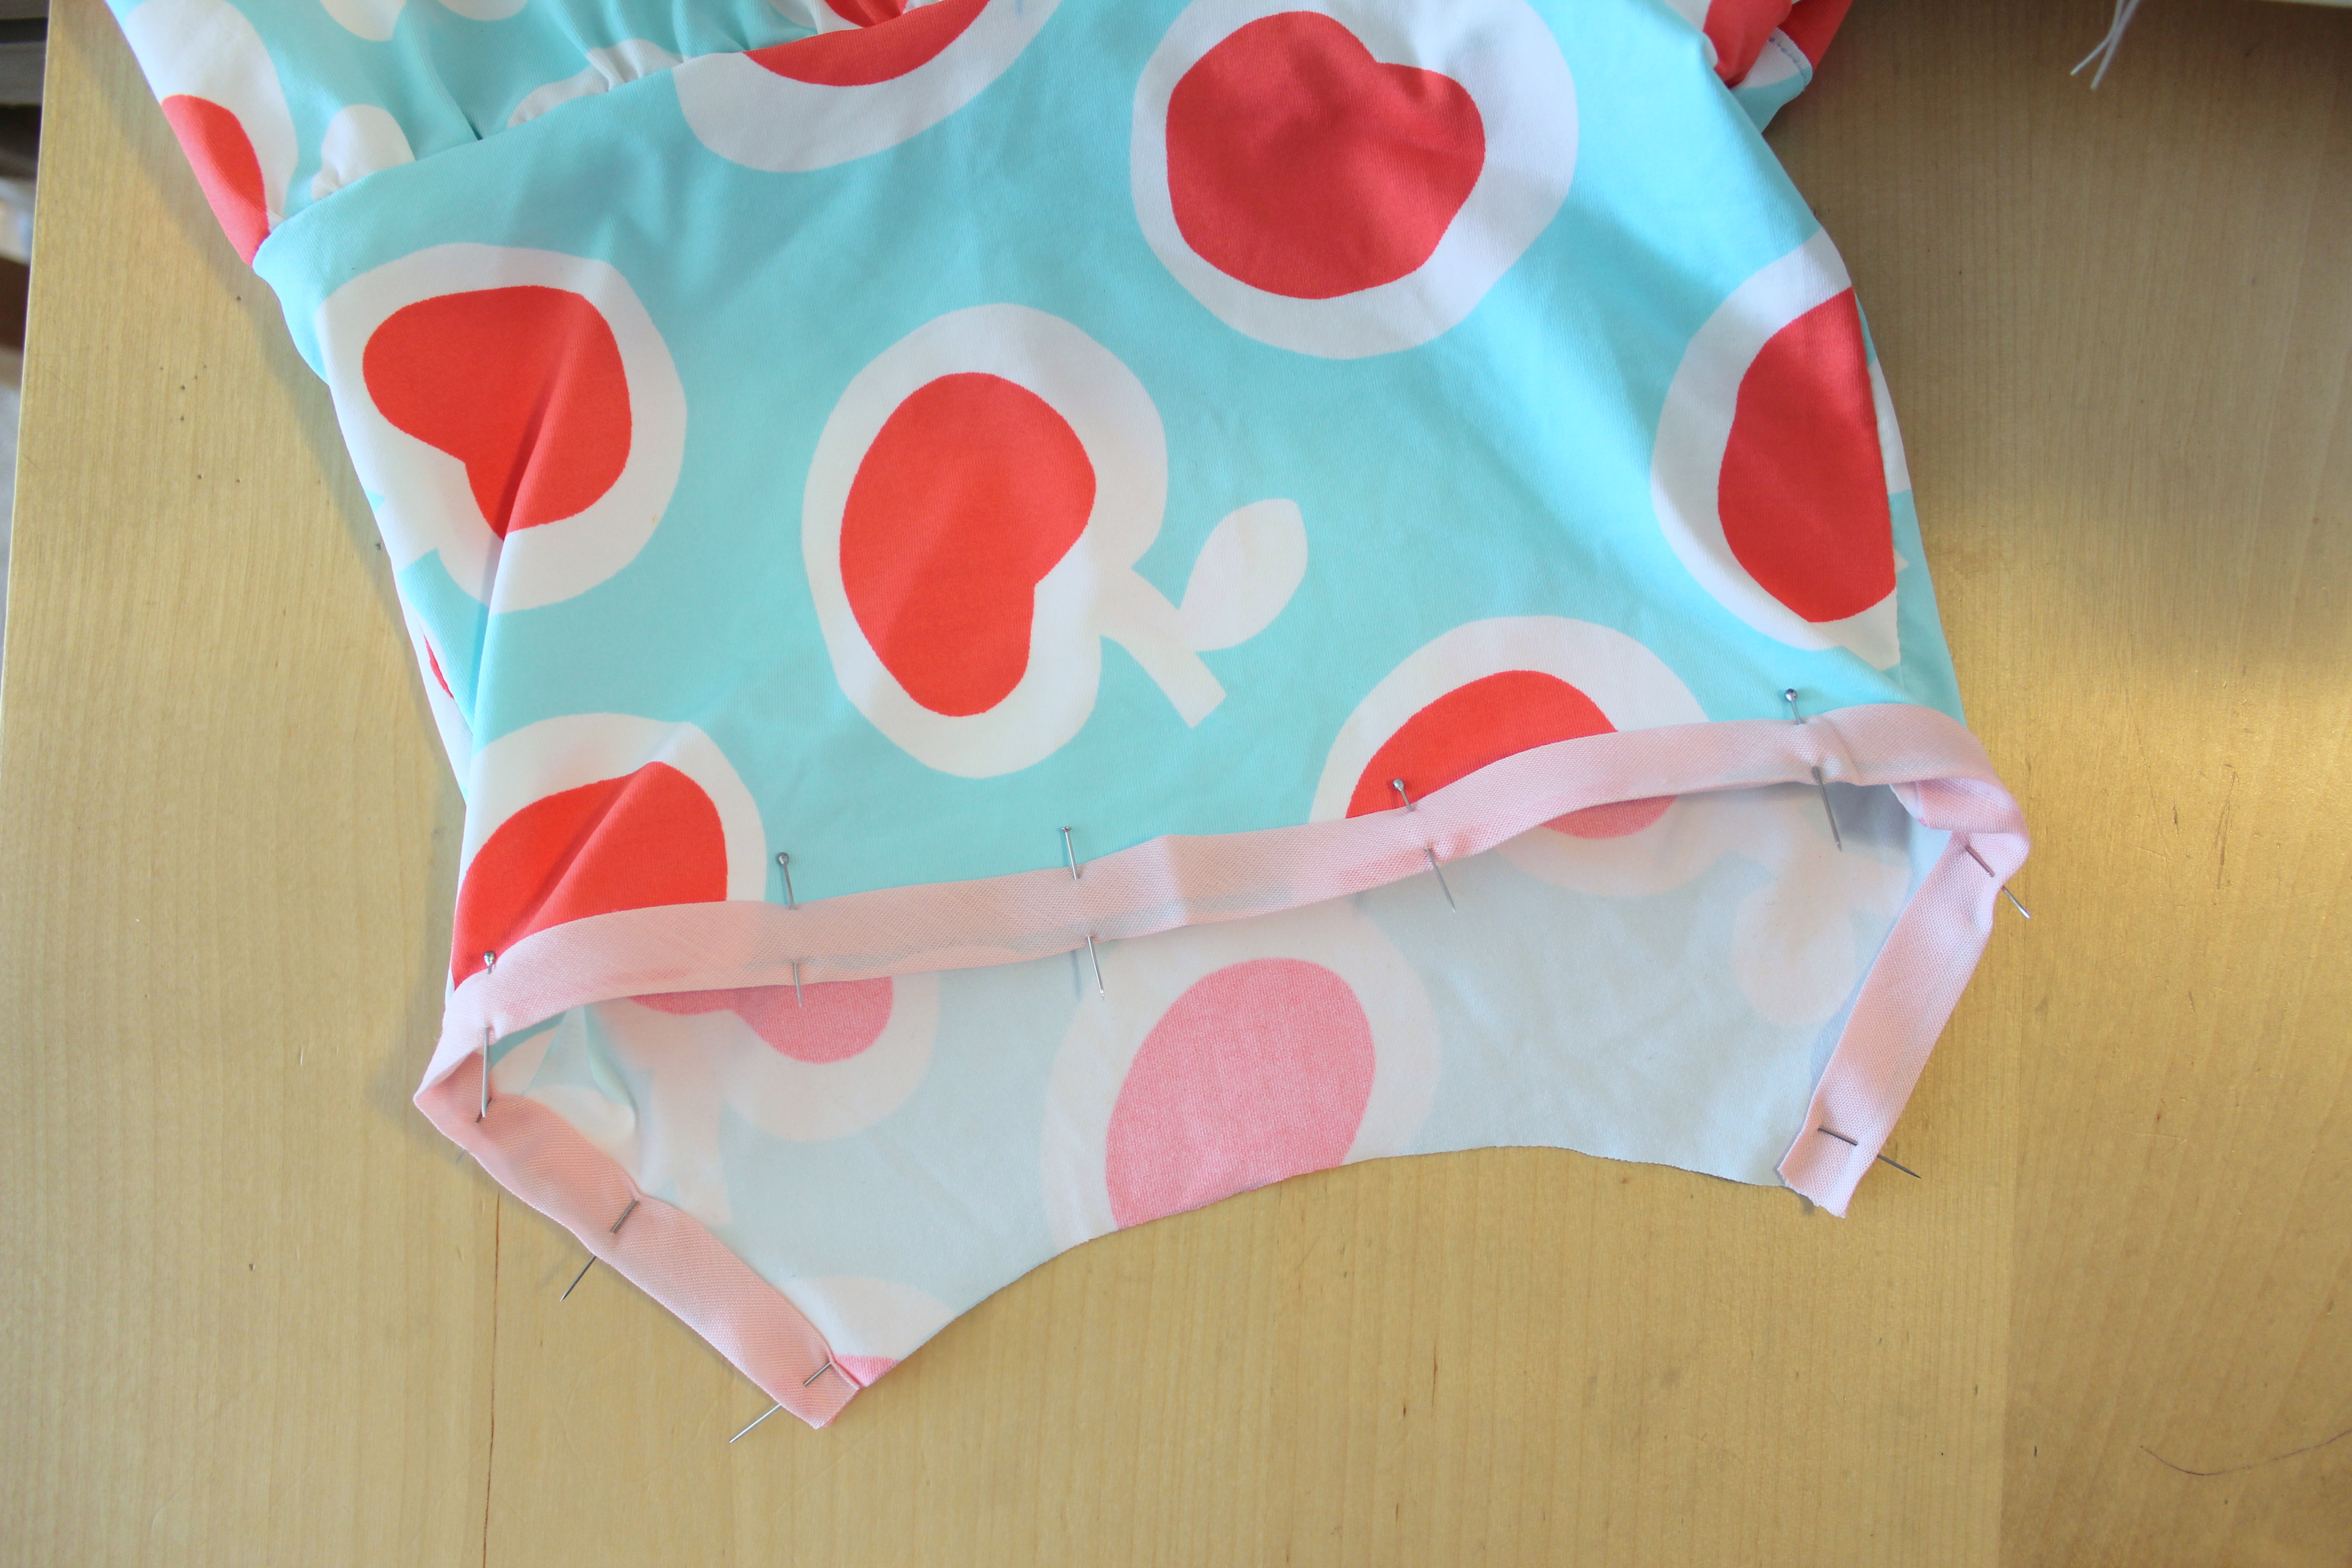
Pin the bottom pieces with right sides together then sew the sides and the bottom of the pieces together.
Fold over about 1/4-1/2 inch of the the leg openings and stitch. (If your leg openings are loose around your child’s thighs, then you will have to make a casing and add elastic)

Fold over 1/2″ of the waist hem, pin, and stitch in place. (Again, if the waist is too loose on your child, then you will have to make a casing and add elastic) That’s why we used undies that fit nicely so we can make use of the stretch already in the fabric to keep the bottoms from falling off and having to add elastic (which can be a pain).
And it’s done! It was really a quick afternoon project with no elastic, buttons, clasps, etc. Super simple and super cute! I love the way it turned out and now big sis wants a swimsuit like this too! Too bad I’m out of this adorable apple fabric.

Thanks for reading! Have an awesome weekend!!! Maybe it’ll be warm enough to go swimming! (One can hope)
-Flora
