I have a confession to make. I am Korean. Okay, that wasn’t my confession. Here it is:
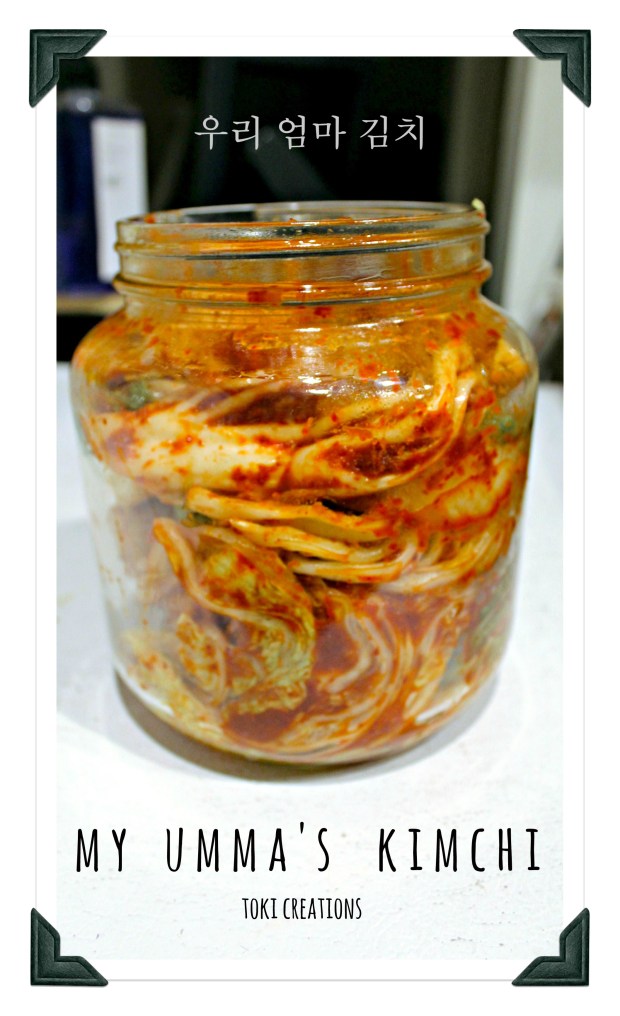
I am Korean. And I buy my kimchi. -_- I know, I know. I don’t deserve to lay claim to my Korean roots if I don’t make my own kimchi or own a kimchi refrigerator. (Yes, there is such a fridge and it keeps kimchi and regular produce fresh forEVER!) But wait, do you know what kimchi is? It’s only the best, tastiest, and healthiest Korean mealtime staple with natural probiotics and lots of Vitamin A and C. Basically it’s fermented Chinese cabbage (can also be made from a variety of other vegetables and seasonings) that is eaten as a side dish and ranges from mild to spicy, to watery, to fishy.
My mom’s visiting and I’m taking full advantage of her Korean cooking skills and documenting her kimchi-making process so I can try to replicate it next time I run out of her kimchi. I’ve made kimchi by myself once before in my lifetime and I must confess it was a fail. My mom sort of walked through the steps and ingredients with me over the phone and I tried to mimic it… and well… it just wasn’t the same. Hopefully, standing over her shoulder and breathing down her neck while watching her make this kimchi will help me the next time I attempt it. We sort of measured the ingredients as she went along because, like many Korean moms out there, her measurements and recipe is in her head and her hand. She just sort of eyeballs it and adds more or less by taste. I was probably frustrating her whenever I stopped her to measure the ingredients 🙂 but she was super patient with me. So here is how my mom makes her kimchi:
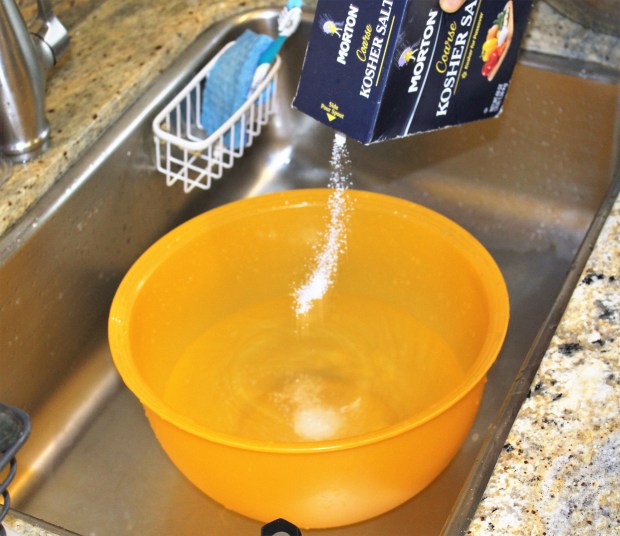
Add lots of salt to a bucket of water (should taste like the sea). We used Kosher Salt because I don’t have Kimchi salt, but my mom prefers to use Kimchi salt (which might be the same as rock salt).

Slice your cabbage in half, vertically.

Slice again, so you have quartered your cabbage. Cut off the hard core/stem, but we want enough of the stem to keep the leaves together.

Dunk your cabbage quarters in the brine water, let it drain, then salt between each leaf, concentrating on the thicker, white (non-leafy) portion of the cabbage. Repeat for all.
Here’s a quick video to help you (and me) see how to prep/brine the cabbage.
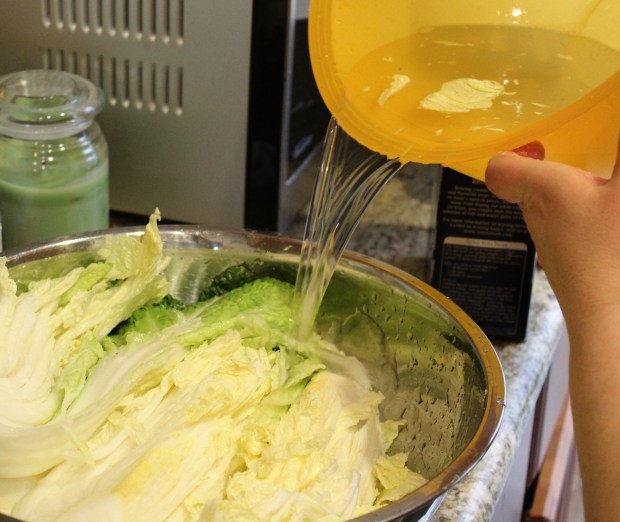
After salting all the cabbage, pour the rest of the salt water over the cabbage and let it brine for about 2-3 hours. (depends on how much salt and water. taste it after 2 hours to determine)
Turn and rotate the cabbage halfway through brining


Meanwhile, make the kimchi paste/marinade by chopping your onion, Korean pear, ginger, garlic, and radish, place in a blender, add your fish sauce, then puree.
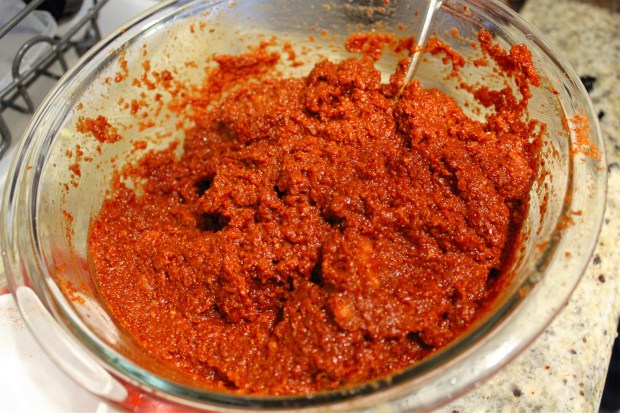
Add your red pepper flakes and brown sugar to your puree and you have your kimchi paste


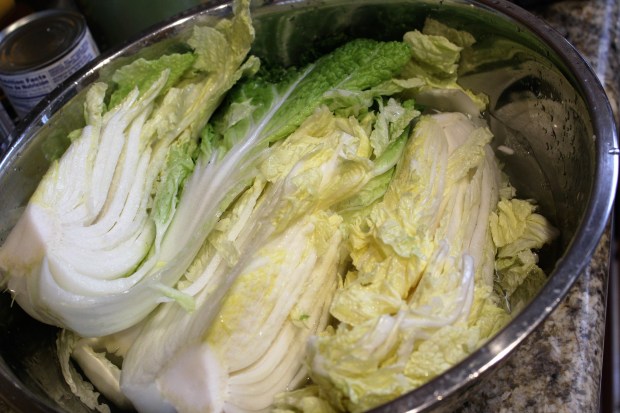
After the cabbage is salty enough, dump out the salt water, then rinse your cabbage in running water 2-3 times and let drain for about 30 mins. Now get on some food service gloves (the red pepper on your skin will sting) and smear on that kimchi paste all over and between the cabbage leaves. “Wrap” the outer most leaf around the quarter of cabbage then carefully tuck into a glass jar. Fill the jar (cover w/ lid) then place in the refrigerator (or to eat it sooner, leave it out at room temperature for a day). And you lucky ducks with a kimchi refrigerator, you know what to do.
Ingredients
- 2 Napa (Chinese) Cabbage, washed
- Lots of Coarse salt (Preferably Kimchi salt)
- 1 cup fish sauce (I used Tiparos brand Thai Fish Sauce. Korean ones are saltier and less sweet, so add more or less according to taste)
- 1/2 onion, chopped
- 1/2 Korean pear, chopped
- 1 cup Daikon radish, chopped
- 1 inch ginger root, chopped
- ~13 cloves garlic, sliced
- 1 ½ cups coarse red pepper flakes
- 1 TB brown sugar
*You will need a big, wide bowl to brine, a bucket, food service gloves, and wide-mouth glass (preferably) jar to store kimchi)
Directions
- Add lots of salt to a bucket of water (should taste like the sea)
- Slice your cabbage in half, vertically. Then slice again, vertically, so you have quartered your cabbage.
- Cut off the hard core/stem, but we want enough of the stem to keep the leaves together.
- Dunk your cabbage quarters in the brine water, let it drain, then salt between each leaf, concentrating on the thicker, white (non-leafy) portion of the cabbage. Repeat for all.
- After salting all the cabbage, pour the rest of the salt water over the cabbage and let it brine for about 2-3 hours turning and rotating the cabbage halfway through brine period . (depends on how much salt and water. taste it after 2 hours to determine)
- Meanwhile, make the kimchi paste/marinade by chopping your onion, Korean pear, ginger, garlic, and radish, place in a blender, add your fish sauce, then puree.
- Add your red pepper flakes and brown sugar to your puree and you have your kimchi paste
- After the cabbage is salty enough, dump out the salt water, then rinse your cabbage in running water 2-3 times and let drain for about 30 mins.
- With food service gloves (the red pepper on your skin will sting), smear on the kimchi paste over and between the cabbage leaves.
- “Wrap” the outer most leaf around the quarter of cabbage then carefully tuck into a glass jar. Fill the jar (cover w/ lid) then place in the refrigerator (or to eat it sooner, leave it out at room temperature for a day). And you lucky ducks with a kimchi refrigerator, you know what to do.
*I bought only one Napa cabbage but the recipe makes enough kimchi paste for two Napa cabbages so the recipe calls for two of the cabbages.

Good luck to you (and to me)!
Thanks for reading!
-Flora (and my mom)