DIY: Leather Cord Charm Bracelet

DIY Leather bracelet Main pic.jpg

Another year has flown by with 2018 looming just over the last page of our dogeared  calendar; and I was just getting used to writing 2017 on all the kids’ school forms/permission slips.  The fam-bam and I packed so much in this year yet that feeling of regret over having lost another year, time we won’t ever get back, and all the to-do’s that never got “do-ed”, leaves me in disbelief at how time really does, literally, fly.  But just like I get a fresh, new slate daily, it’s time for my annual fresh, new slate.  Yeah, you shouldn’t wait for the new year to set and evaluate your goals and progress, but the new year is always a perfect time to do just that.  So, yes.  I’m saying a triumphant ‘goodbye’ to 2017 and I am ready to receive 2018 with open arms.  But first, let me get through this Christmas rush while I try to reverence the true meaning of the season with my little ones amidst all this commercialism.  And since Christmas and gift-giving go hand-in-hand, here’s a little DIY tutorial for a shiny, little something to put under your Christmas tree.

I work with a church youth group of girls ages 12-17 yrs and every year the leaders put together a little birthday gift for the girls and drop it off for them on their birthday.  So while brainstorming gifts, I stumbled across an image of a leather cord bracelet with gold tubing that would be perfect but way out of our budget to purchase.  Plus, we wanted to incorporate the new year’s youth theme into the gift as well.  After doing some research, (hrs upon hrs, ok not really) I figured out a way we could make the bracelets ourselves for about $3 each including a charm etched with our new theme!  I was pretty ecstatic because they are so cute and I know the girls will love it!  (One can hope)

I added links to places where I purchased the material, but I was buying in bulk so you may want to purchase smaller batches.

DIY Leather Cord Charm Bracelet w/ Gold Tube

Materials:

Tools:

  • scissors
  • jump-ring tool (I just used my fingers)
  • E6000 & Super glue (or Gel Superglue, Gel Gorilla glue)
IMG_5090-1

I guess gold comes in different hues… Luckily the charms and the gold tube matched while the end caps were a little more yellow, but I made it work.

IMG_5116-1

What you’ll need to make one complete bracelet. (plus the glue)

Instructions:

IMG_5119-1

  1. Cut desired length of leather cord. (My finished bracelet size is 7 inches.  Measure wrist for accuracy but that seemed to be a good size for most of the girls.  You want the length of your leather cord and the clasp to total your desired bracelet length)IMG_5121-1
  2. Thread the cut cord through the gold tube bead.IMG_5120-1
  3. Add the charm. (I had to switch the jump ring on my charm to an 8mm jump ring in order for it to fit over the gold tube)IMG_5122-1
  4. Add a dab of glue to each end of the leather cord and gently insert into the end cap clasp. (if using E6000, let dry few mins, then pull back out and add a dab of super glue.  E6000 by itself came out with a tug test) (If using gel super glue or gel gorilla glue, then just glue once and done)* Let it dry overnight.

*I had E6000 glue already from a past project and thought that would suffice when gluing on the end caps, but when I tested it with a tug the next day, it slipped out fairly easily.  So I added a dab of super glue (runny kind) and it held tight.  I decided to get gel gorilla glue and that by itself held well.  Use what glue works for you.

IMG_5108-1

SUPER EASY and SUPER CUTE!!!

IMG_5080-1.jpg

I hope you made one for yourself, too~

Thanks for reading-  Wishing you a Merry Christmas and Happy Holidays (however you may celebrate)!

-Flora

Bottle Cap Necklaces and Keychains DIY

bottlecap collage

This summer has gone by way too fast!  I can’t believe it’s already mid-August and school is just around the corner!  I’ve been swamped the last couple months with a work, trips, family, and wedding planning (not mine; been there, done that).  We welcomed summer with a trip to Yosemite with my father-in-law during his annual trip to the US from Hong Kong.  After a week of Bible Camp we made the 14 hrs drive to WA to visit my family for 2 weeks and got to experience their unusual heat spell in a A/C-less apt.  As soon as we got back, I got to help plan a wedding!  How many of you can say you helped plan your mother-in-law’s wedding? I sure can!  Now there’s only 2 weeks left before school starts and I’m prepping for one last trip to Southern California before we get back into the grind of pickups, dropoffs, ballet, soccer, etc…

While getting a few things ready for school, I made some keychains for the kiddos’ backpacks with some of their favorite characters.  I had all the materials leftover from a birthday party many moons ago. My daughter had a birthday back in March and asked for a gymnastics party after she had a blast attending a friend’s birthday party at the same venue.  She also wanted the birthday theme to be Strawberry Shortcake so I decided to make bottlecap necklaces and keychains for party favors.  I looked around online and found the following method to be the most simple and cute for making these bottlecap necklaces/chains.

Materials:

IMG_20150304_124655

Gather your materials

IMG_20150304_135853

Carefully stick your 1″ circular image onto the 1″ epoxy sticker. Flatten back to make sure there are no bubbles

IMG_20150304_140006

Squeeze some E6000 adhesive to inside of bottlecaps and center your epoxy image onto the center.  Make sure to work in a well ventilated area and away from children.

IMG_20150304_140319

Lay out to dry overnight. Then punch a hole on the top of the bottlecap edge and insert split ring.  Then place on a necklace or keychain of your choice.

IMG_20150304_123724

For the party favor, I wrapped a Strawberry Shortcake coloring book in brown wrapping paper, then placed the necklace, crayons and a Strawberry Shortcake tattoo in a pink polka dot baggy (Target). 

IMG_20150304_124458

Finished off with green laundry rope from the Dollartree for a cute Strawberry Shortcake-esque look.

IMG_20150307_130234

IMG_20150307_130325 IMG_20150307_134815

My daughter had a blast at her party with her dear friends and everyone got cute little cupcakes to take home too!  You can never have too much cake!

DIY: Striped Red/White Knit Dress

Recently Updated9

Now that school is out and I have all three of my sweet, wonderful, perfect children at home (always playing nicely, sharing their toys, never whining or pushing my buttons), I can’t imagine why I have no time to sew or blog.  I never realized this end of school year period would be so busy, even with a Kindergartener.  You would think it would be wind down time, but nope.  Just the opposite.  Plus, we had my father-in-law in town visiting from Hong Kong and we got to take a family trip together to Yosemite as soon as my son got out of school on Friday.  It was the perfect place to finally relax after the end of school year fiasco was over; surrounded by nature and no cell phone reception!  I don’t know about you, but I get nervous when I don’t have reception and that’s probably a sign that I am relying too much on this “smartphone” contraption and dumbing myself down… Ode to the days when we could remember all our family and friends’ phone numbers and could actually read a map.  Speaking of maps, I was the designated navigator once we got into Yosemite Park and I panicked (secretly) when I realized I couldn’t use Googlemaps and I actually had to look around at signs and terrain to figure out where we were and where to go.  Imagine my joy when I found our location on the little loops and squiggly roads drawn on the map after confirming we had actually passed the two tunnels that the map said we should be passing through! I had to give myself a pat on the back for navigating us through the park 🙂

Now this red and white knit fabric is from my past Knitfix purchase from Girl Charlee and I must admit, I had the hardest time trying to decide what to make with it.  I finally found an inspiration for this dress after I saw this “Beachcomber” dress by Shabby Apple, which unfortunately, is no longer available.  I loved the look of the dress and how the stripes on the skirt was cut on a bias to create a unique look.  Their dress has pockets, but I didn’t do the pockets because their fabric is a lot more “drapey” and soft, while my fabric is a cotton jersey knit, therefore, thicker and has more structure.  So the feel of the dress is a bit different from the loose, soft, flow of the inspiration dress, but I still like my dress.

I drafted a rough pattern for this dress using a loose top I have for the bodice of the dress then did some math (I know, crazy) to figure out how to split my waist measurement into four pieces for the skirt while adding enough room for seam allowances.  Then I measured the length of the skirt and when cutting out my skirt pieces, I cut it carefully so I could get the right look with the stripes.  When I finished piecing all the parts together, I realized it was too big, so I had to go back, cut, rip seams, and sew it again to get it just right.

I used a straight stretch stitch on my (very basic) babylock and used about a 3/8″ to 1/2″ seam throughout.  I ironed my hems when folding it and pinning to get clean, straight hemlines.

IMG_0514

This top works perfectly since it doesn’t have separate sleeves, which is the look I was going for.

IMG_0521

Trace the shirt and add seam allowances, then cut out your piece for the front and the back. I tried to make somewhat of a v-neck for the front.

IMG_0523

Pin and sew the sides up to the bottom of the sleeve.

IMG_0522

PIn and sew the shoulder and upper sleeve part with right sides together

IMG_0525

Divide your waist measurement by 4 then add 1/2″ seam to each side of your 4 pieces and cut. I tapered each of the skirt pieces so it gets gradually wider as it goes down.

Carefully eyeball the stripes so you get the right diagonal design for the skirt. I did horizontal lines for the middle front and middle back of the skirt. Then cut on a bias for the two side pieces of the skirt.

Carefully eyeball the stripes so you get the right diagonal design for the skirt. I did horizontal lines for the middle front and middle back of the skirt. Then cut on a bias for the two side pieces of the skirt.

IMG_0530

Pin and sew all four pieces of the skirt together with a 1/2″ seam with right sides together.

IMG_0531

The skirt portion should look something like this.

IMG_0532

With the top wrong side out and the skirt right side out, tuck the skirt (bottom hem first) into the top then pin and sew. It helps to make center and side marks on the bottom hem of the top and the top hem of the skirt to match you evenly when you pin.

IMG_0927

Double fold the neckline then sew. I cut my neckline too wide and it could almost be off-shoulder… I was trying to go for the wide boatneck look with a slight V. Oh well.

IMG_0929

Hem your sleeves to desired length. I only single folded the hem for the sleeves.

IMG_0930

Double fold and iron the skirt hem then pin and sew.

IMG_0931

Aaaaaaand you’re done!!!

Hey, this dress would be perfect for the 4th of July!  I just need to add some blue and stars and I’m the US flag!  I’m excited to add this to my small, but growing, knit dress collection.

Thanks for reading!

-Flora

P.S.  Thanks for taking the time to take pictures of me modeling the dress this morning before you left for work, Ken hubby!  Love you!

IMG_0938

DIY Tutorial: Girls Peplum Tankini and Bottoms

IMG_0788 picmonkey words

This week, perhaps due to the Memorial Day holiday, has just flown by and I can’t recall anything particularly special about it (aside from remembering our Soldiers and Veterans), what with it being jumbled together with the repetitious motions of LIFE and having a husband MIA for most of it due to a business trip.  Oh yes, there was a “memorable” incident that will be, I only hypothesize, the first of many more to come, and I chuckle now, but I do dread the days when drama will set up house in my home.  Of course my house is filled with drama now, but this is drama of a different sort of which I speak.  My 6 year old decided he would run away and handed me a note which stated he no longer loved me and that he would leave and never return because I didn’t take him to Burger King after school.  And the punchline is this: there was a girl from his class he wanted to go with.  He would abandon mom for a girl!  Too soon!  Okay, maybe he just really wanted to eat a burger, but I admit I chuckled to think my son had so easily pushed aside me, his mom, for a girl and a burger.  Then it dawned on me that this was a foreshadowing of events to come.  He is my little momma’s boy now but I will have to move aside sooner of later… and so goes life.  It definitely is a reminder to cherish this time of innocence and sweetness of my children before they all grow up and decide mom’s no longer cool.  ha.

Recently Updated7 pic monkey

Now on to the swimsuit.  Does this apple fabric look familiar to you?  If you’ve browsed through my “DIY Tutorial” page, you might have seen this same fabric for another swimsuit I made several years ago for my now 5 yr old.  It has recently been retired due to major wedgie issues so I wanted to try another swimsuit project for my C because it’s been in the 50’s/60’s here and that’s perfect weather for swimming in a “supposedly” heated pool!  (sarcasm)  Finally, today was the first day in weeks where I was able to take off my sweater and sit outside in the sun without freezing my butt off, so what better way to welcome the return of our sun than to make a swimsuit!  I tried to find cute swim fabric at Joann, but was disappointed with how unappealing and boring all their active fabrics were and ended up getting some solid pink active fabric; because you can never go wrong with pink with my girls.  I racked my brain and scoured the internet for some ideas for a solid colored swimsuit and was left unimpressed and uninspired.  As luck would have it, I found the remnants of this apple swim fabric left over from my previous swimsuit venture and after some careful measuring, was able to use almost every inch of that scrap of fabric to make this cute swimsuit for my little C.  The peplum idea came out of necessity because I wouldn’t have been able to cut one continuous piece for a tank with the scrap fabric, but cutting separate pieces for the peplum worked beautifully.

To make your girl’s swimsuit, you will need some swim (knit) fabric that has a a good amount of stretch in all directions.  I probably made this swimsuit (3T) with about a quarter of a yard of fabric remnants, but I really had to cut and measure carefully.  I didn’t use any elastic because the fabric has great stretch and fits her nice and snug and I used bias tape for binding the upper edges of the tank which extends into a ribbon to tie behind the neck.

Materials:

  • about 1/2 yard of swim fabric (depends on the size of your child)
  • bias tape
  • coordinating thread

IMG_0745

Please excuse C’s cute elephant undies, but this is what I used to make my pattern for the swim bottoms.  Add seam allowance and trace around the undies, then cut out the pattern and fold it in half, vertically.  Trim so both halves are identical; that way you have an even piece that’s not lopsided. This is the back piece for the swim bottom.

∗Pick a pair of undies that fit nice and not too loose, then you won’t have to add elastic to the leg opening and waist and your life will be a lot easier.

IMG_0747

Trace your back bottom piece onto a new piece of freezer paper, then using the undies as a guide, draw a curve (like above) for the front bottom piece on one side of the leg opening.

IMG_0748

Cut out the pattern piece, fold it in half vertically, then trace and cut the same curve on the other side of the leg opening to complete your front bottom pattern piece.

IMG_0746

Now, please excuse C’s little undershirt.  Use a tank top that fits nicely, not too tight and not too loose, fold it in half and trace, adding seam allowance.  I traced right at the edge of the tank top and didn’t add extra seam allowance because this undershirt is a bit loose on C and I don’t want the tankini to be too loose.

IMG_0749

So you should now have pattern pieces that look like this.  I used the same top pattern piece for both the front and the back and later ended up slashing the tank pattern piece across the waist to make a peplum.

IMG_0753

Draw a straight, horizontal line across the top of the tank perpendicular to the armpit point of the tank, as shown above.  That will be your pattern piece for the back of the tankini.  Then figure out where the waist is on your tank piece and draw another horizontal line across so you have a tankini bodice and the lowest third of the pattern piece will be the peplum.  Make sure to cut your upper bodice piece at the waistline (2nd line) that you drew.  Your peplum skirt piece should be 1.5x the width of your entire bodice width and cut 2.

* just fold down the pattern piece at the lines when cutting out your back and Peplum pieces.

IMG_0751

You should have a front bodice, back bodice, 2 peplum skirts, a front bottom, and a back bottom piece.  Make a center mark on the bottom hem of your front and back bodice pieces and for the upper hem of your peplum skirts.

IMG_0754

Take your peplum skirt and run a gather stitch (zero tension, longest stich 4) and pull the thread to make even gathers.  Repeat for the other skirt piece.

IMG_0755

With right sides together, pin one skirt piece to the front bodice piece, evenly distributing the gathers and matching the center marks.  Repeat with the 2nd peplum skirt and the back bodice piece.

∗I used a zigzag stretch stitch and straight stretch stitch to allow the fabric to stretch throughout this project.

IMG_0756

Sew the skirt and the bodice pieces together and you can already see it coming together nicely!

IMG_0758

With right sides together, pin the sides of the front and back tankini pieces and stitch.  Hem the peplum skirt piece if desired.  I was indecisive but ended up hemming mine.

IMG_0762

Pin bias tape to the raw edges of the back and underarms area but leave the neckline.  Sew it together.

∗Upon completing the swimsuit, I would have the neck-tie extend from this strip of bias tape rather than the neckline binding, so the tie will naturally extend to the back of the neck.

IMG_0763

Pin a long piece of bias tape to the neckline that extends beyond the neckline of the tank to create the tie.

∗In hindsight, I would have the tie extend from the back and underarm (in the previous step) bias tape instead, so the tie is not warped when tied behind the neck.

IMG_0759

Pin the bottom pieces with right sides together then sew the sides and the bottom of the pieces together.

IMG_0760

Fold over about 1/4-1/2 inch of the the leg openings and stitch.  (If your leg openings are loose around your child’s thighs, then you will have to make a casing and add elastic)

IMG_0761

Fold over 1/2″ of the waist hem, pin, and stitch in place.  (Again, if the waist is too loose on your child, then you will have to make a casing and add elastic) That’s why we used undies that fit nicely so we can make use of the stretch already in the fabric to keep the bottoms from falling off and having to add elastic (which can be a pain).

And it’s done!  It was really a quick afternoon project with no elastic, buttons, clasps, etc.  Super simple and super cute!  I love the way it turned out and now big sis wants a swimsuit like this too!  Too bad I’m out of this adorable apple fabric.

IMG_0767 pic monkey

Thanks for reading! Have an awesome weekend!!!  Maybe it’ll be warm enough to go swimming! (One can hope)

-Flora

DIY Tutorial: Girl’s Tunic Dress

IMG_20150519_232305

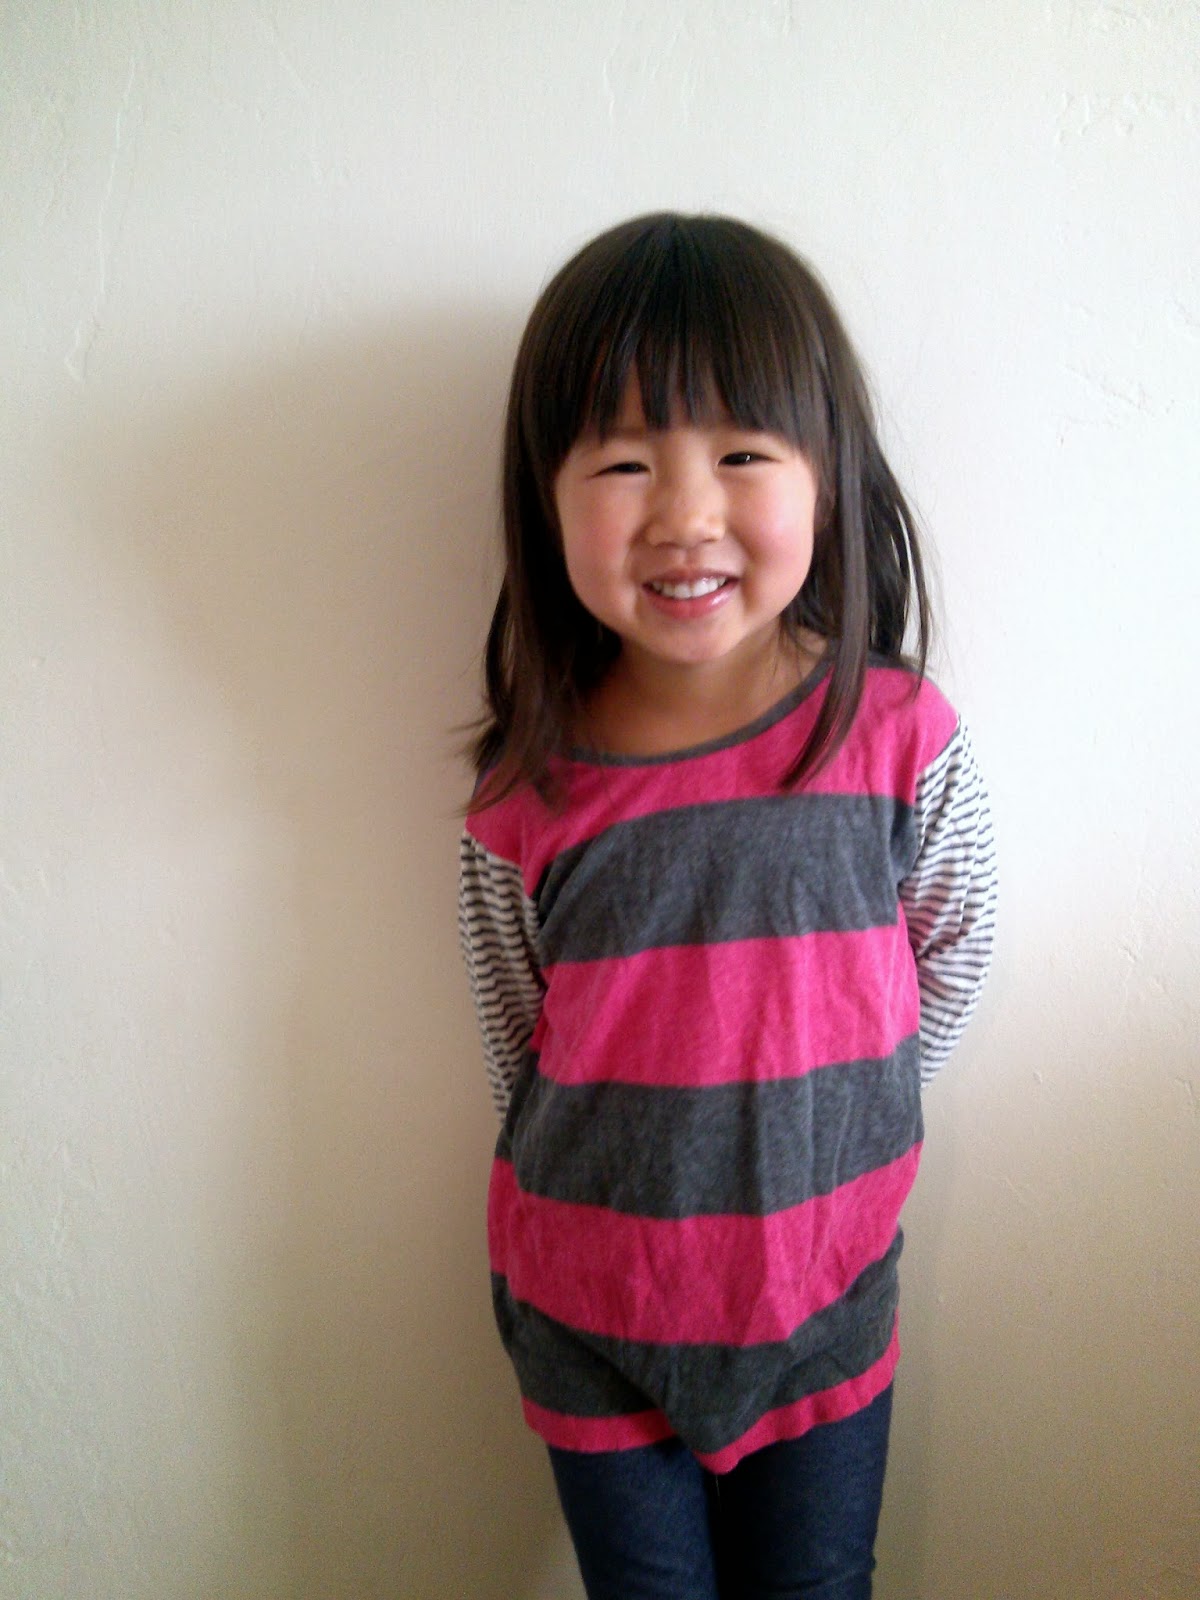
I have a growing problem: I like to hoard pretty fabric.  The clothes that I used to toss into the “donate” bag are being stored in every nook and cranny of our home if there’s even an inch of fabric to be salvaged; all because I will “someday” make use of the fabric to upcycle the garment and give it new life.  I think the TLC show “Buried Alive” may soon come knocking at my door if I don’t start whipping out some projects from this stash.  So I decided to use hubby’s old, nice, striped dress shirt with some floral fabric from my other stash to make a tunic dress for my little A.  My little princess loves dresses and every day is a battle to get her to wear pants with the much cooler weather that has been blowing into the bay area as of late.  I am usually successful in threatening convincing her to wear pants or leggings under her dress but my victory only lasts a couple hours when she takes them off at preschool.  I hope to whip out many more dresses and skirts for my girls so I can reduce the ever-growing pile of “fabric” in our already cramped home.

IMG_0696

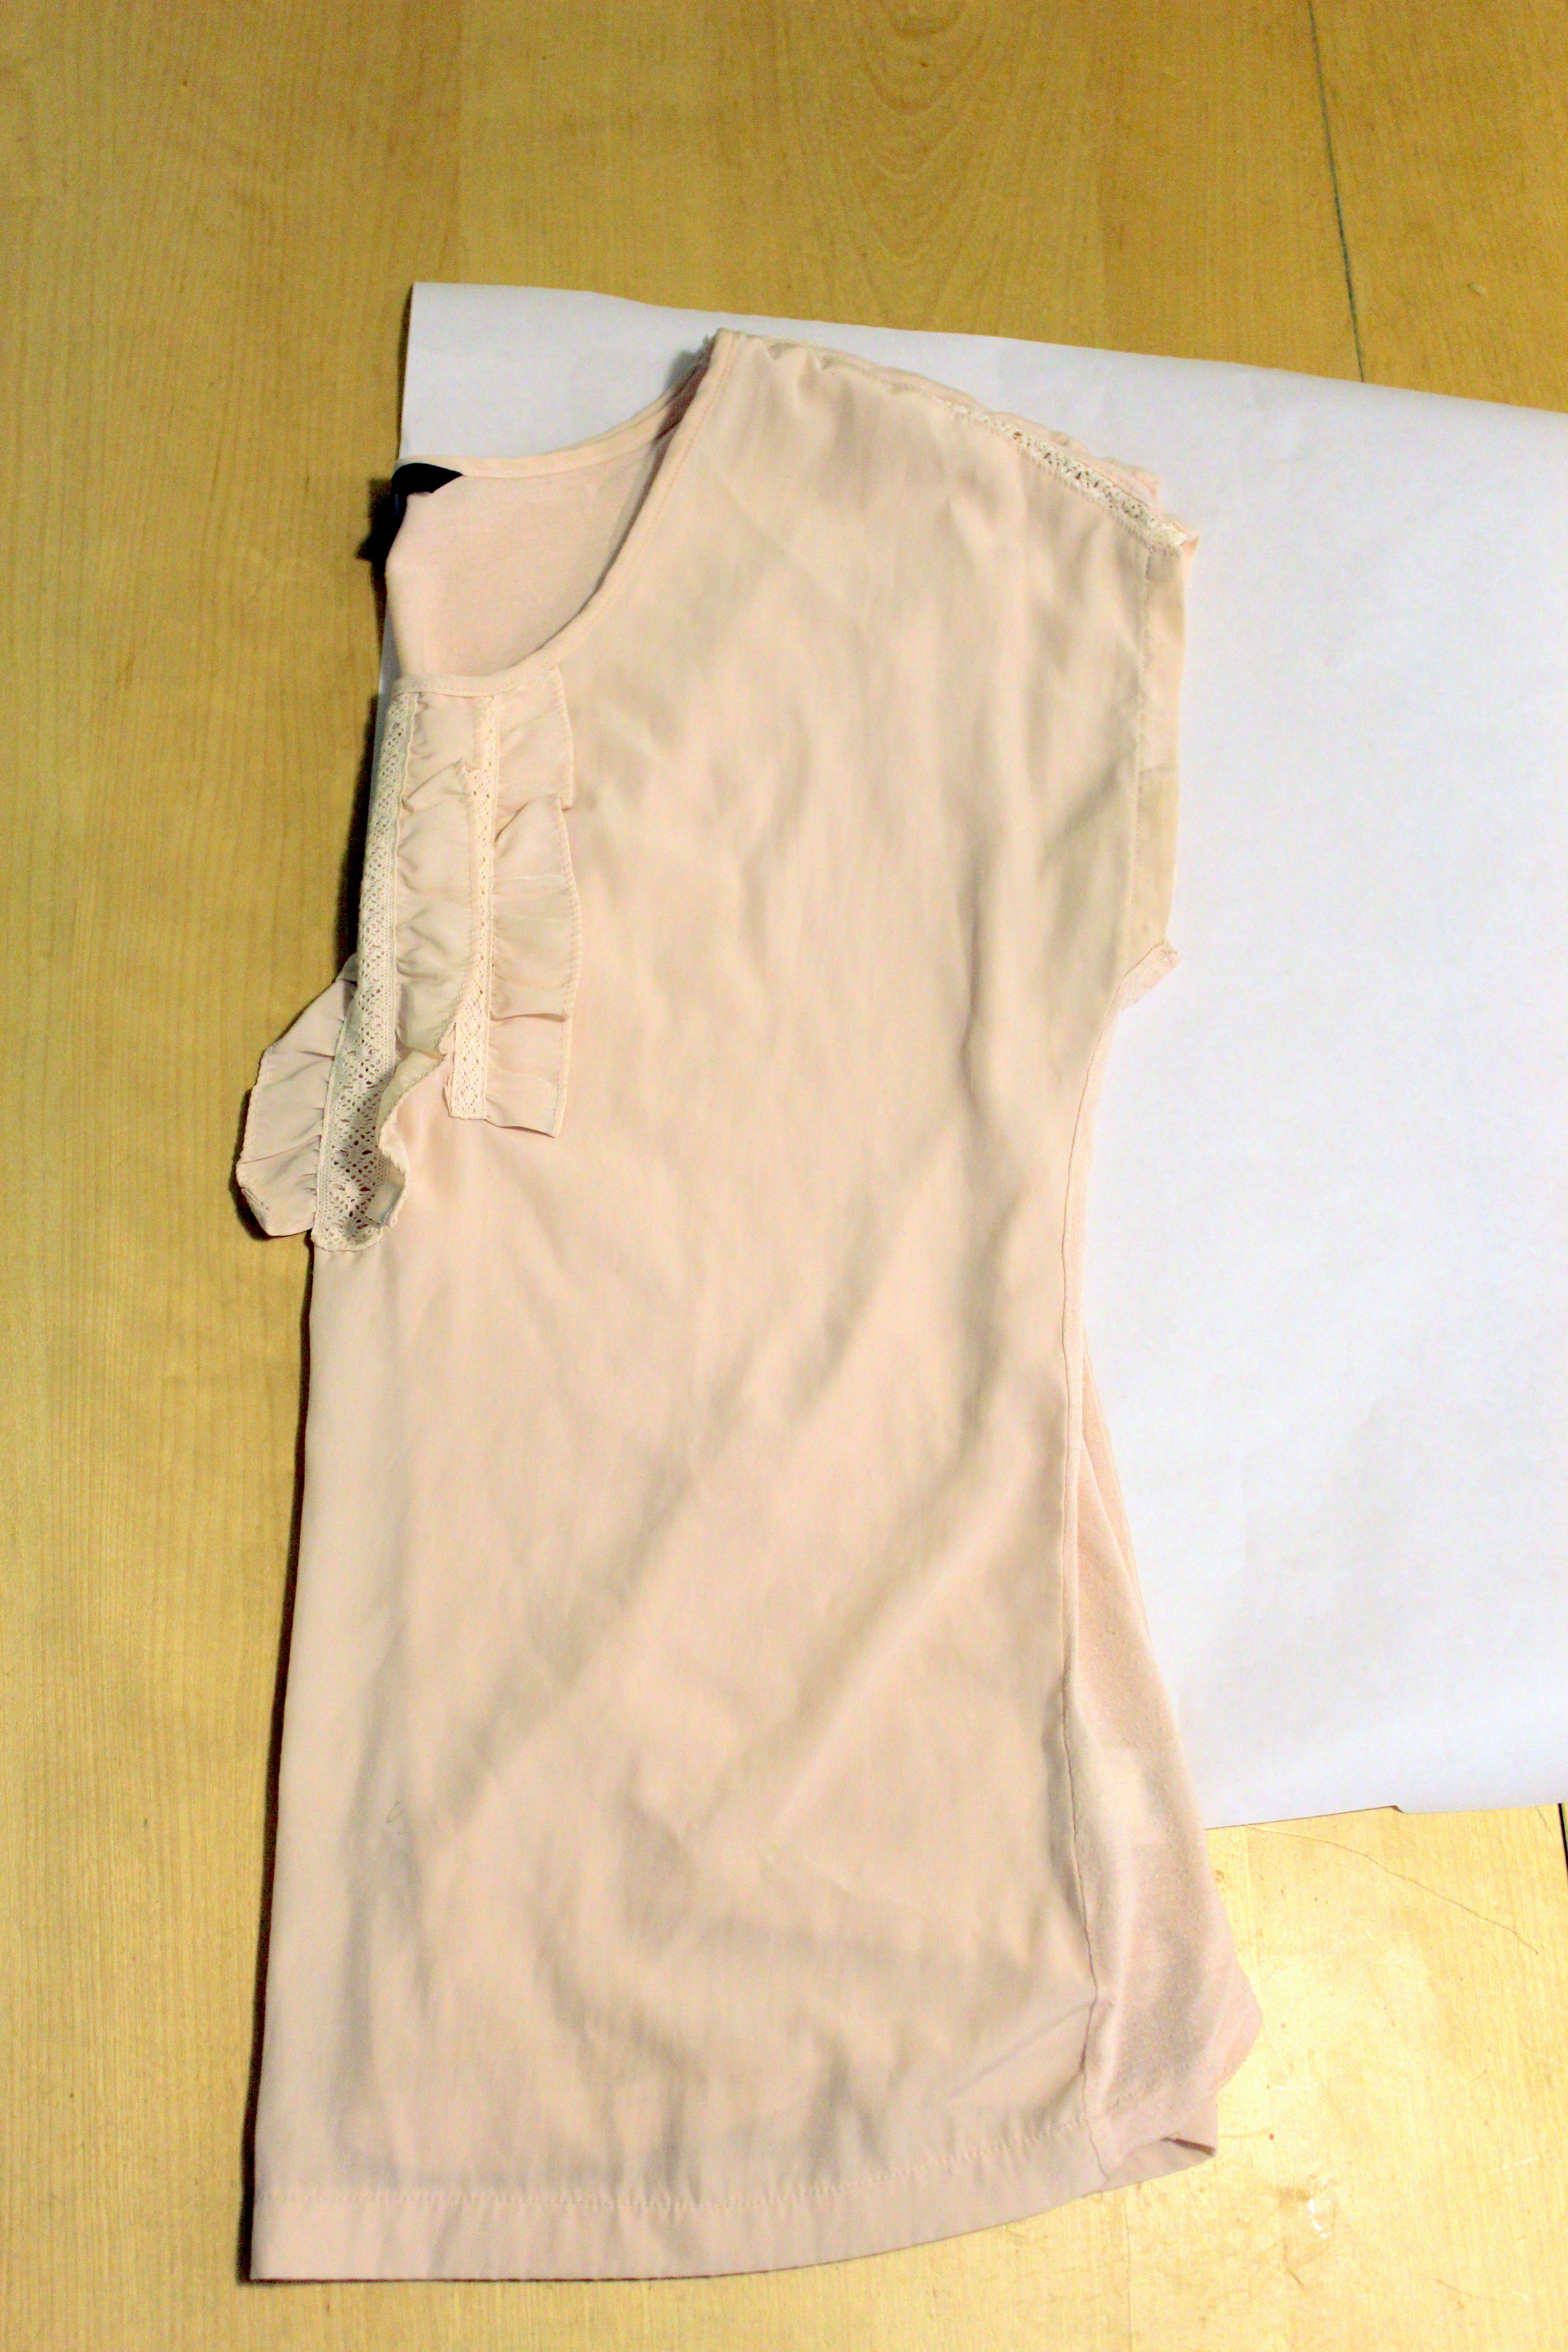
Here’s hubby’s shirt that he doesn’t wear anymore because it wrinkles too easily? Sure~ I’ll take it!

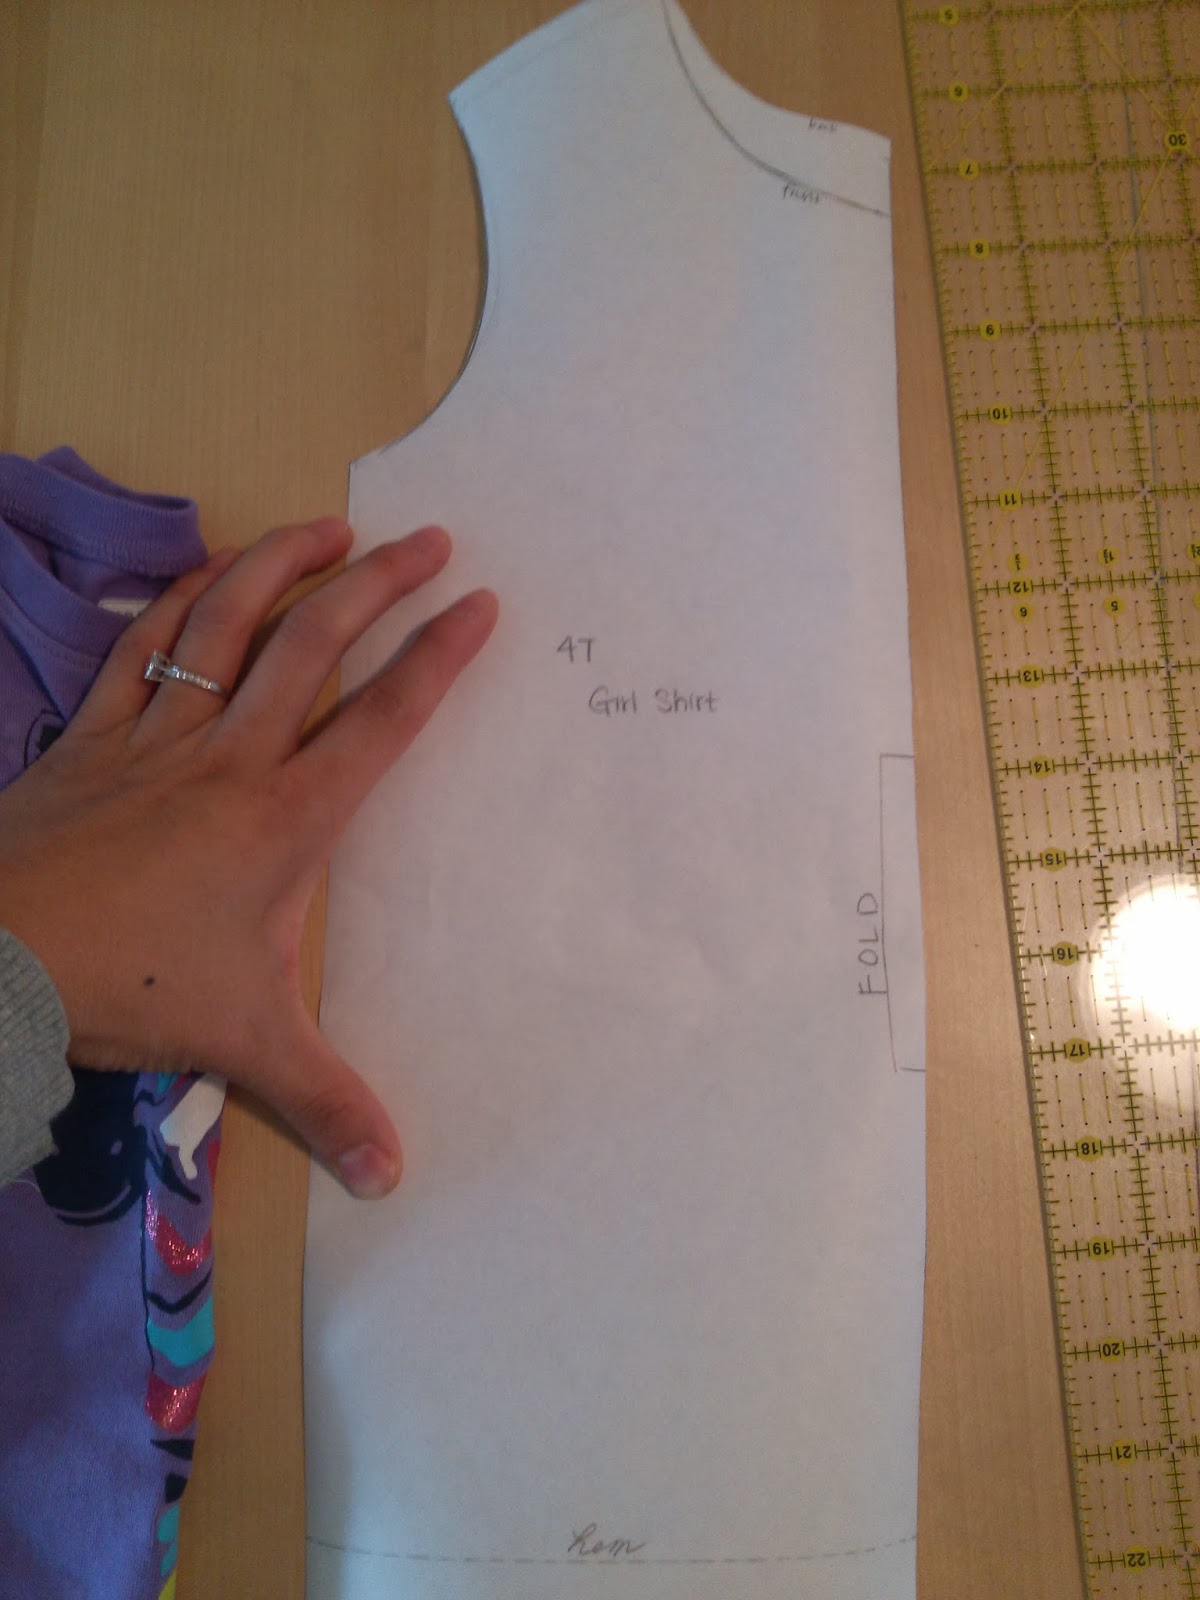
I originally used a tunic block pattern from the book: “Pattern Making for Kids’ Clothes” but ended up using one of A’s play dresses to make adjustments after cutting the fabric because it would have been much too big for my A.  The book does a great job in explaining the purpose of a block and sloper (which I had never heard of before… linguistics major here) as well as how to use these basics to create an entirely unique design.  This book was also a loan from my library and it really makes me feel like I’ve hit the jackpot when I can gain access to these awesome pattern books without having to buy the book myself!  I love shared reading. 🙂

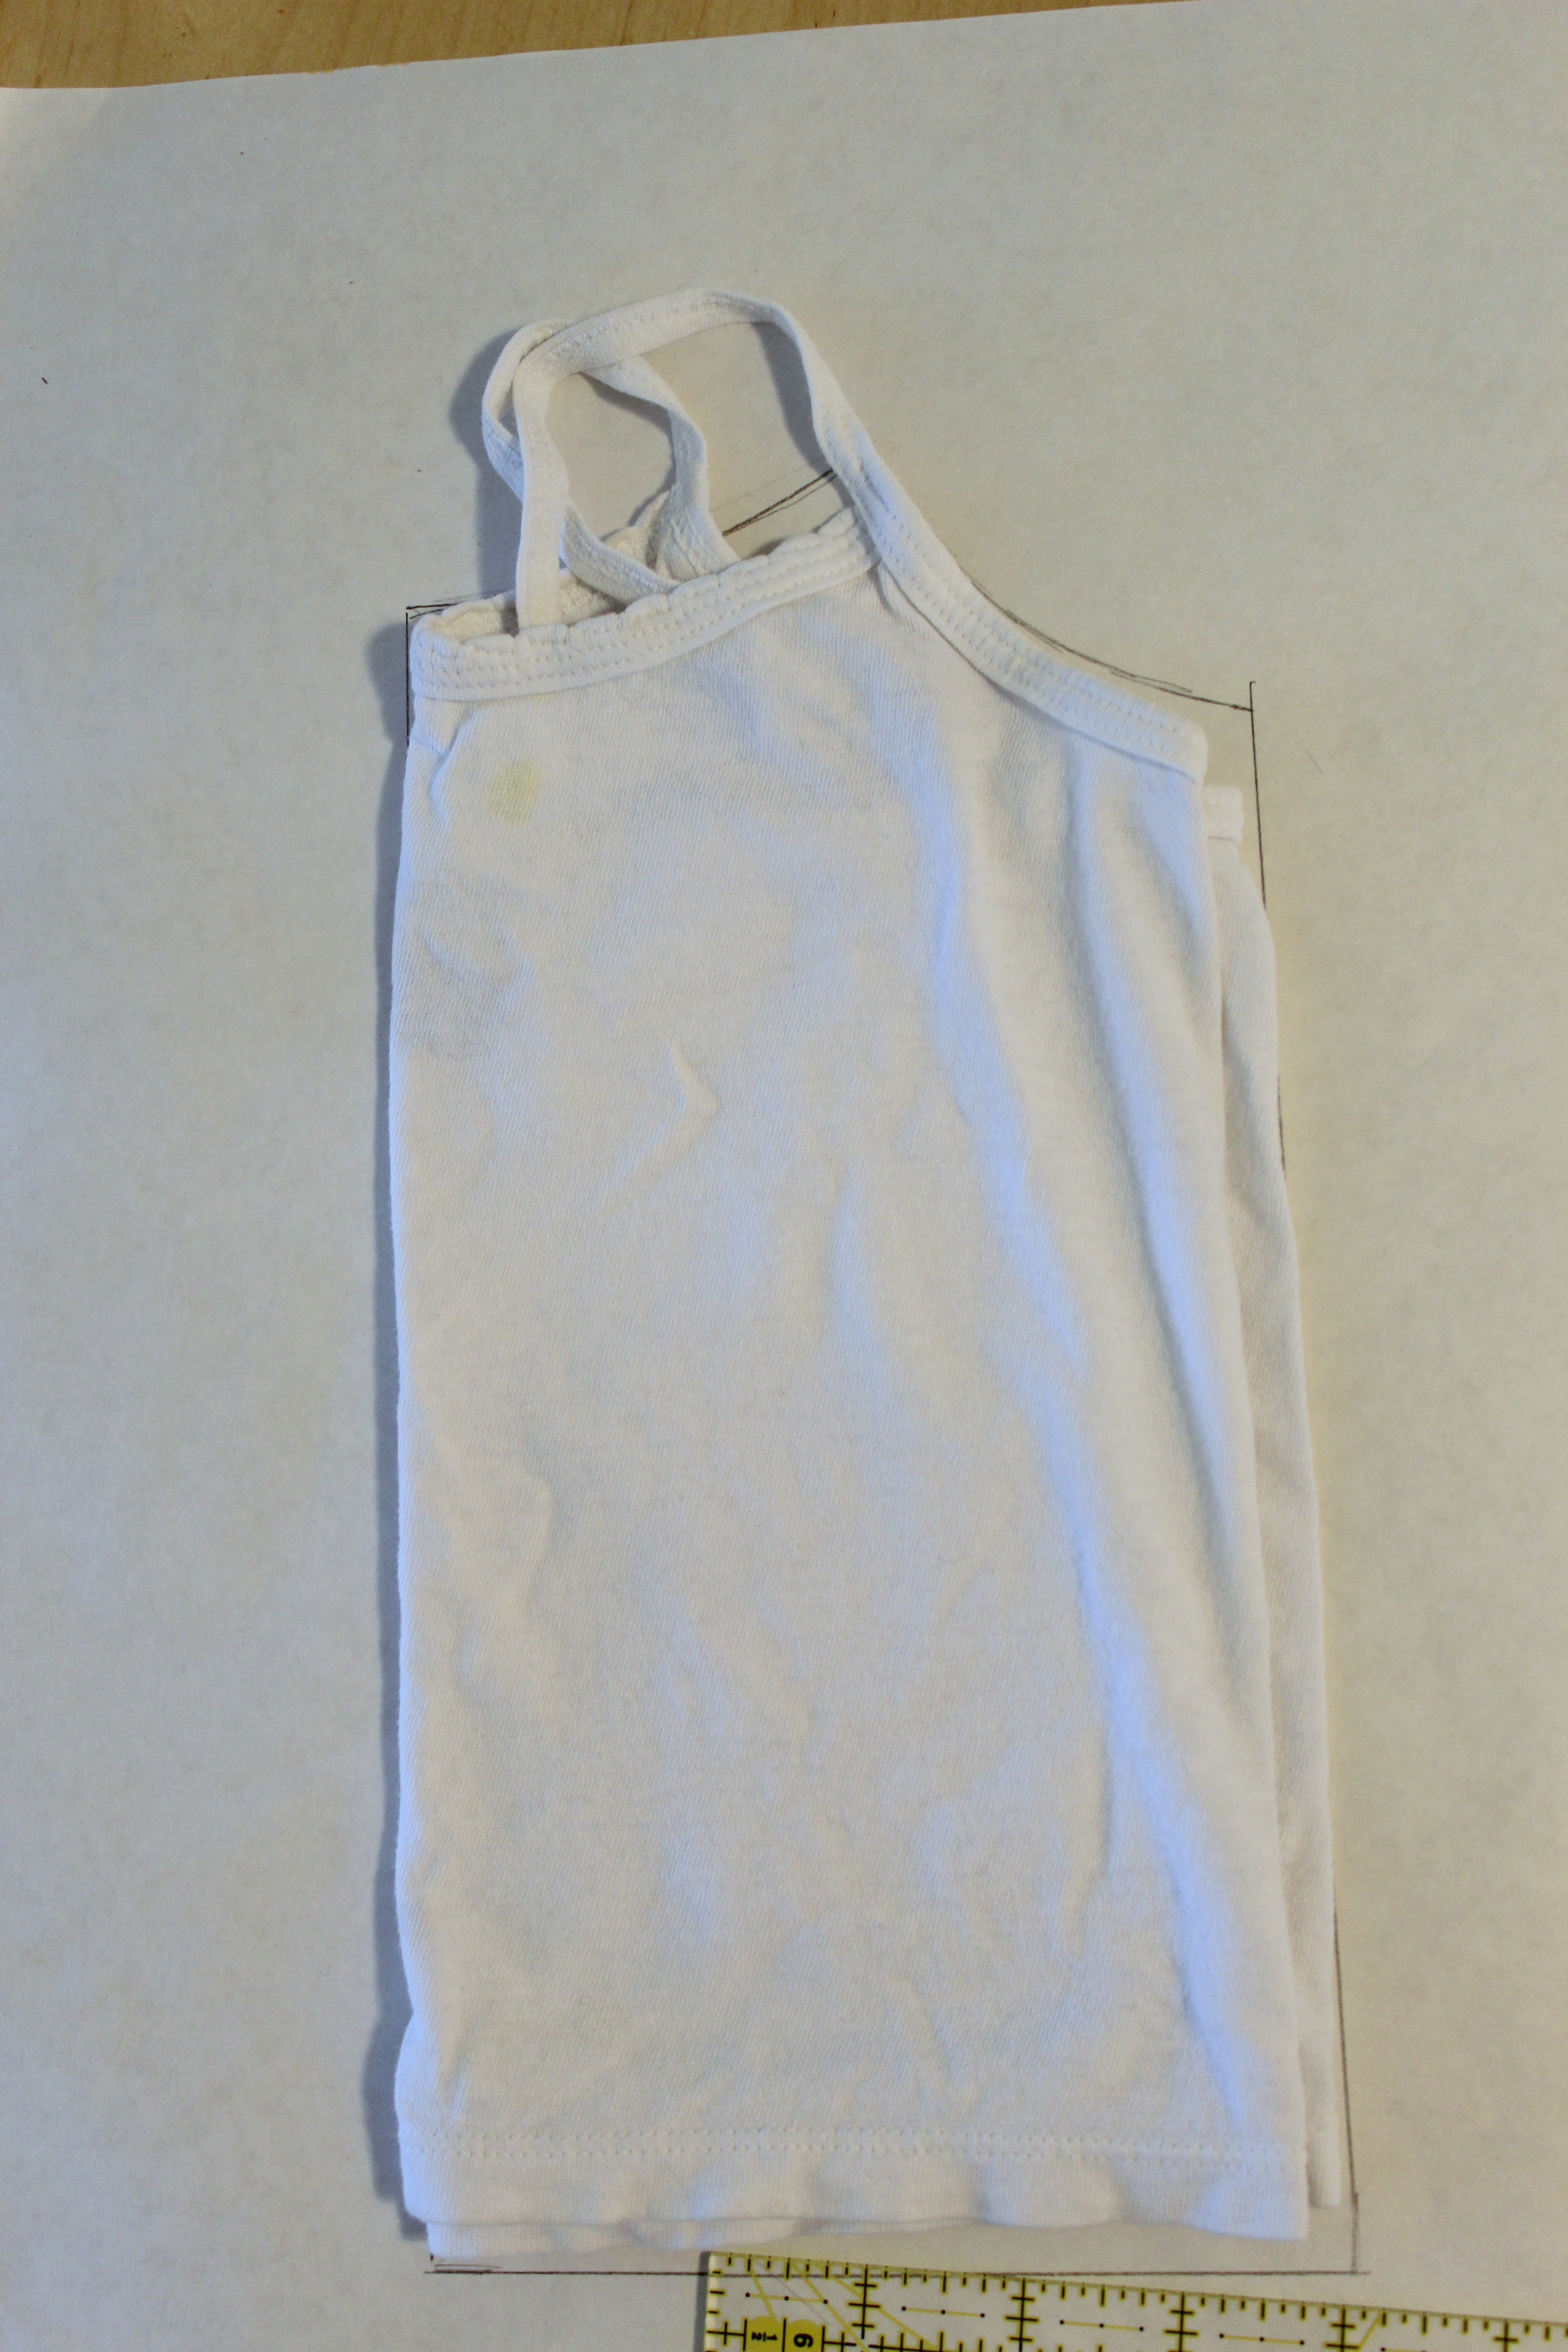
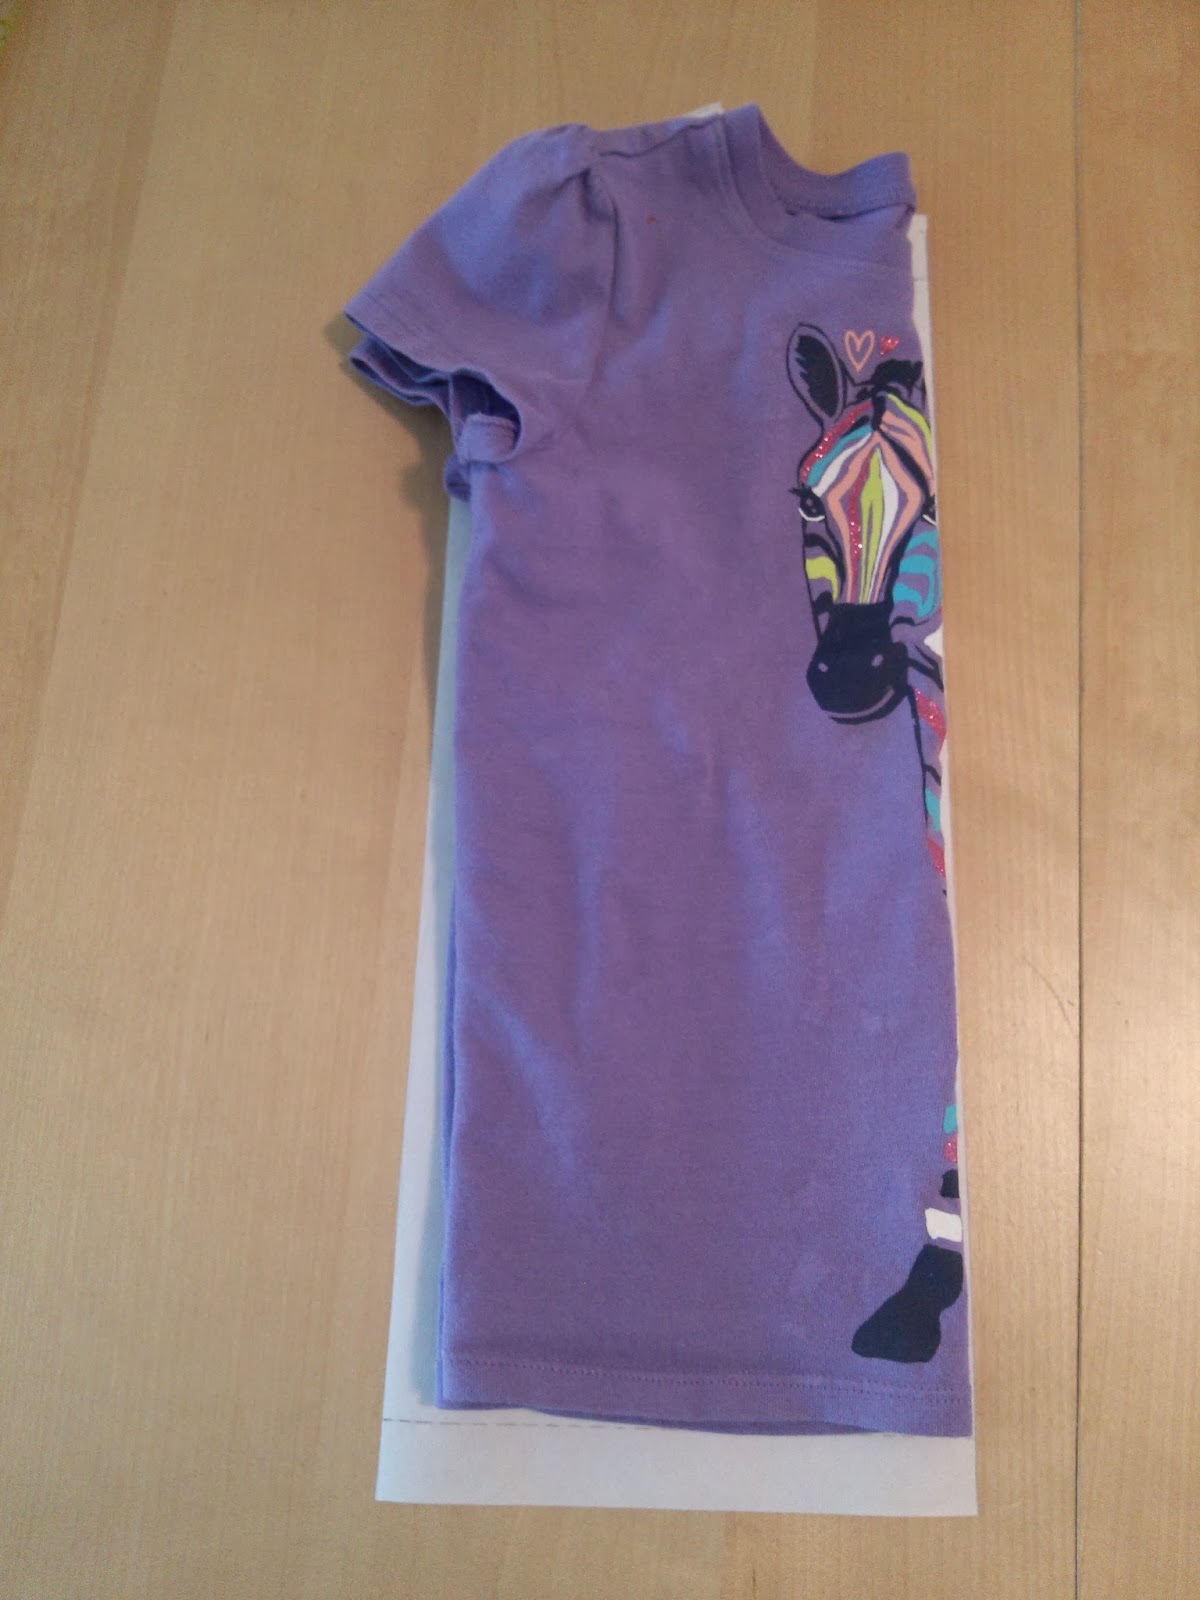
To make your own pattern from an existing dress, just fold the dress in half, lengthwise, trace, and add seam allowance.  I ended up doing basically that since the tunic block needed to be adjusted due to it being too big.

Recently Updated5

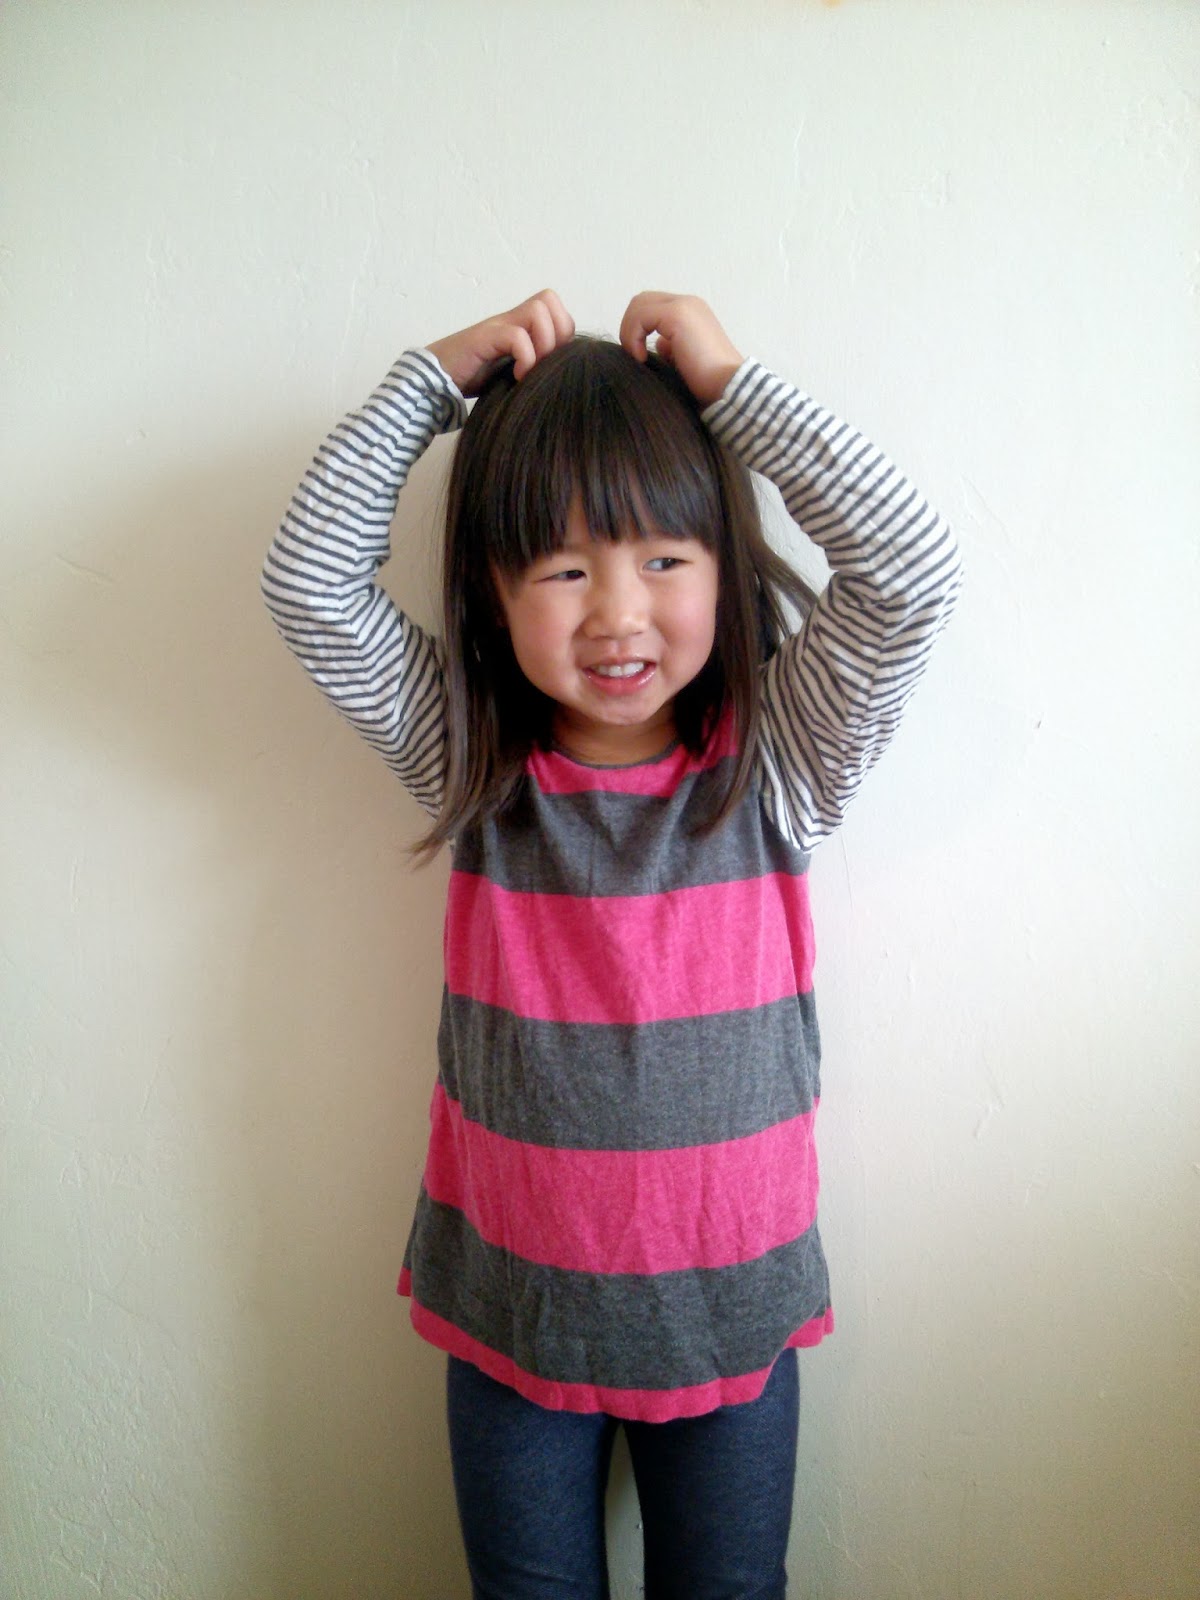
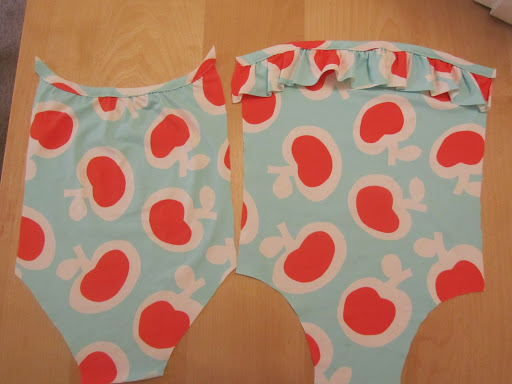
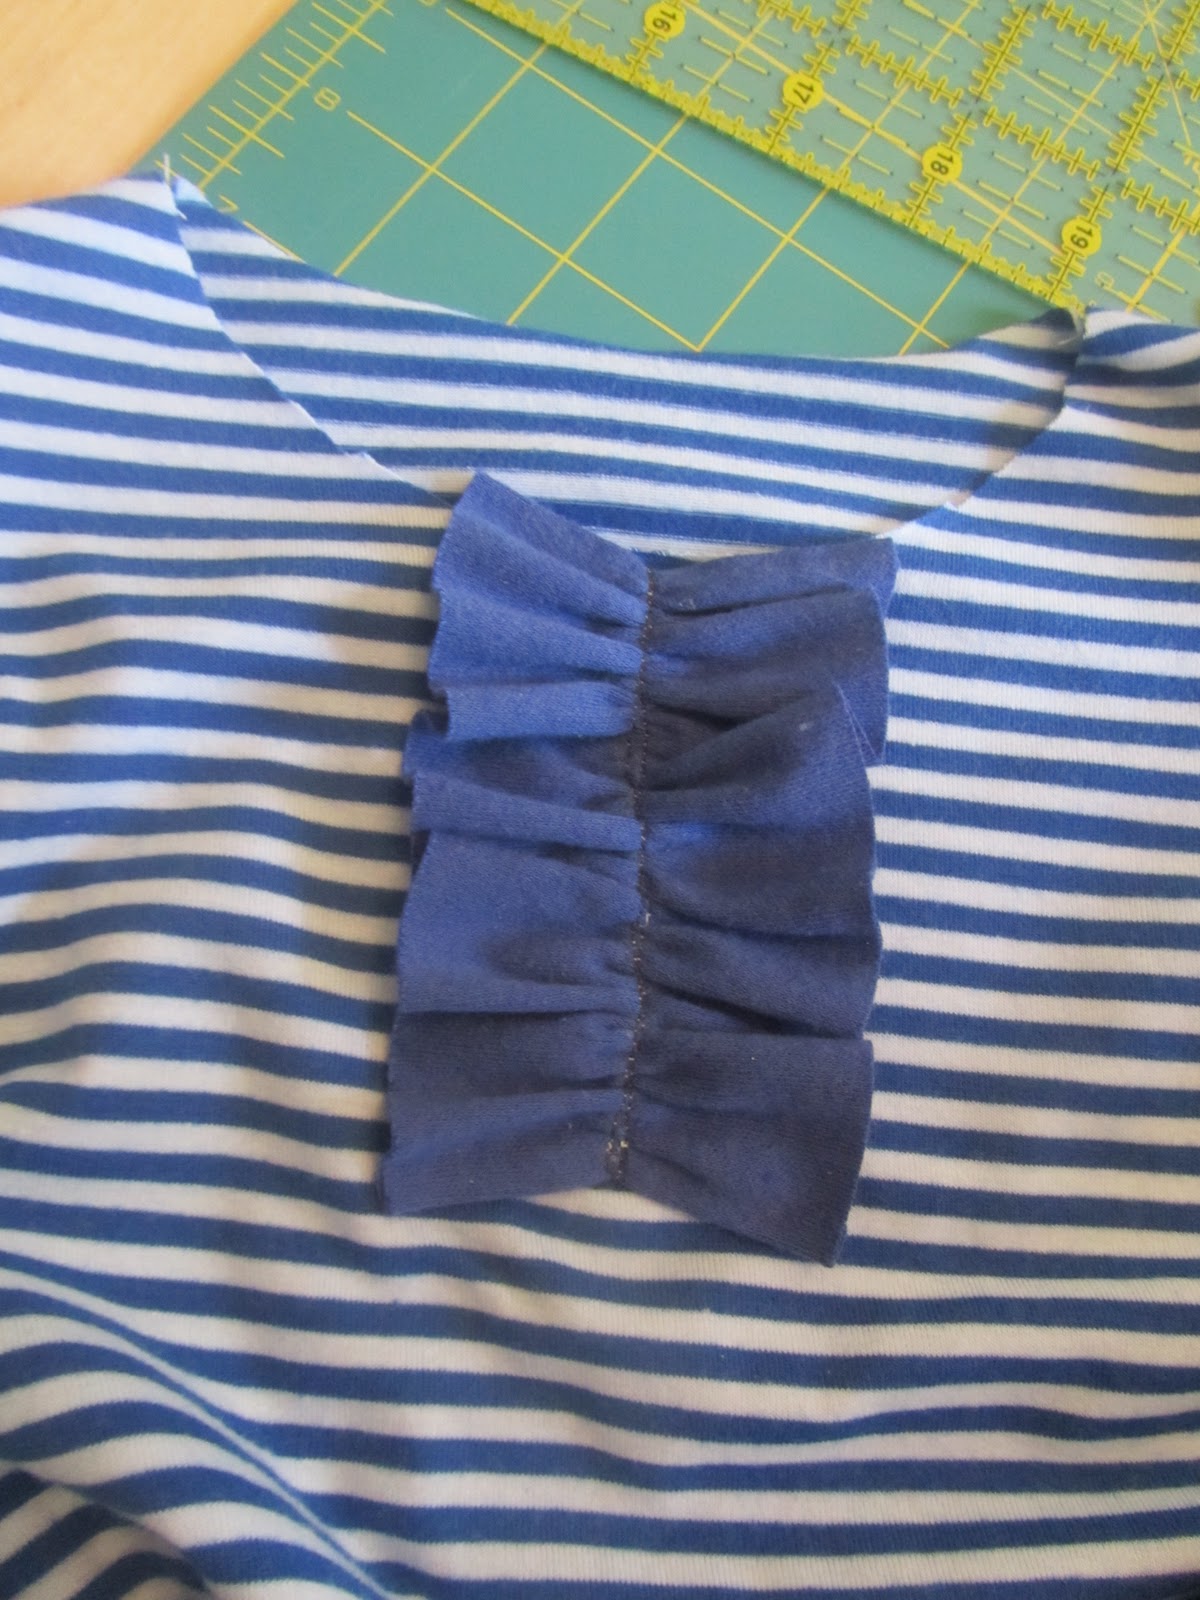
Tunic dresses like these are my favorite to make and to put on my little girls. I love pockets on dresses too and my A totally agrees.

IMG_0692

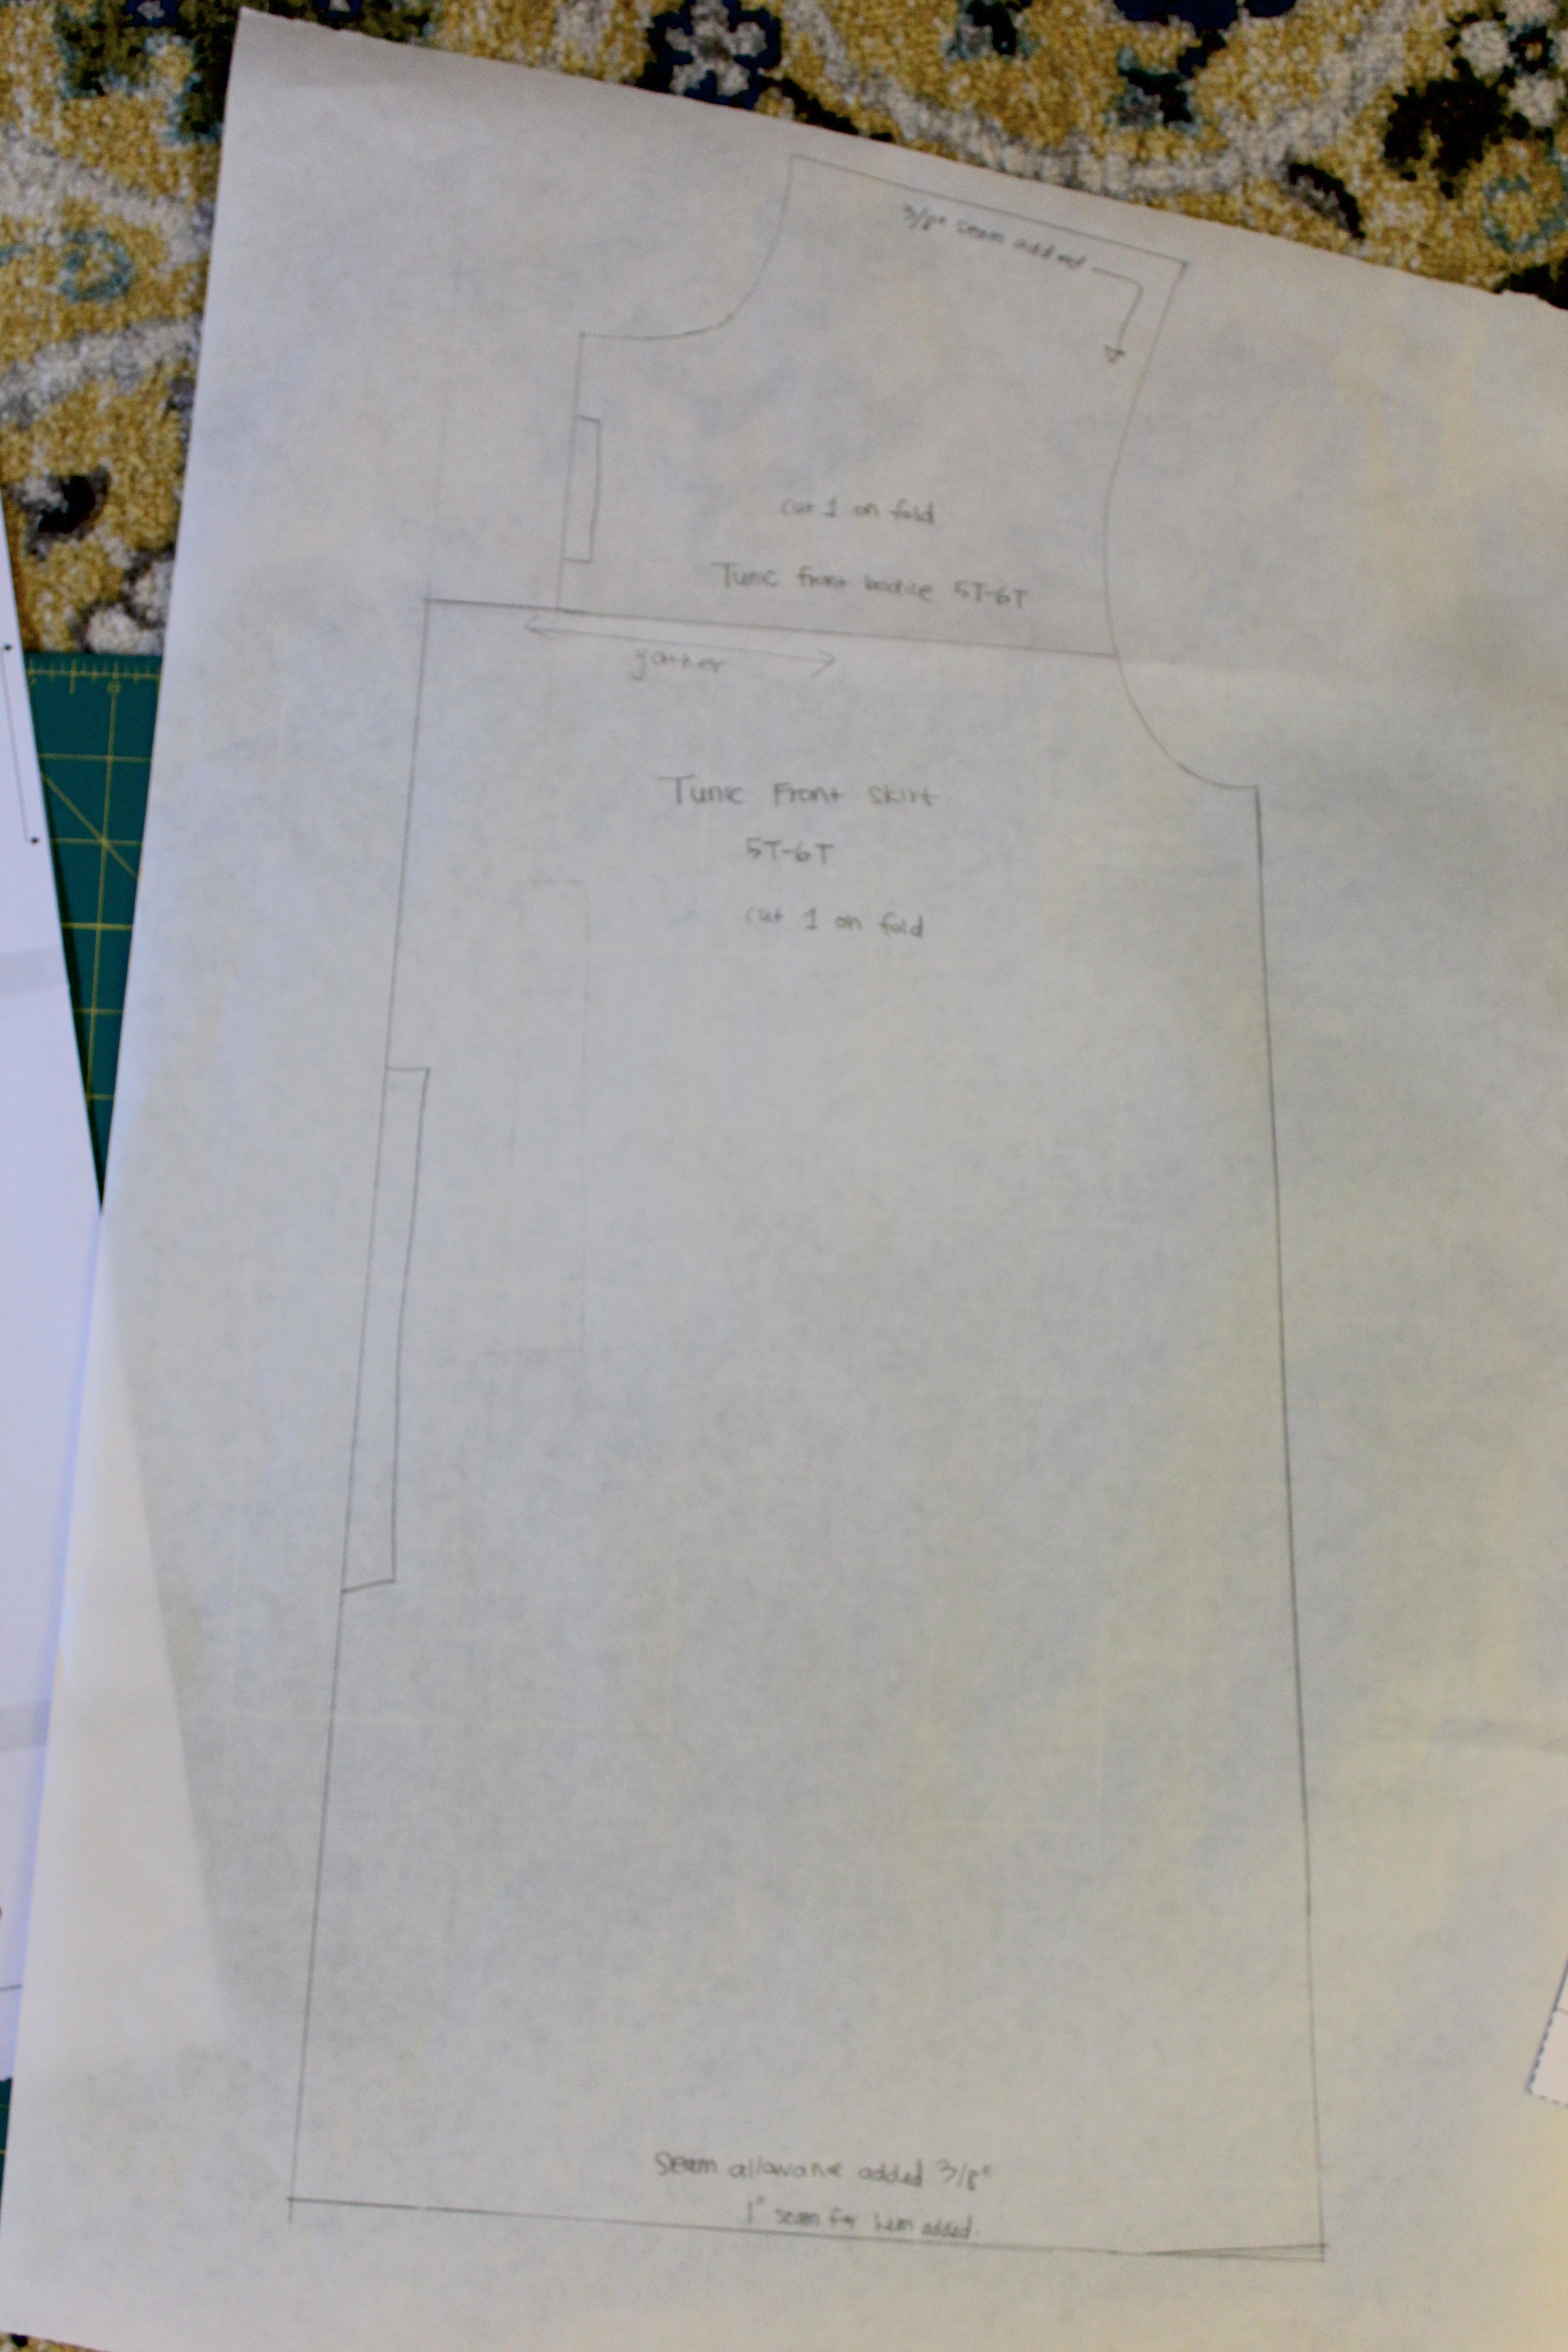
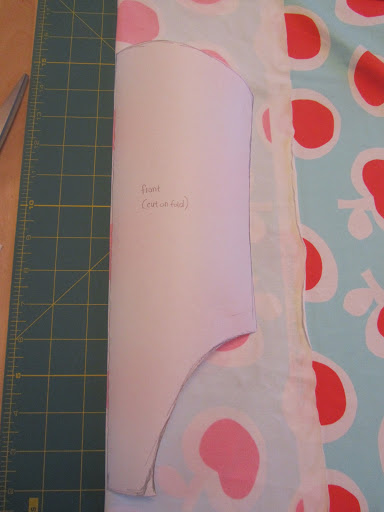
Trace the tunic block and make adjustments to make a tunic dress.

I printed the tunic block following the link given in the book, pieced it together, traced it onto freezer paper, then made my adjustments.  This tunic block is the 5-6yrs size and it was much, much too big for my 5 yr old.  I wanted to make a tunic dress so I lengthened the skirt, slashed through the armpit of the pattern to make a separate bodice, and added 1.5″ to the skirt width to make gathers (since it’s on a fold, you would be adding 3″ of fabric for gathers).

IMG_0693

After all the adjustments for the front of the tunic dress.

IMG_0694

Trace the back tunic block and make adjustments, keeping in mind the foldovers for button plackets

IMG_0695

I did basically the same thing for the back of the tunic: lengthened the skirt, slashed horizontally through arm curve, added 1.5″ width to make the skirt gathers.  But this time, I adjusted the back bodice portion so I have enough fabric to fold under twice and overlap for buttons and button holes.

Add 1.5″ from the first line for one side of the back bodice, then add another 1″ from the middle line you just drew for the other side of the back bodice. Make sure you cut mirror images of the bodice pieces, one should have a longer “flap”.

IMG_0697

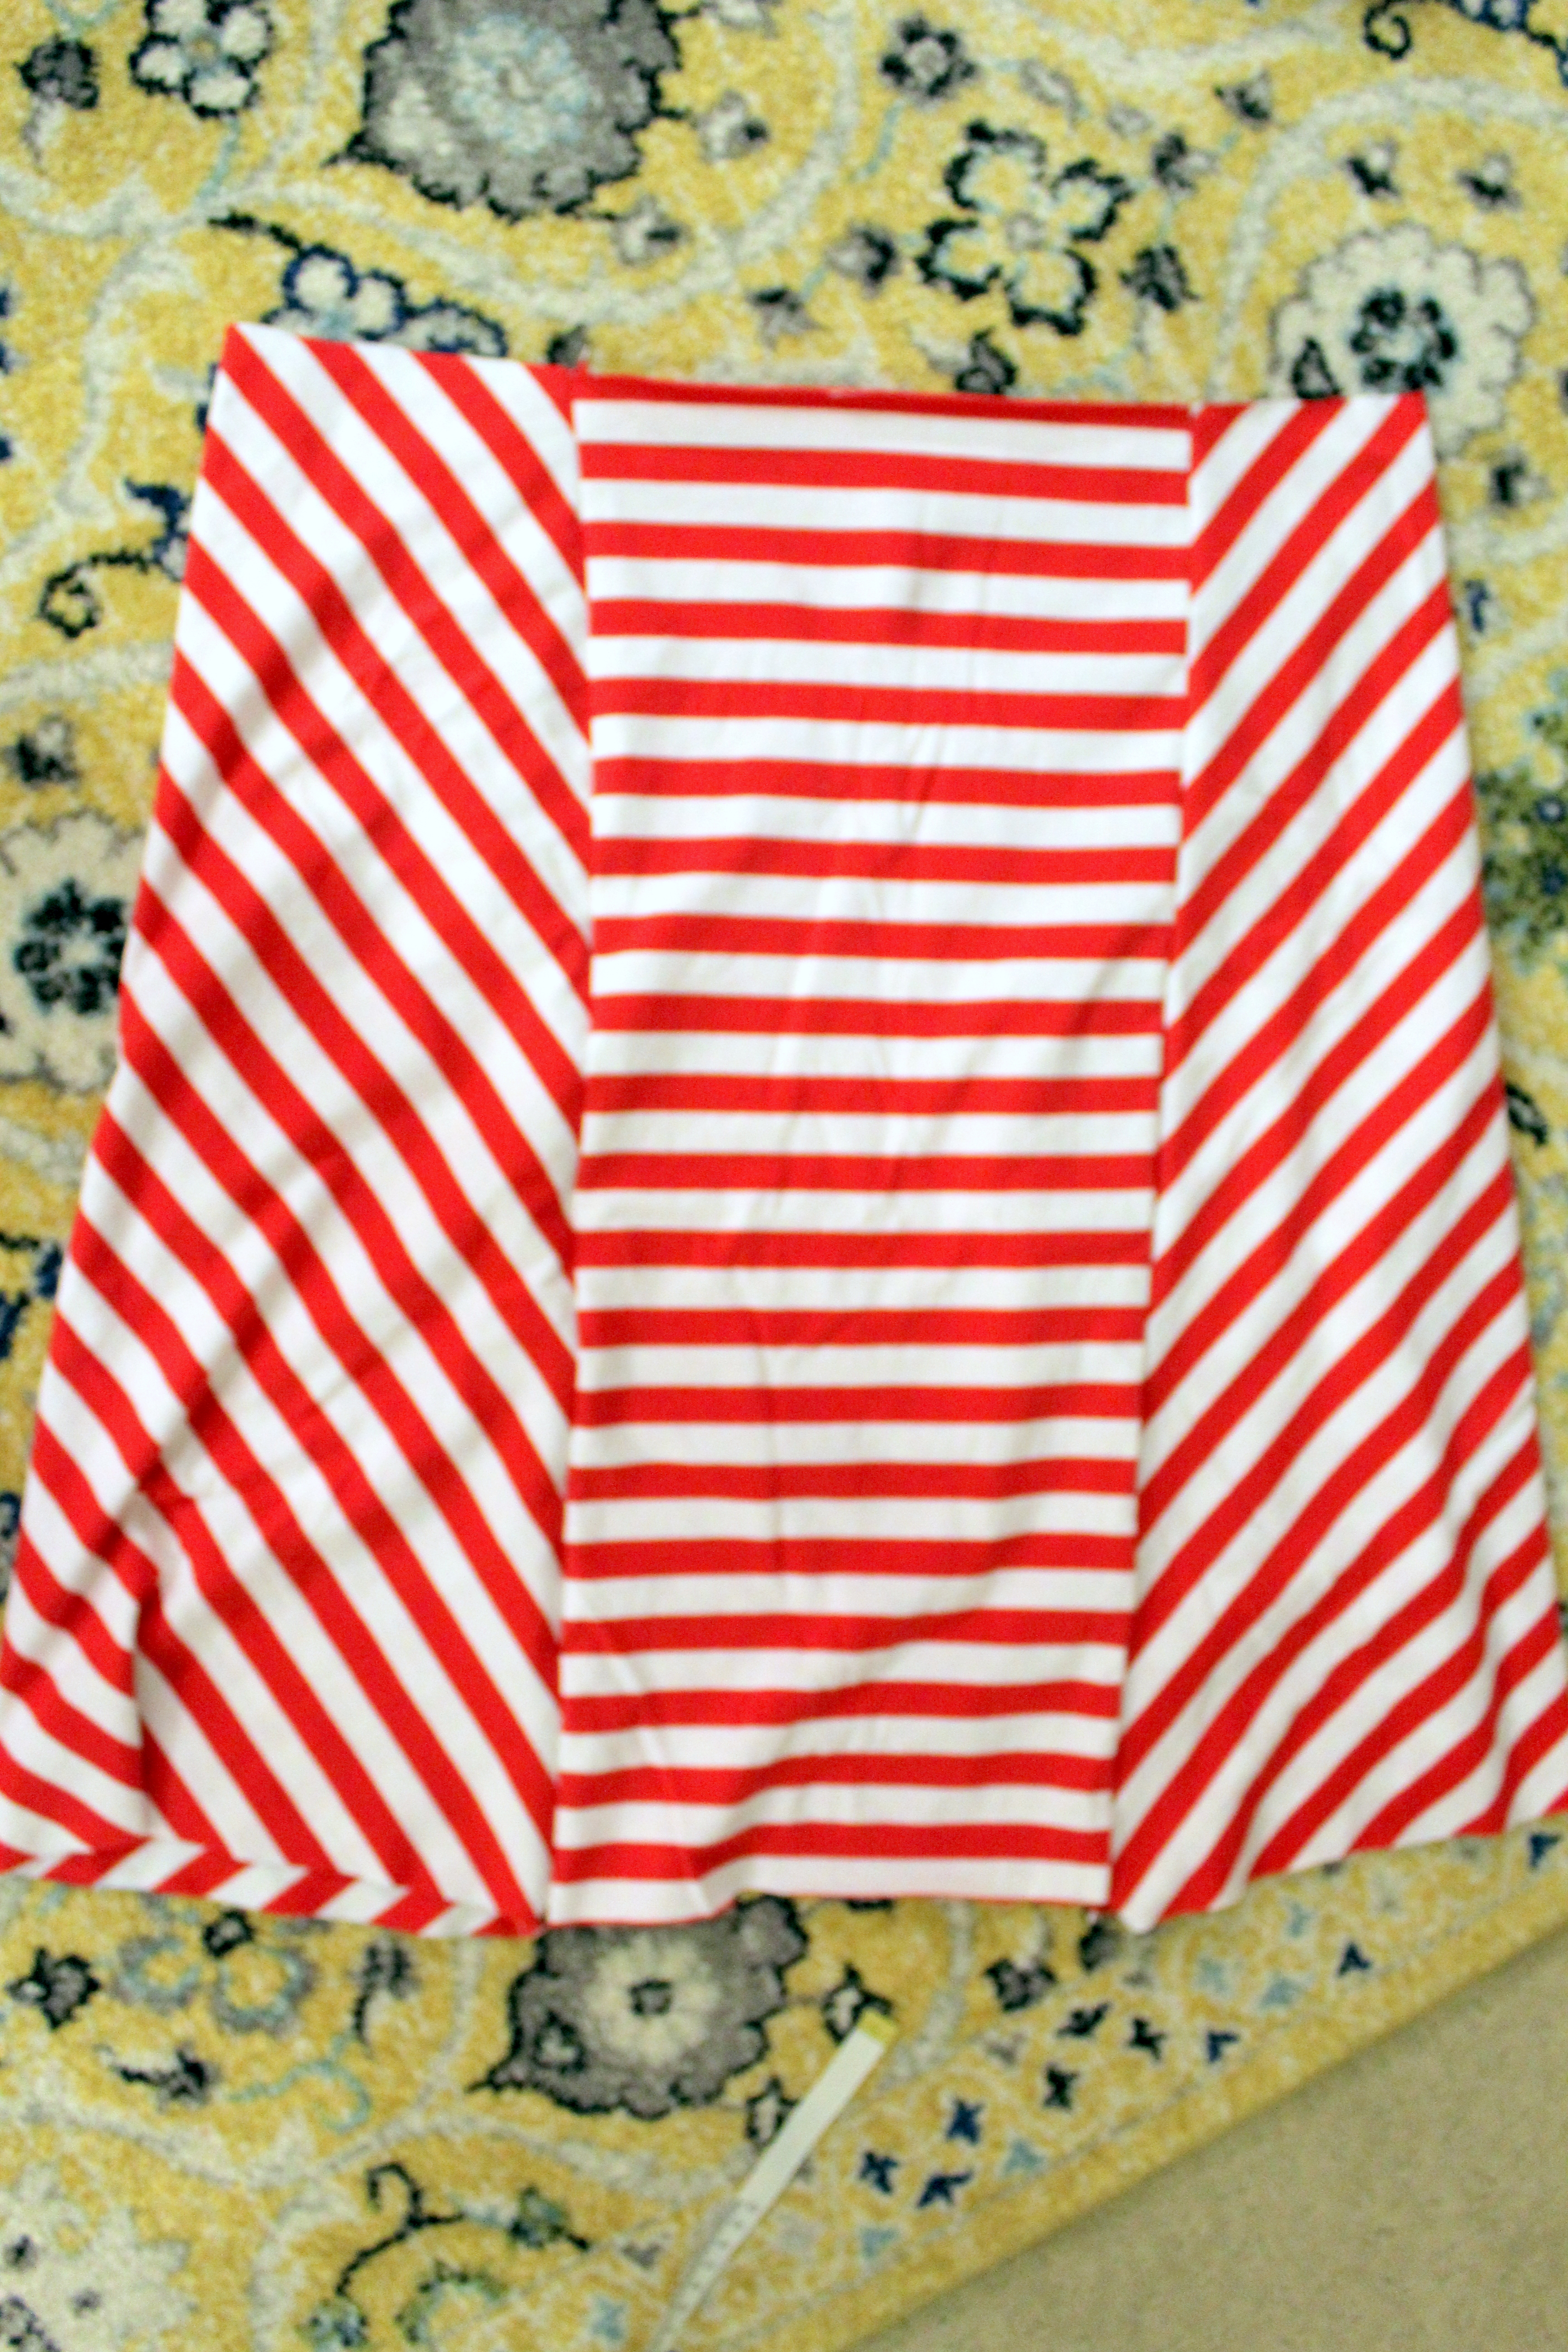
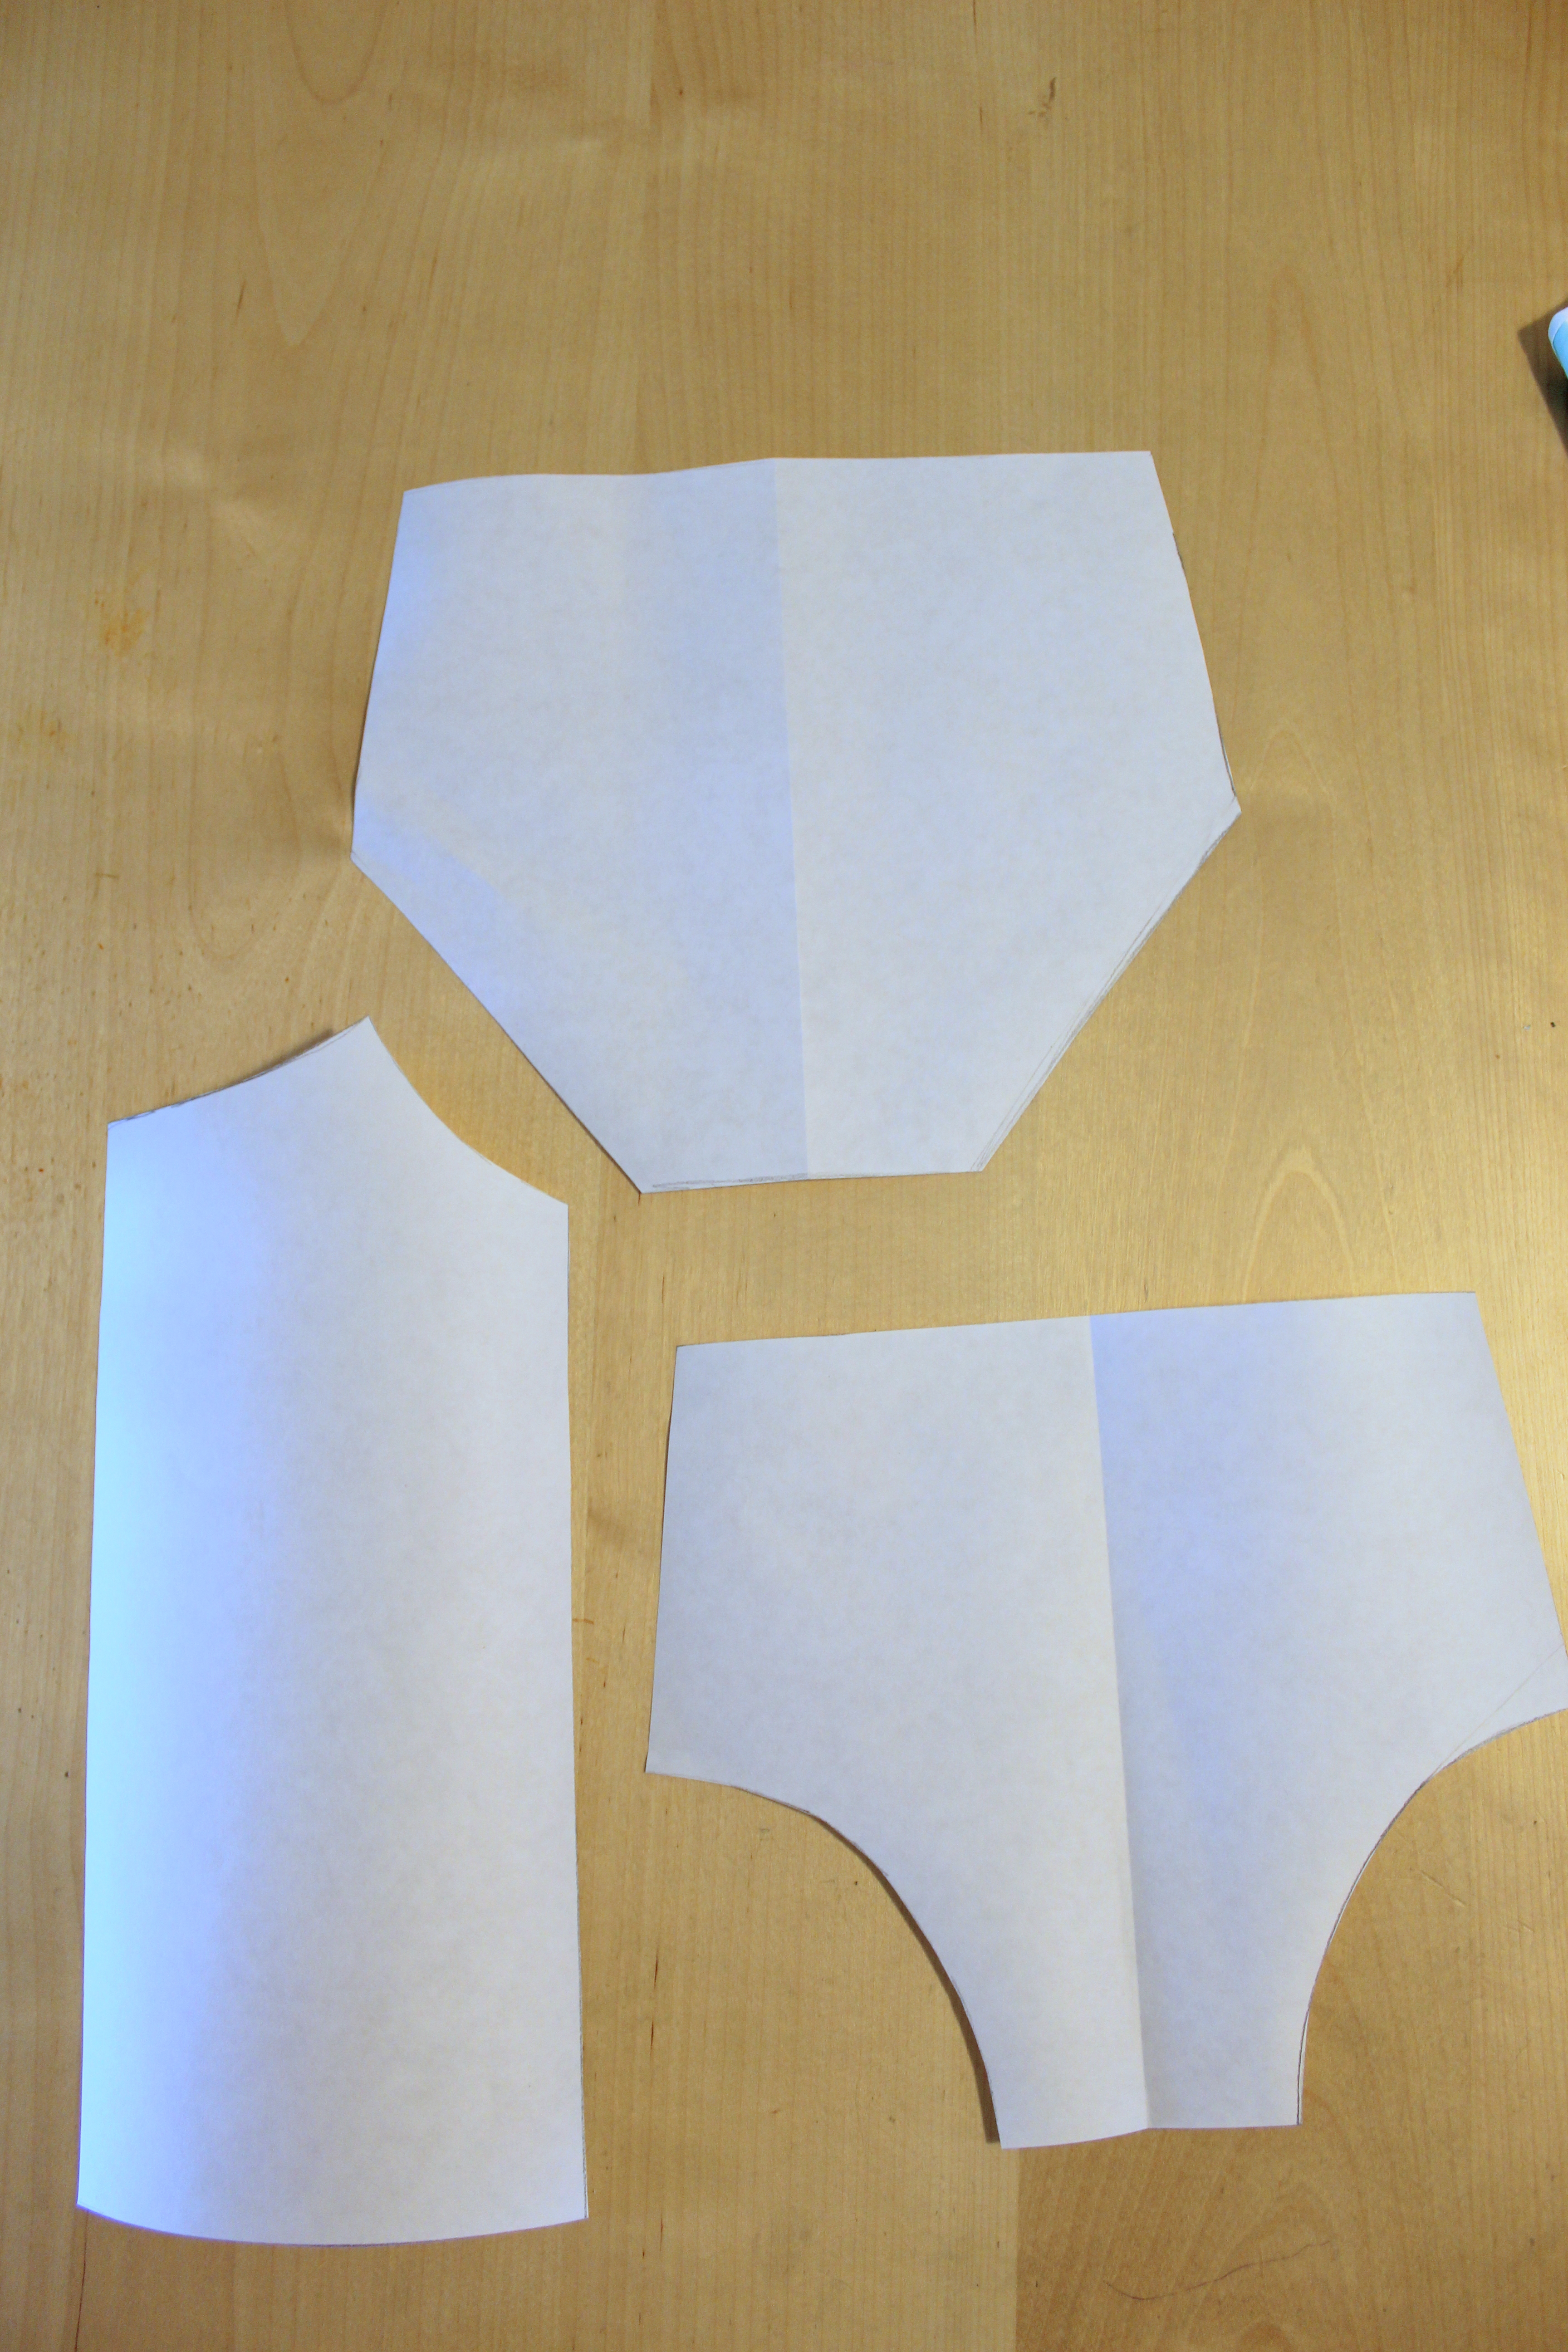
These are my pieces all ready to go.

I ended up having to adjust and cut a narrower shoulder width for the bodices later…  Also, eyeballed and cut out a pocket pattern and used the sleeve from the tunic block, just shortened it since it came as a long sleeve.

IMG_0699

Iron 1/2″ then 1″ for both sides of back bodice.

Add a strip of interfacing to the buttons/buttonhole plackets and then iron a 1/2″ then 1″ to the main bodice line for bodice with the shorter flap.  Do the same thing for the other bodice: you fold over 1/2″ then 1″ and iron.

IMG_0700

line it up to overlap an inch. Should match your front bodice piece.

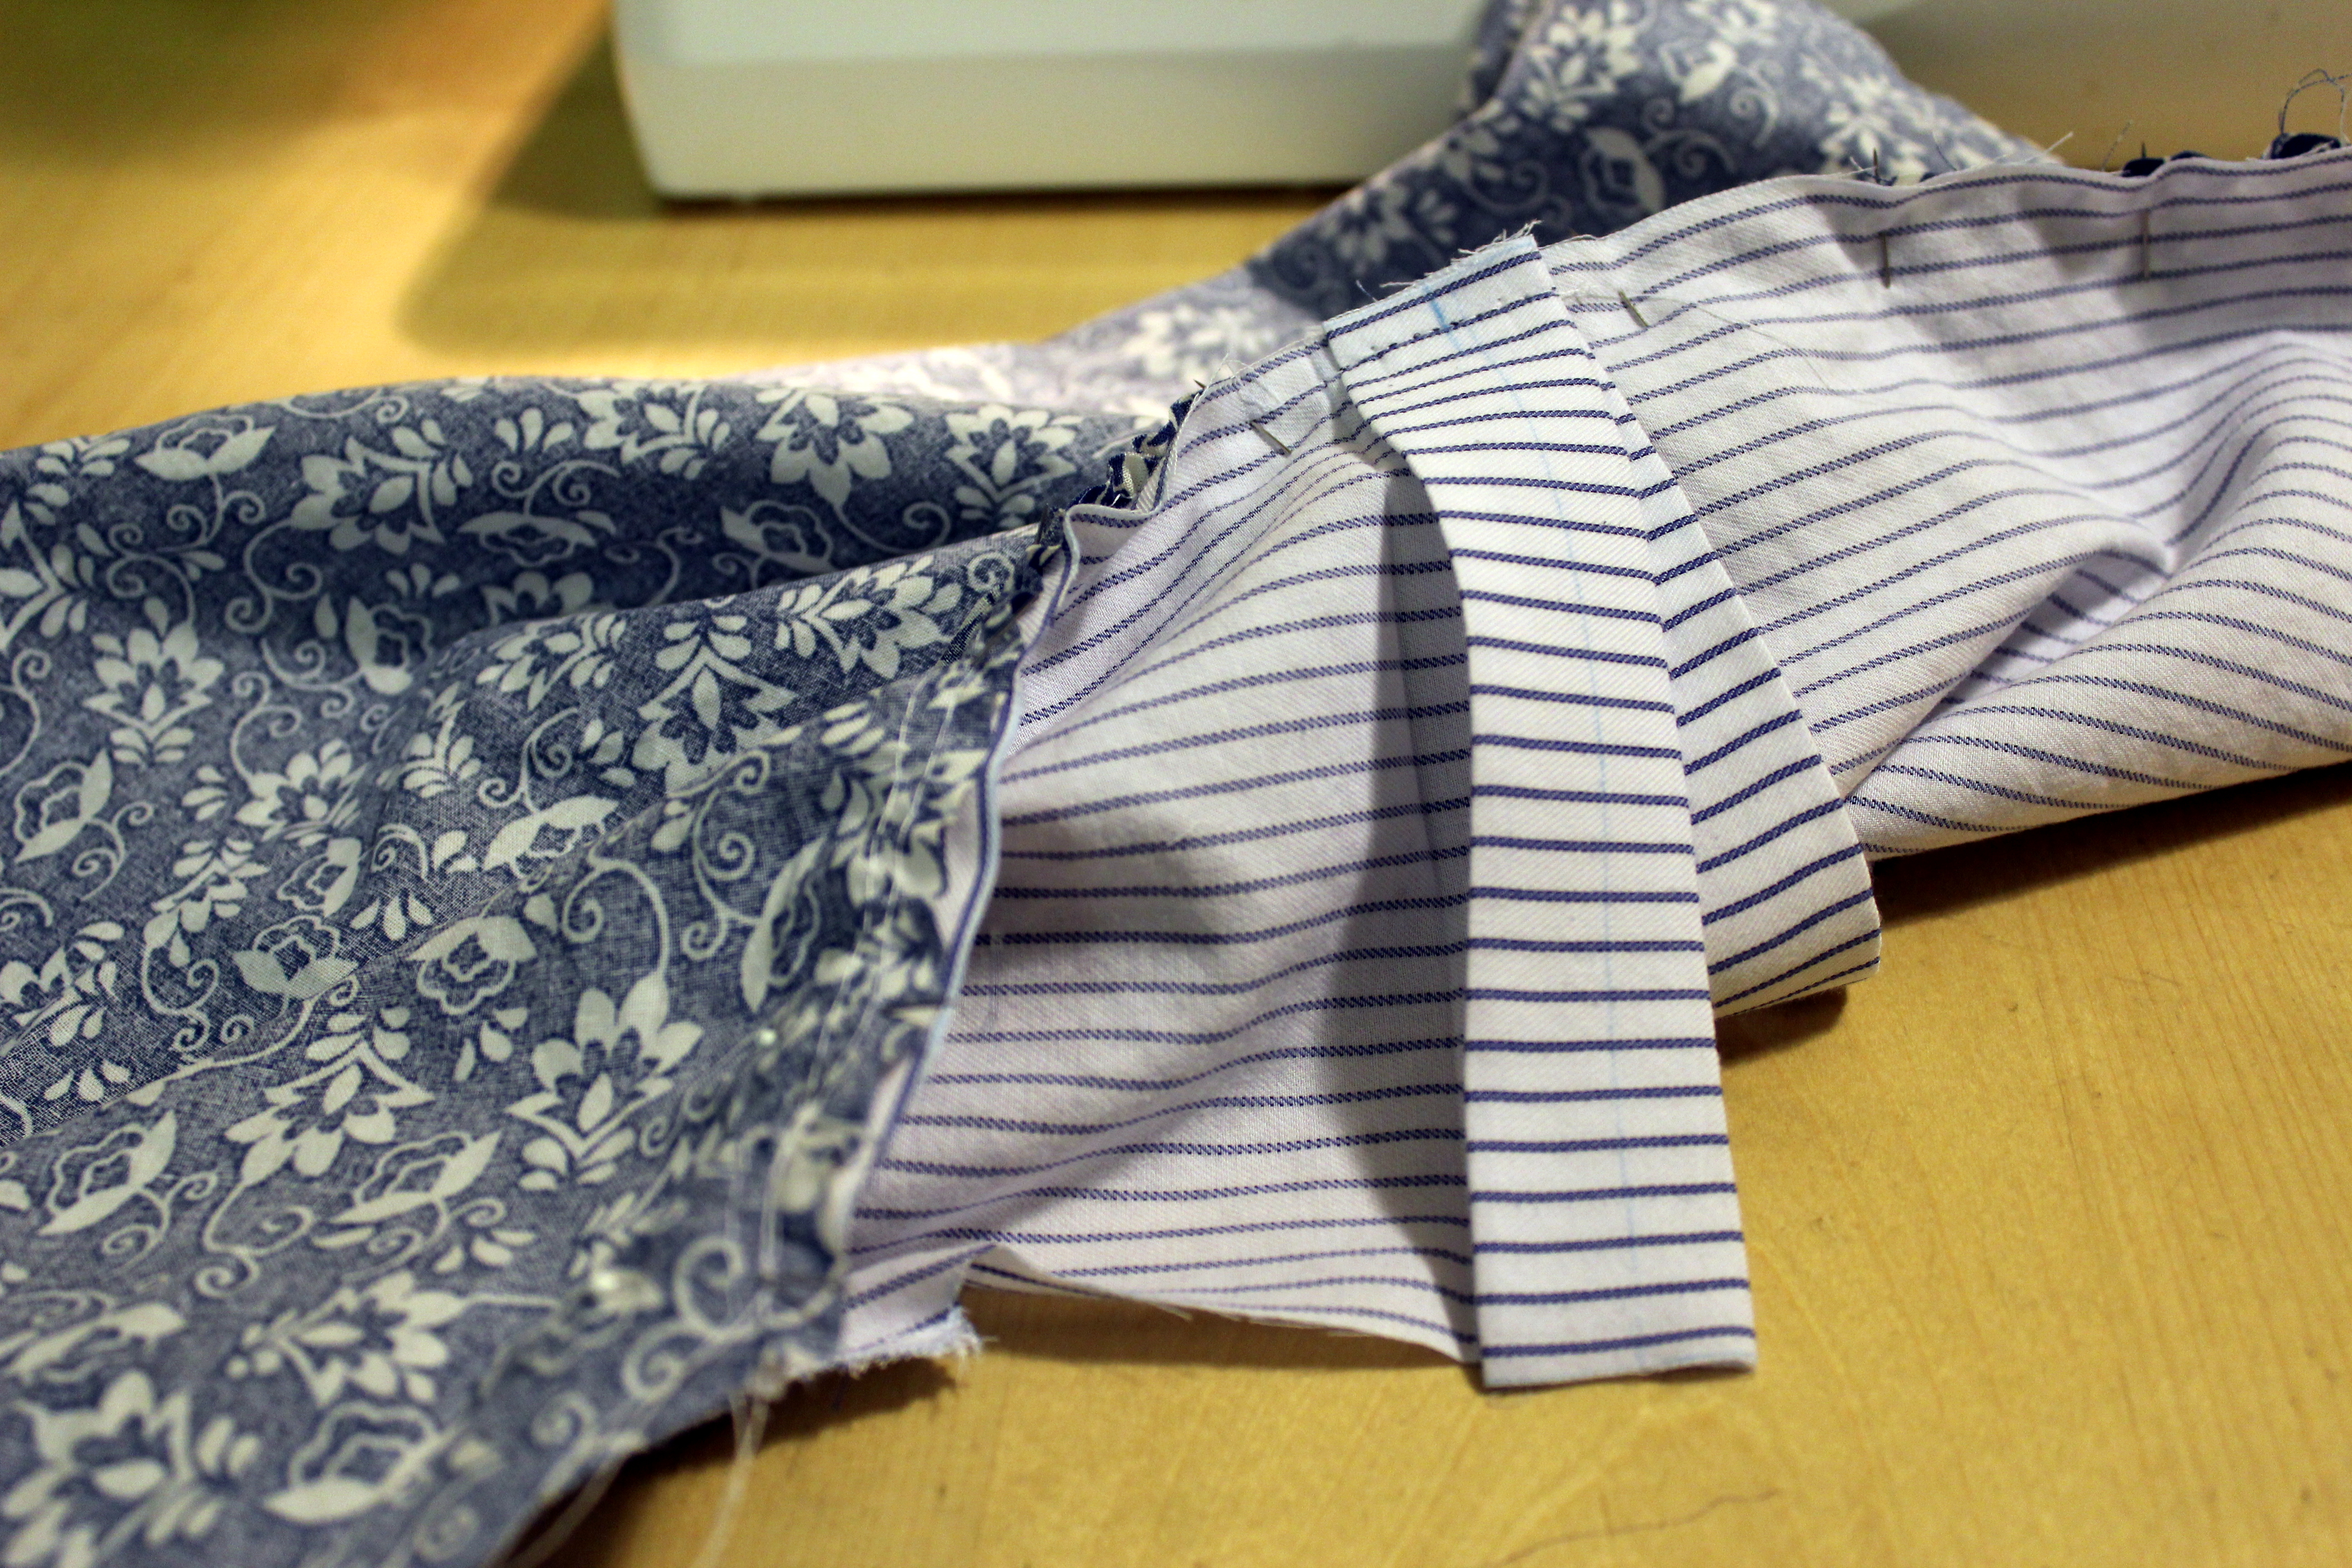
You should have a 1″ overlap of the back bodice like in the picture above so you can have your buttons on the bottom placket and buttonholes on the top placket.

IMG_0701

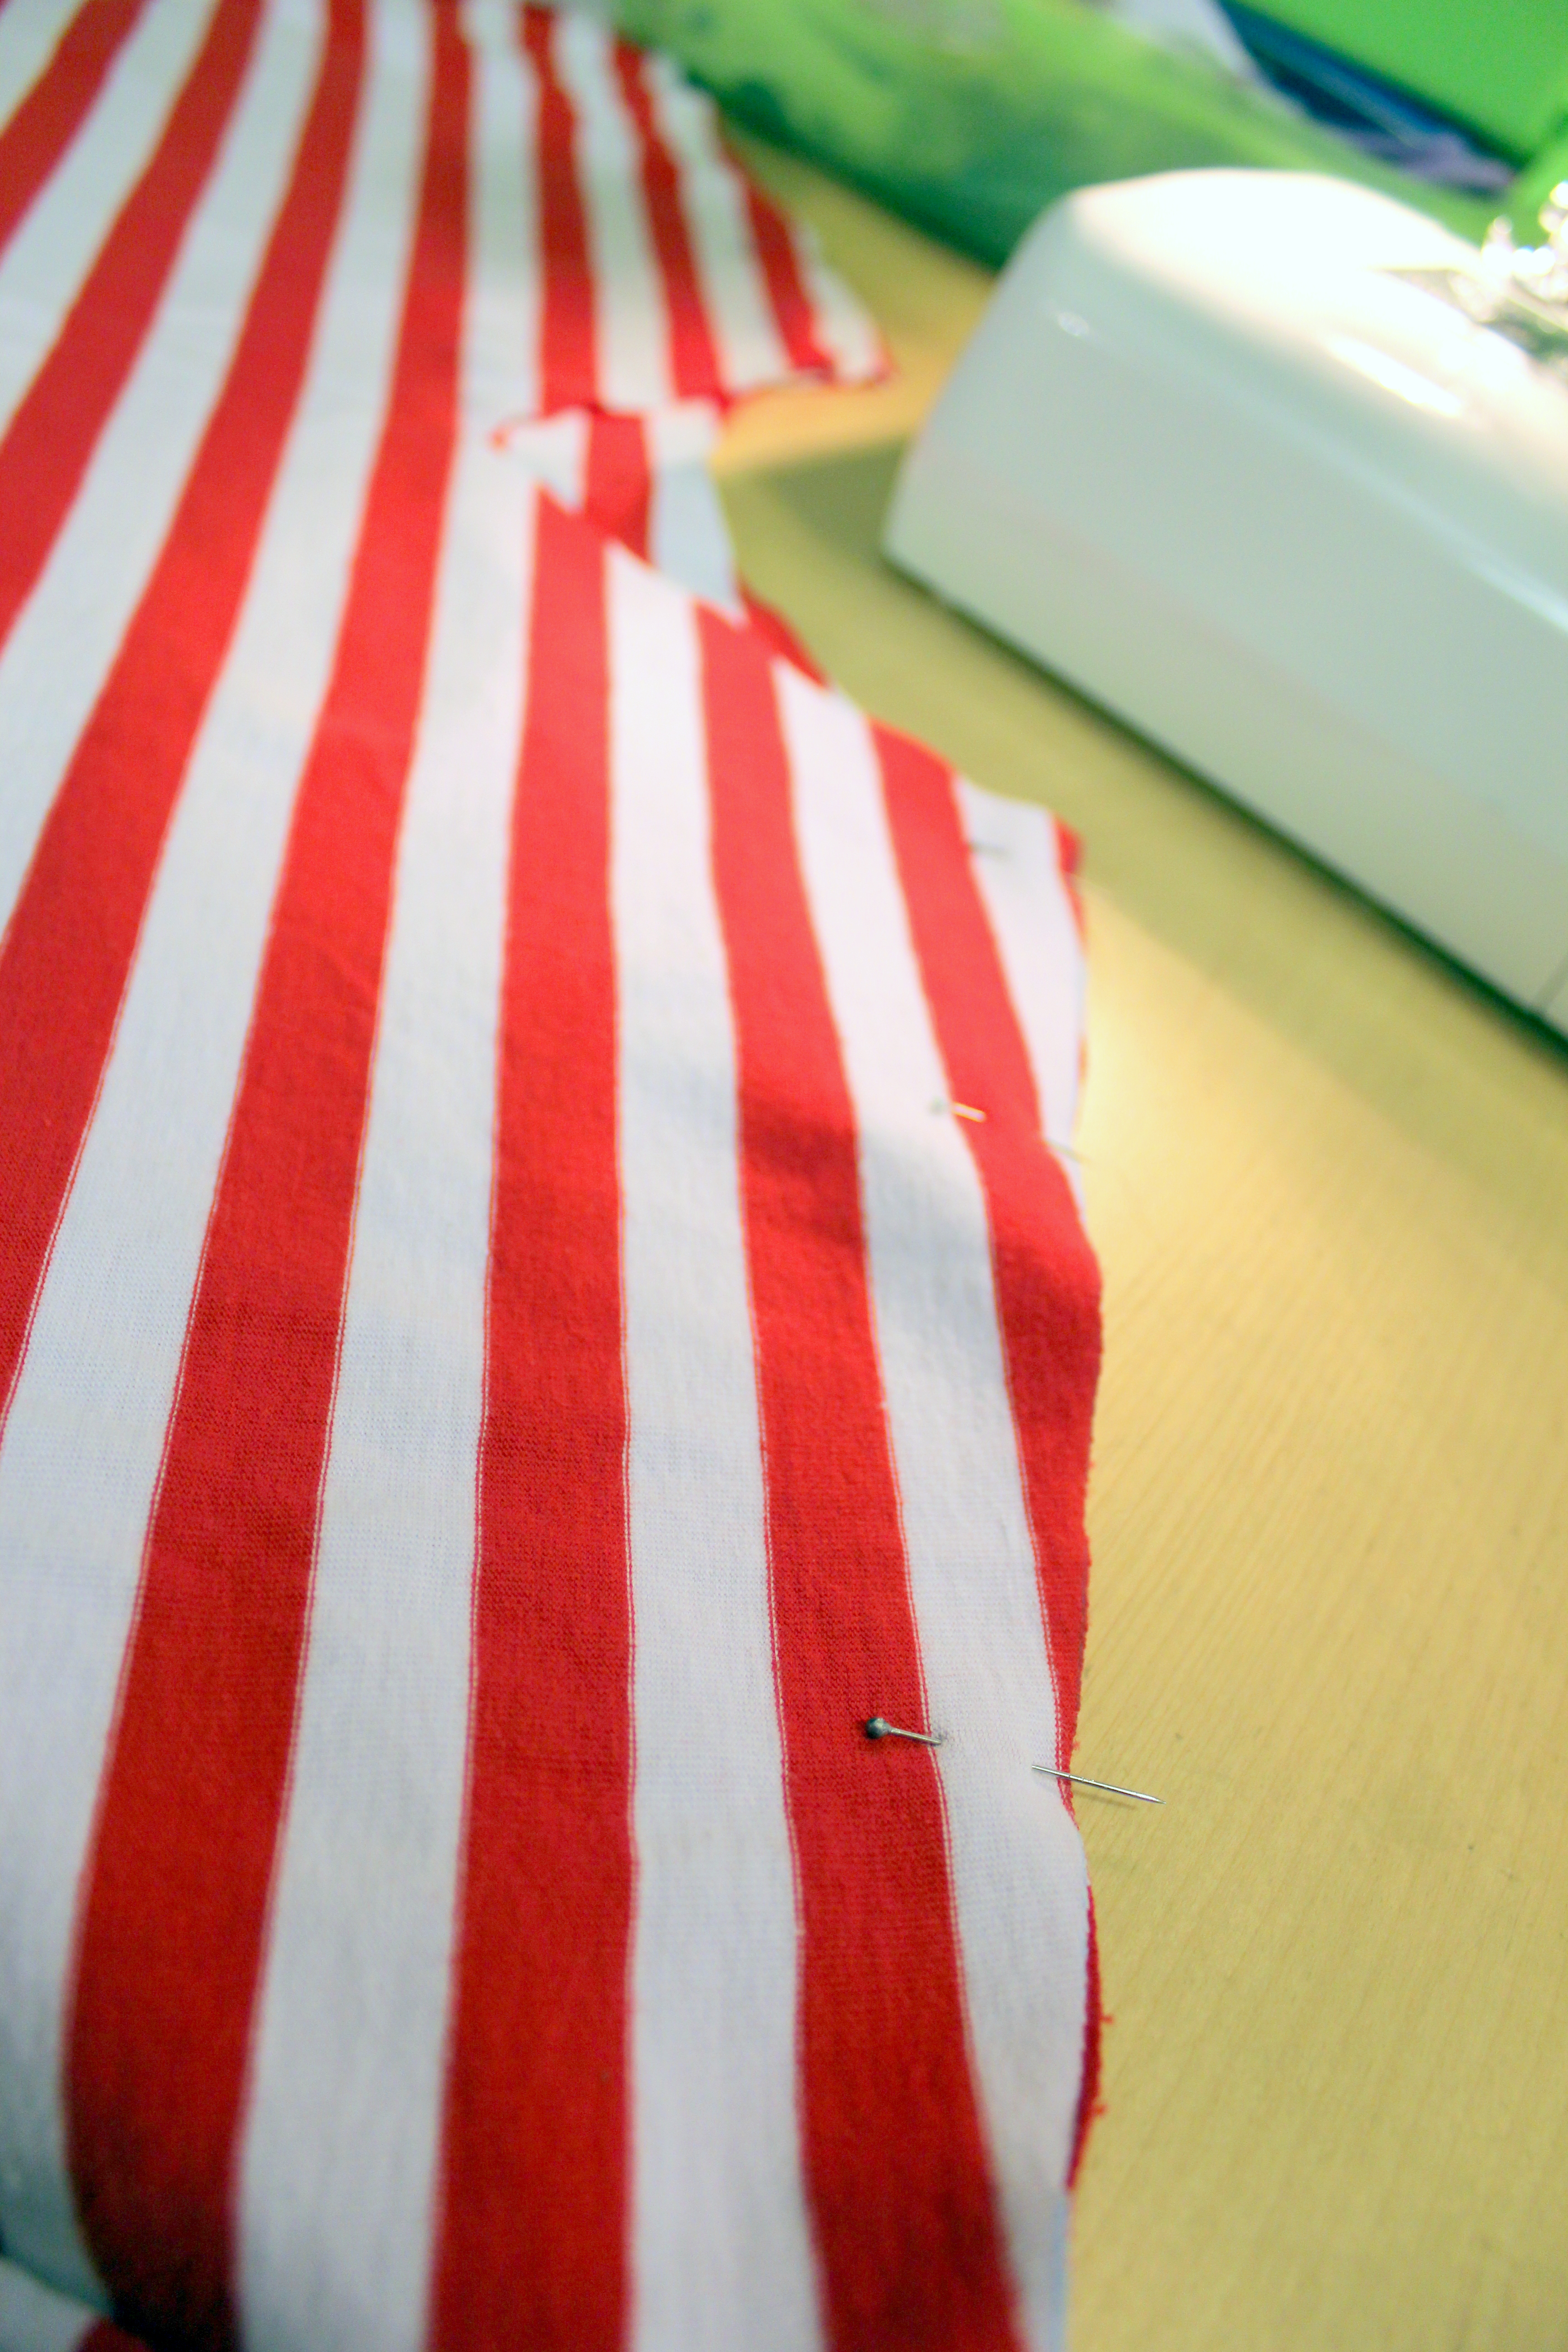
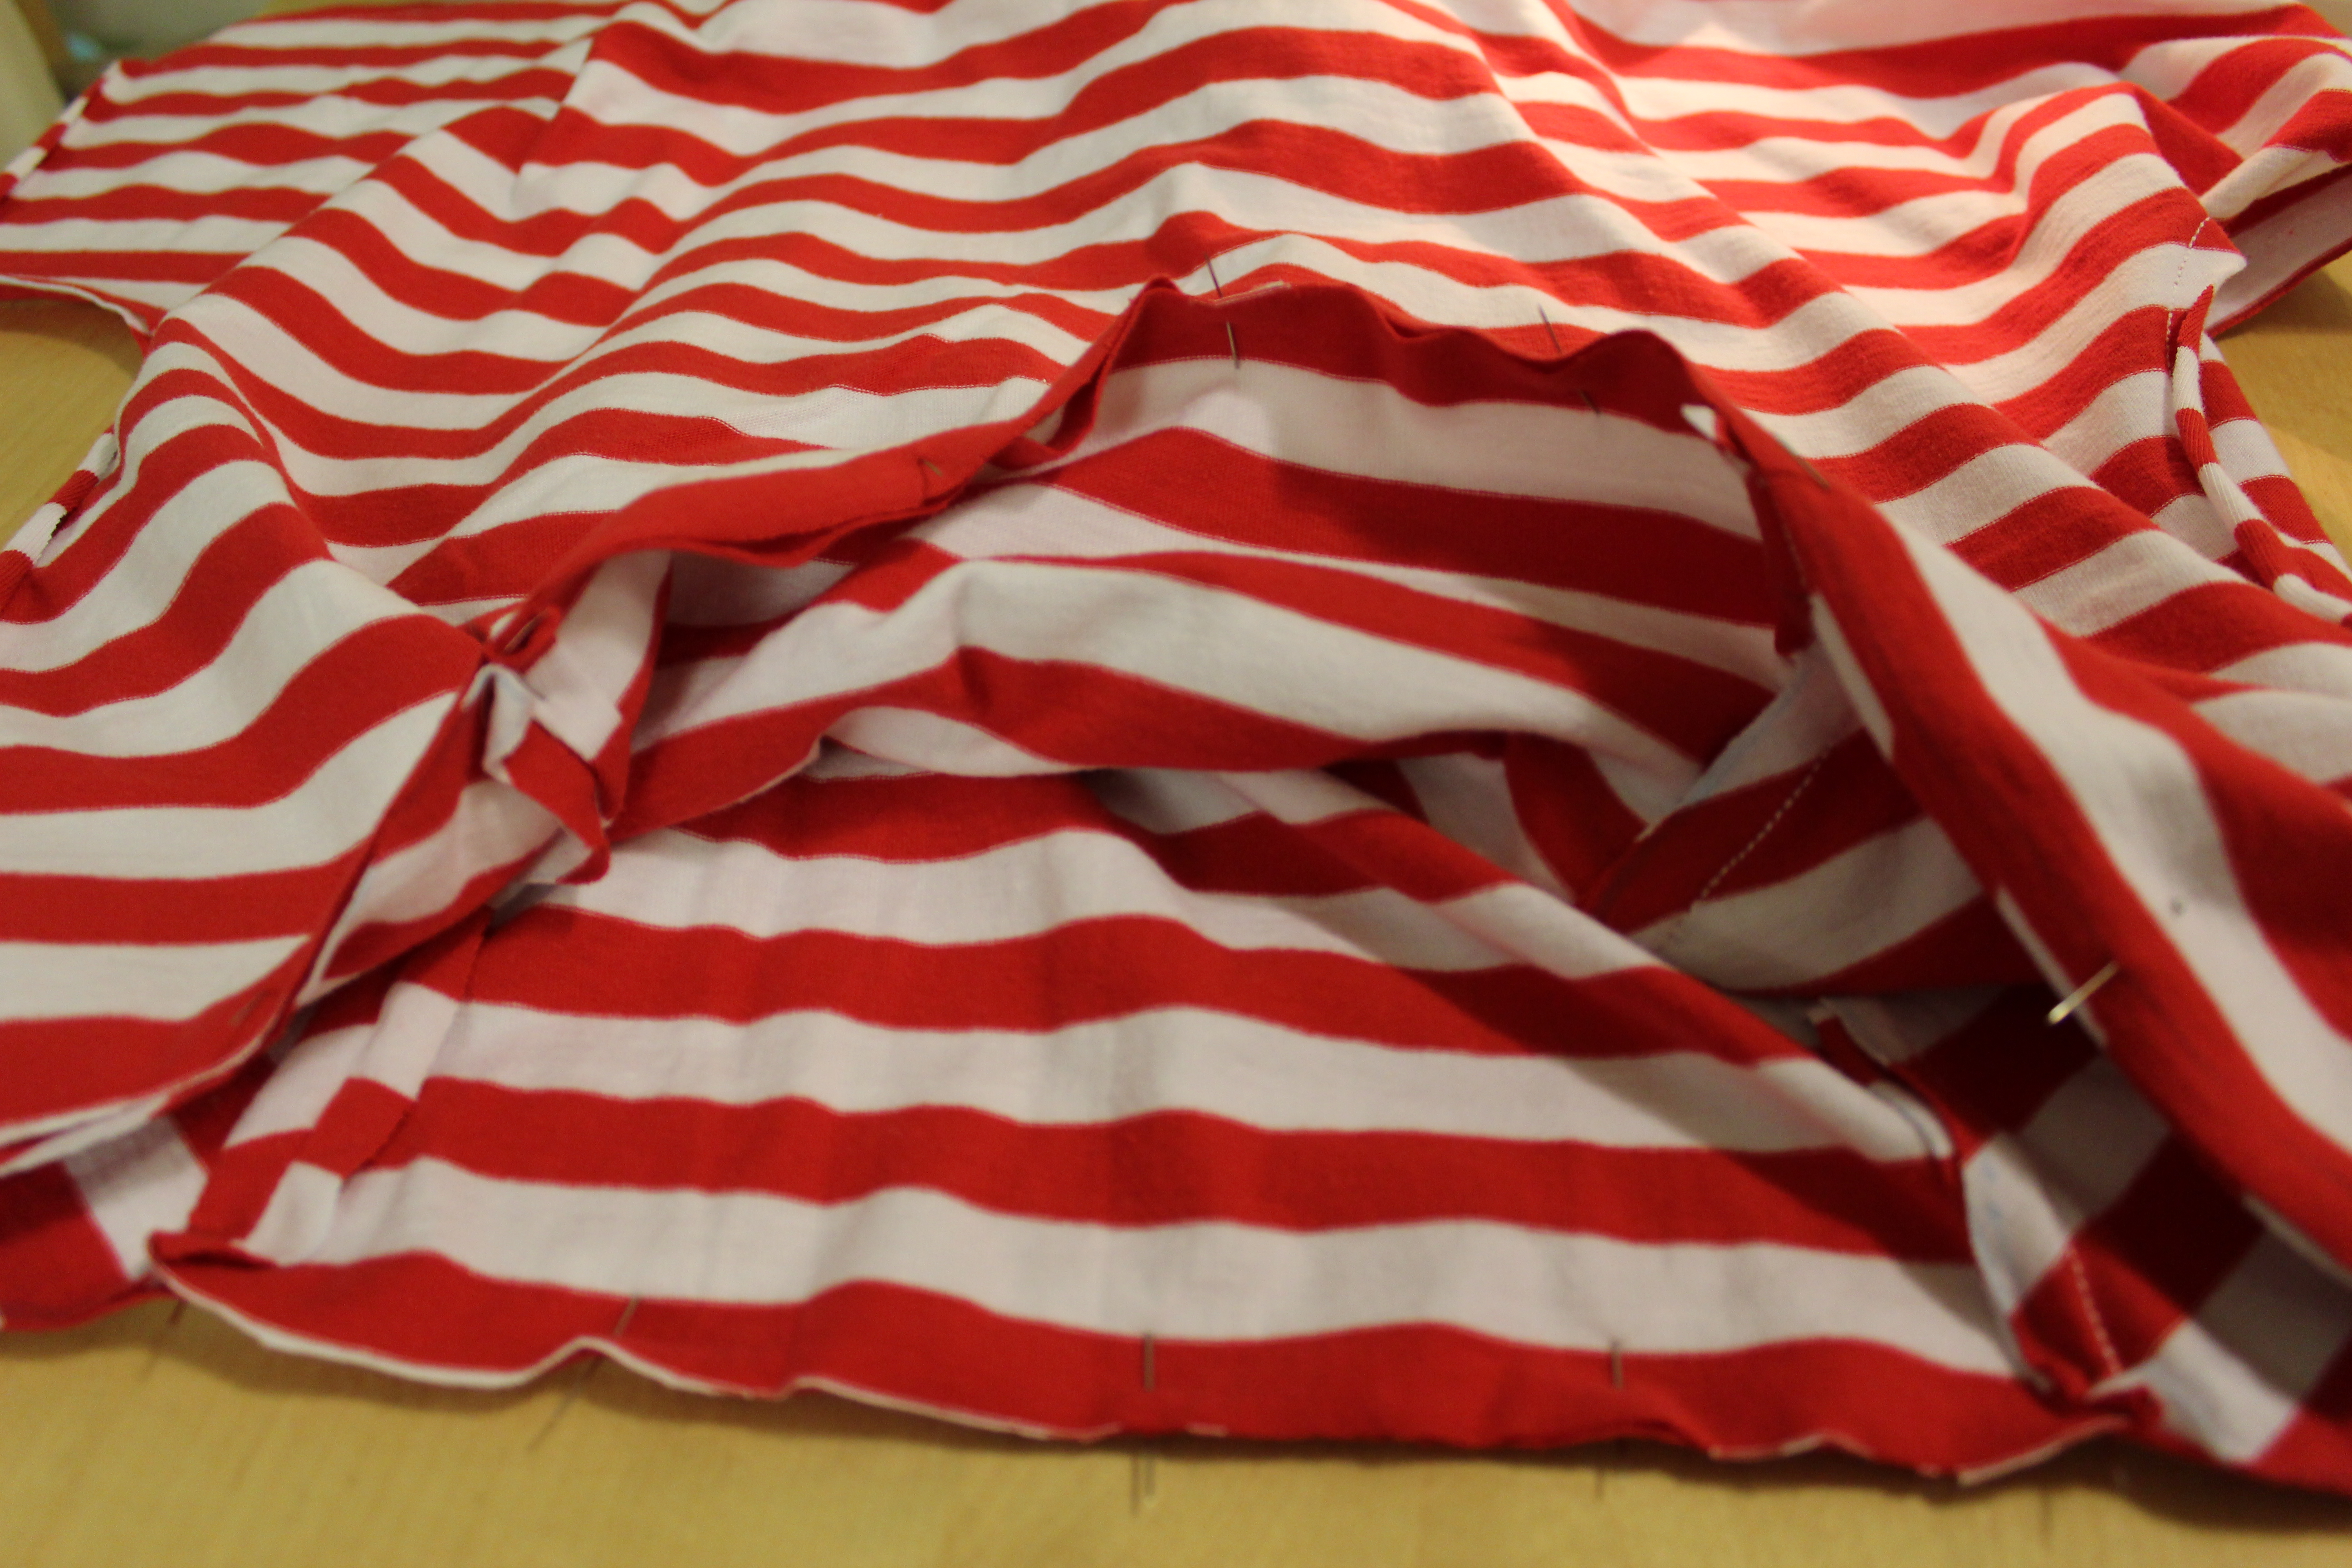
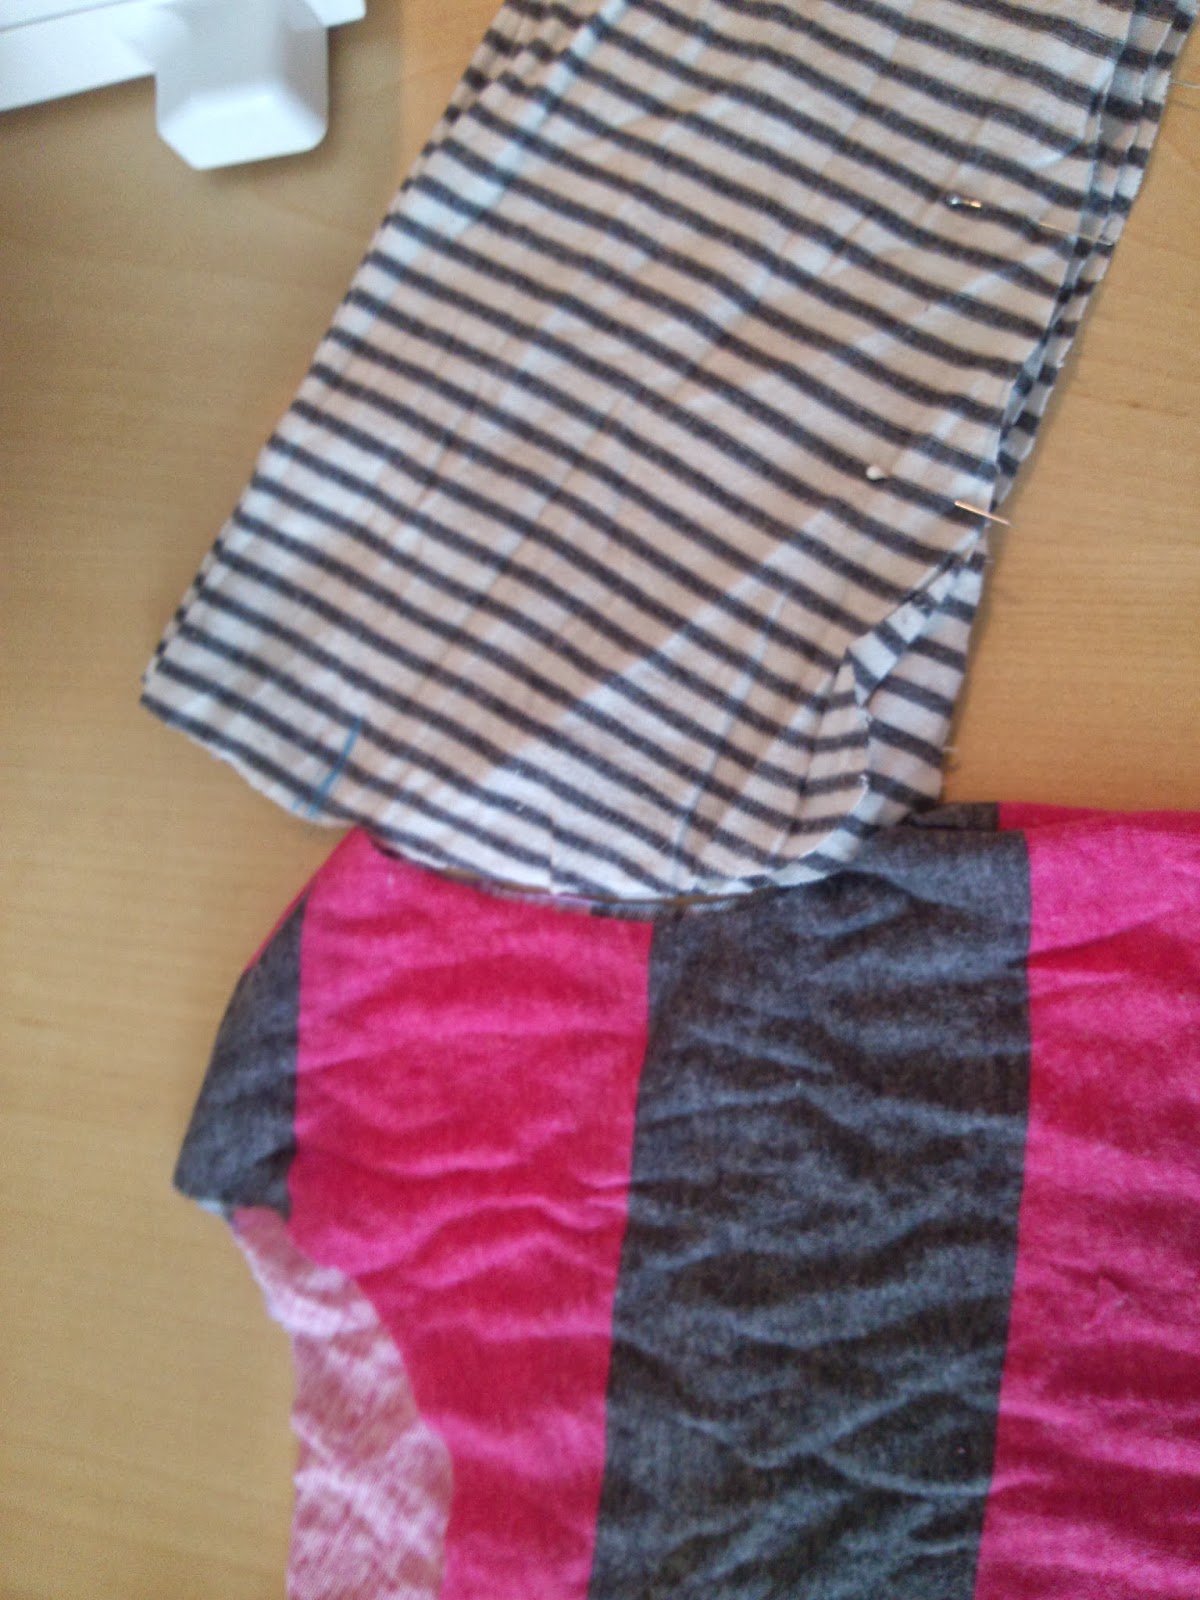
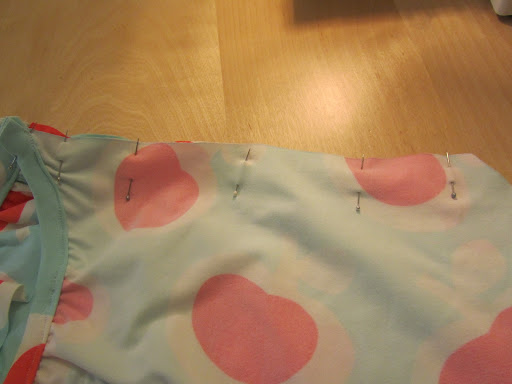
pin and sew across shoulders

With right sides of fabric facing, sew the shoulder seams.  See how wide the shoulders are?  I cut it down to size using a nice fitting dress as reference after I had already sewed the shoulders together.  Zigzag stitch raw edges.

IMG_0702

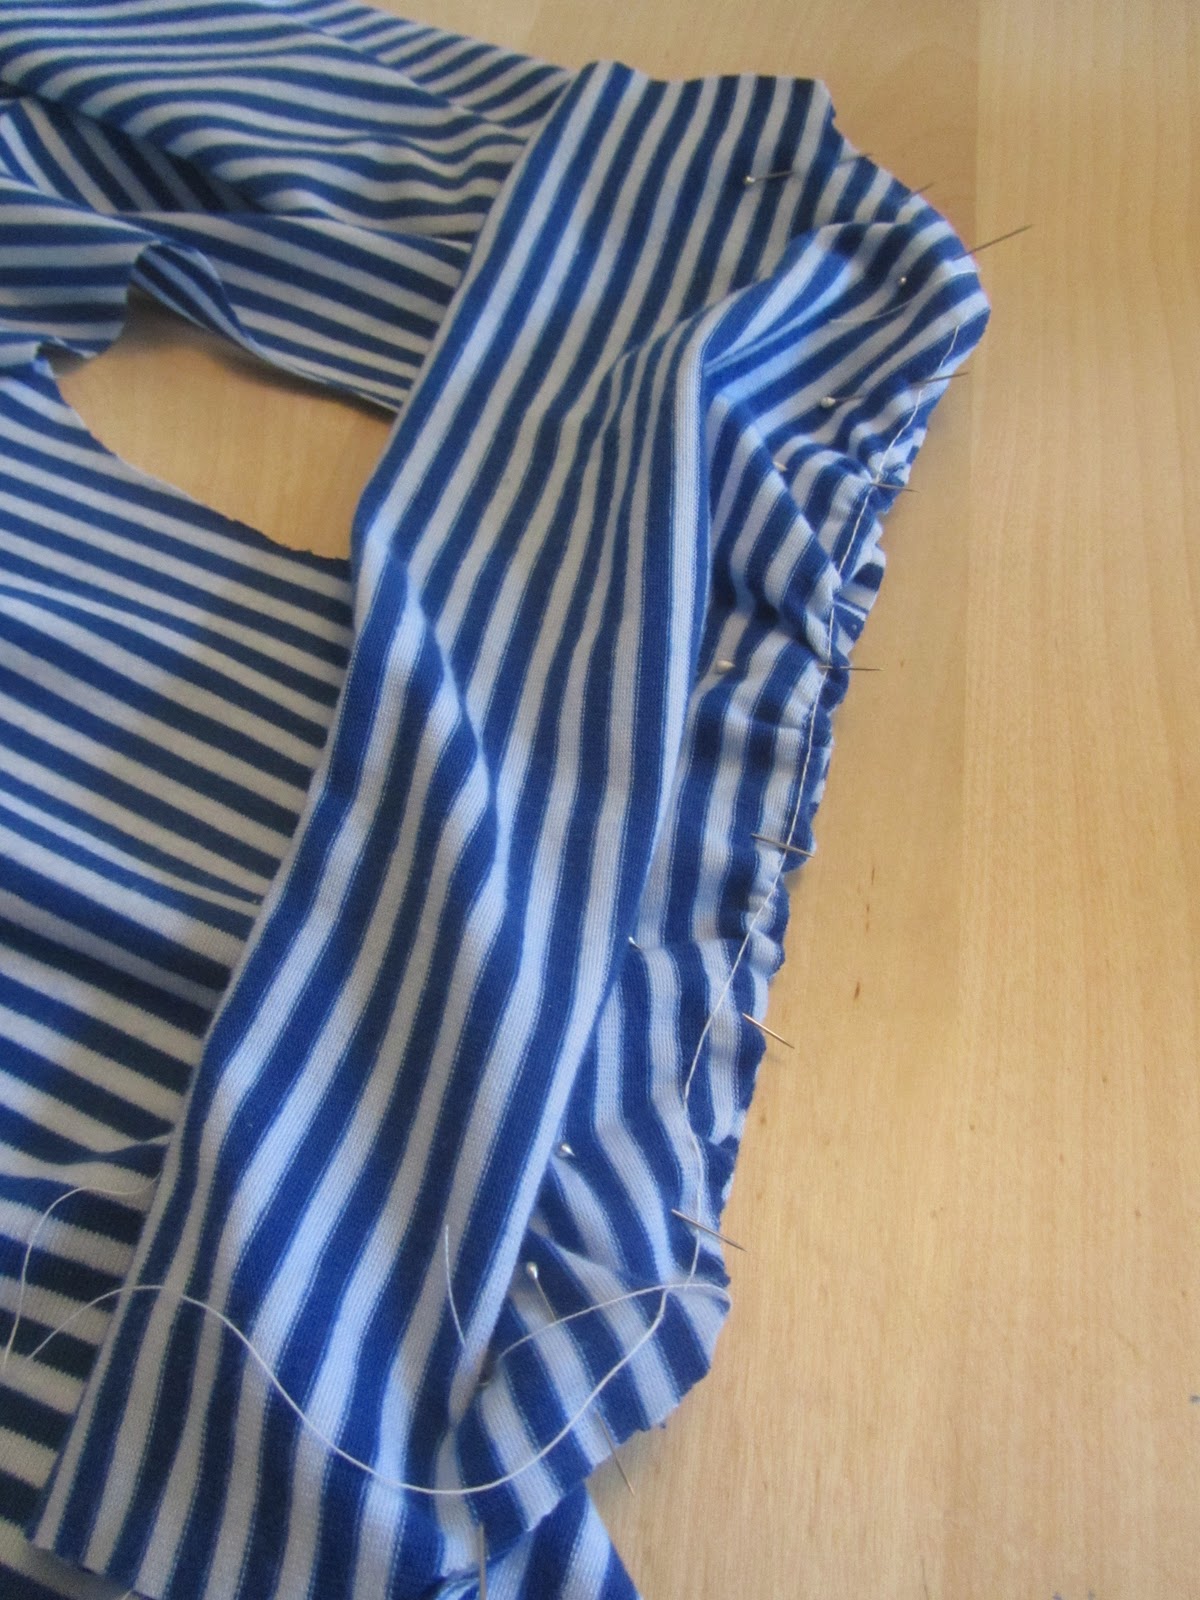
Pin the two back bodice pieces together or you can baste it together, if you prefer.
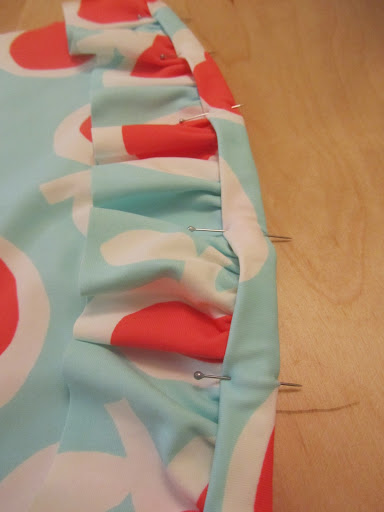
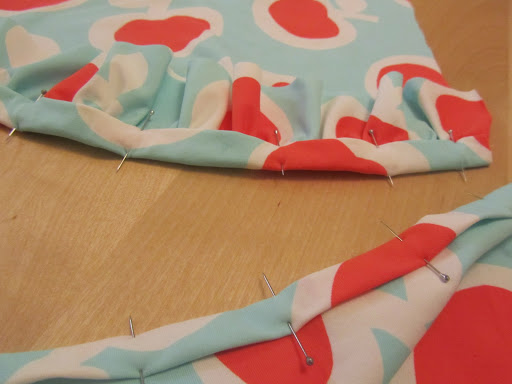
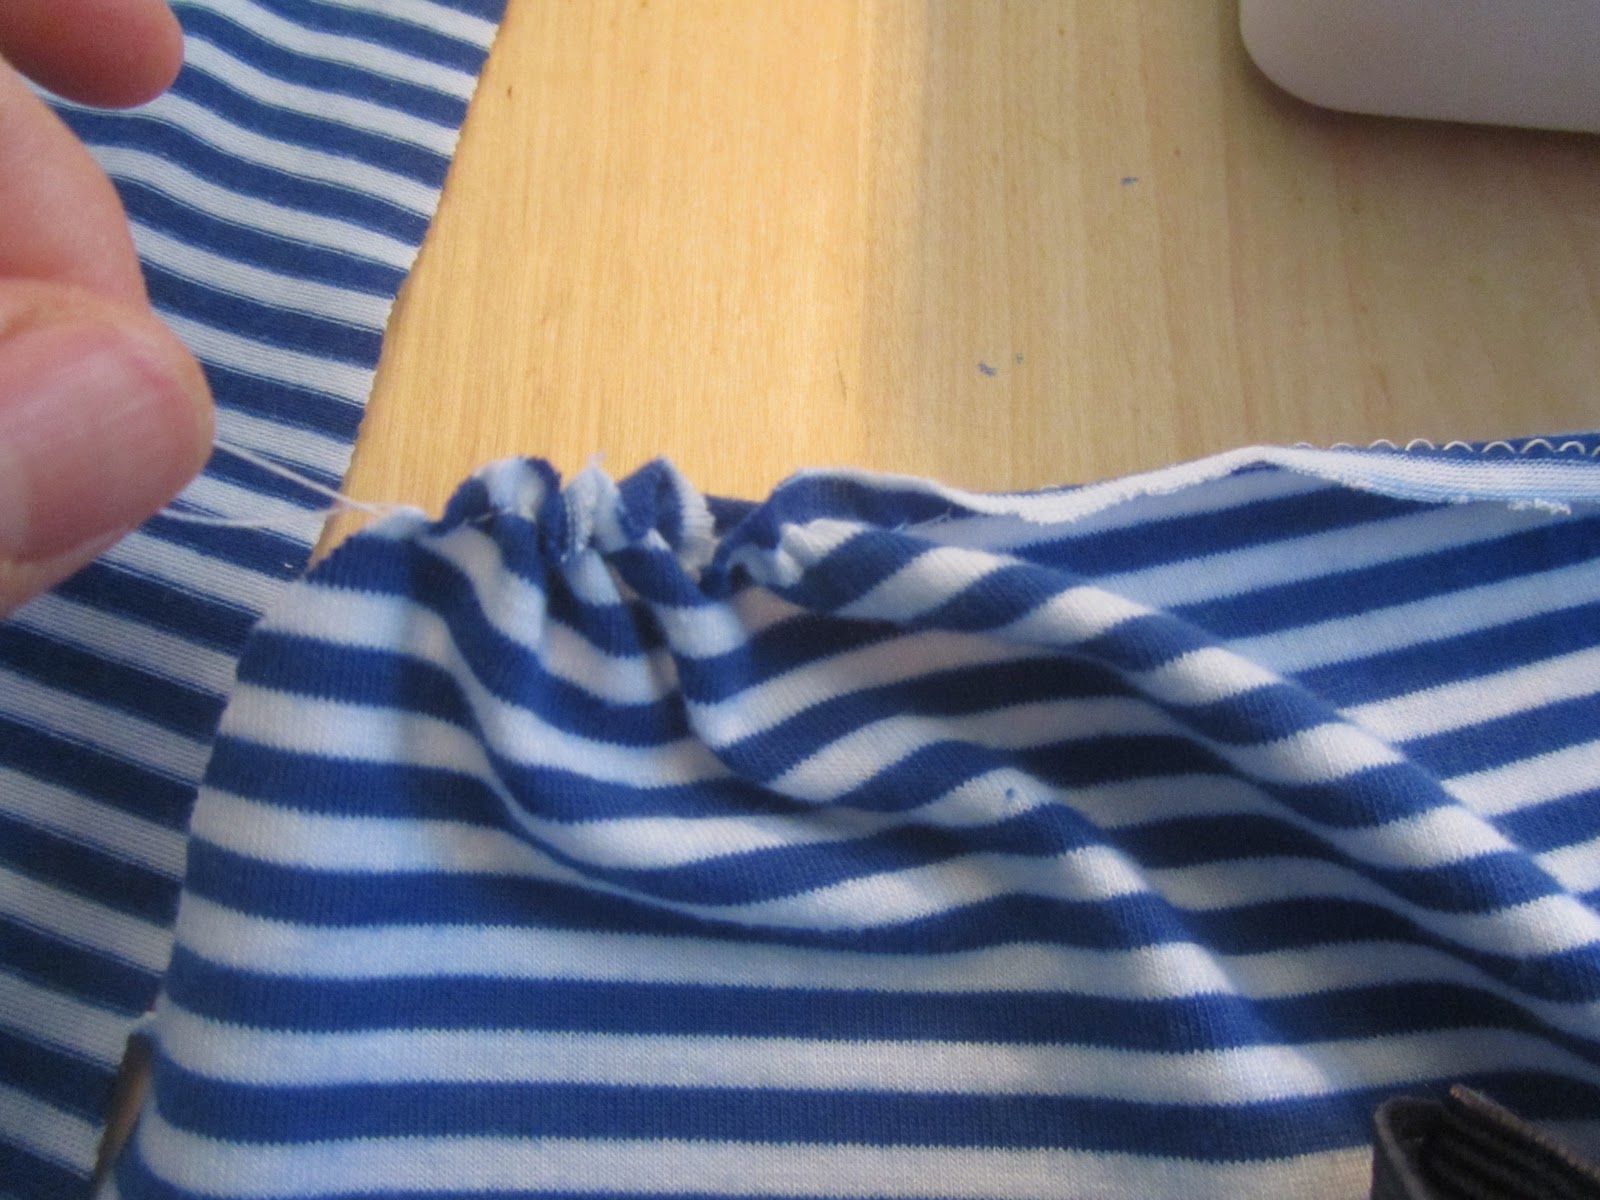
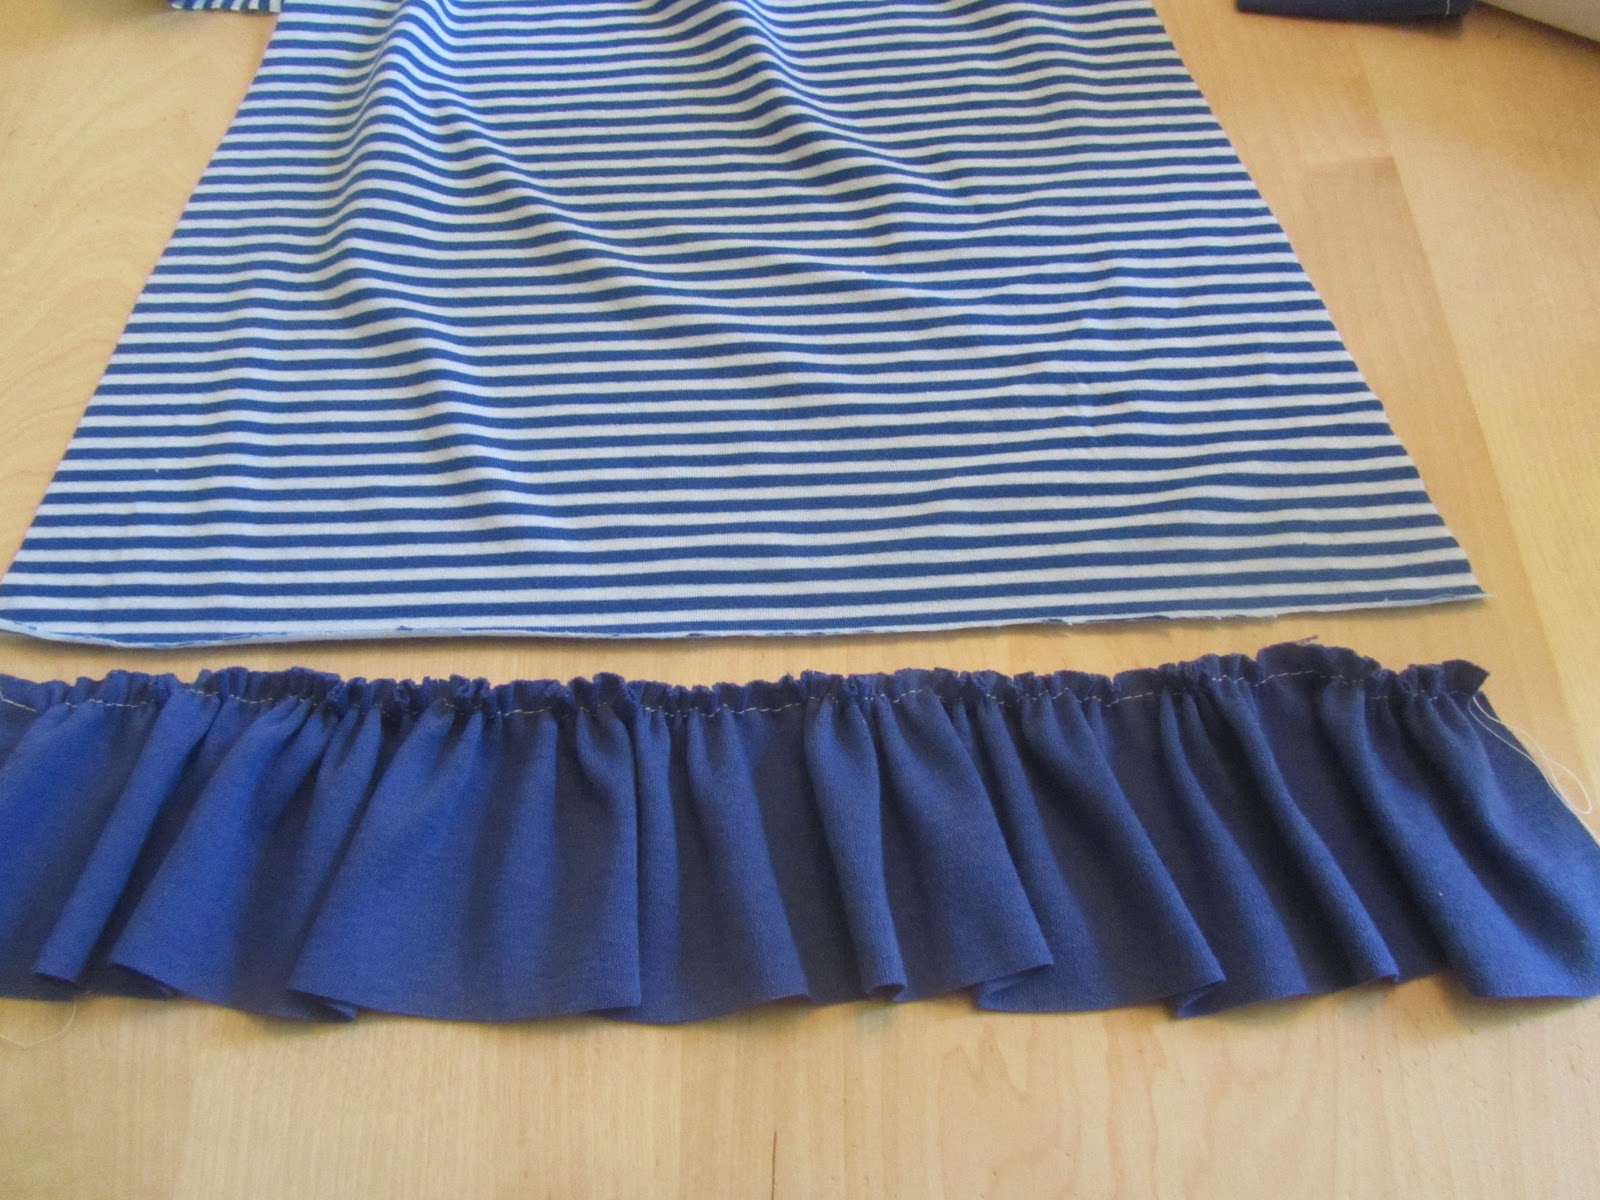
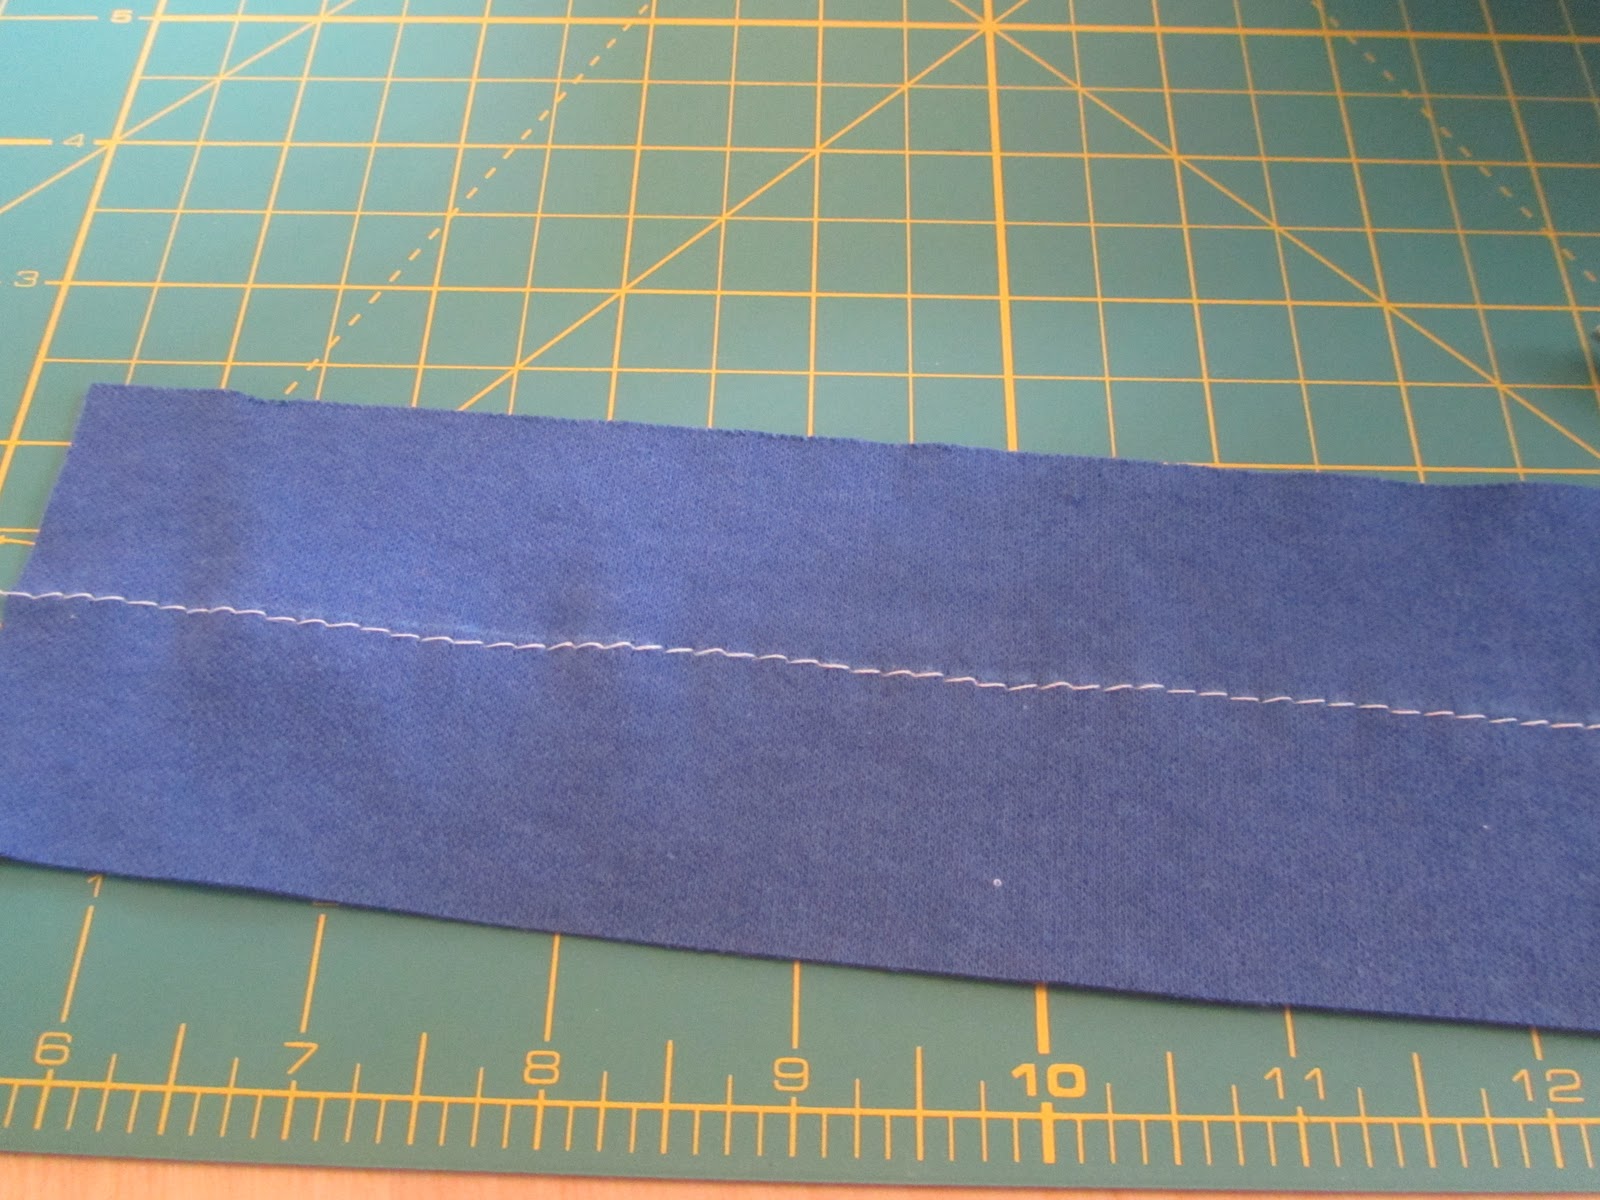
IMG_0703

Gather stitch

Stitch straight across the top of the skirt piece for both the front and back skirt pieces using a long stitch length (4) and “0” tension.

IMG_0704

Pull threads to gather

Pull the thread on the ends to make gathers and evenly distribute them to fit the width of the bottom of bodice.

IMG_0705

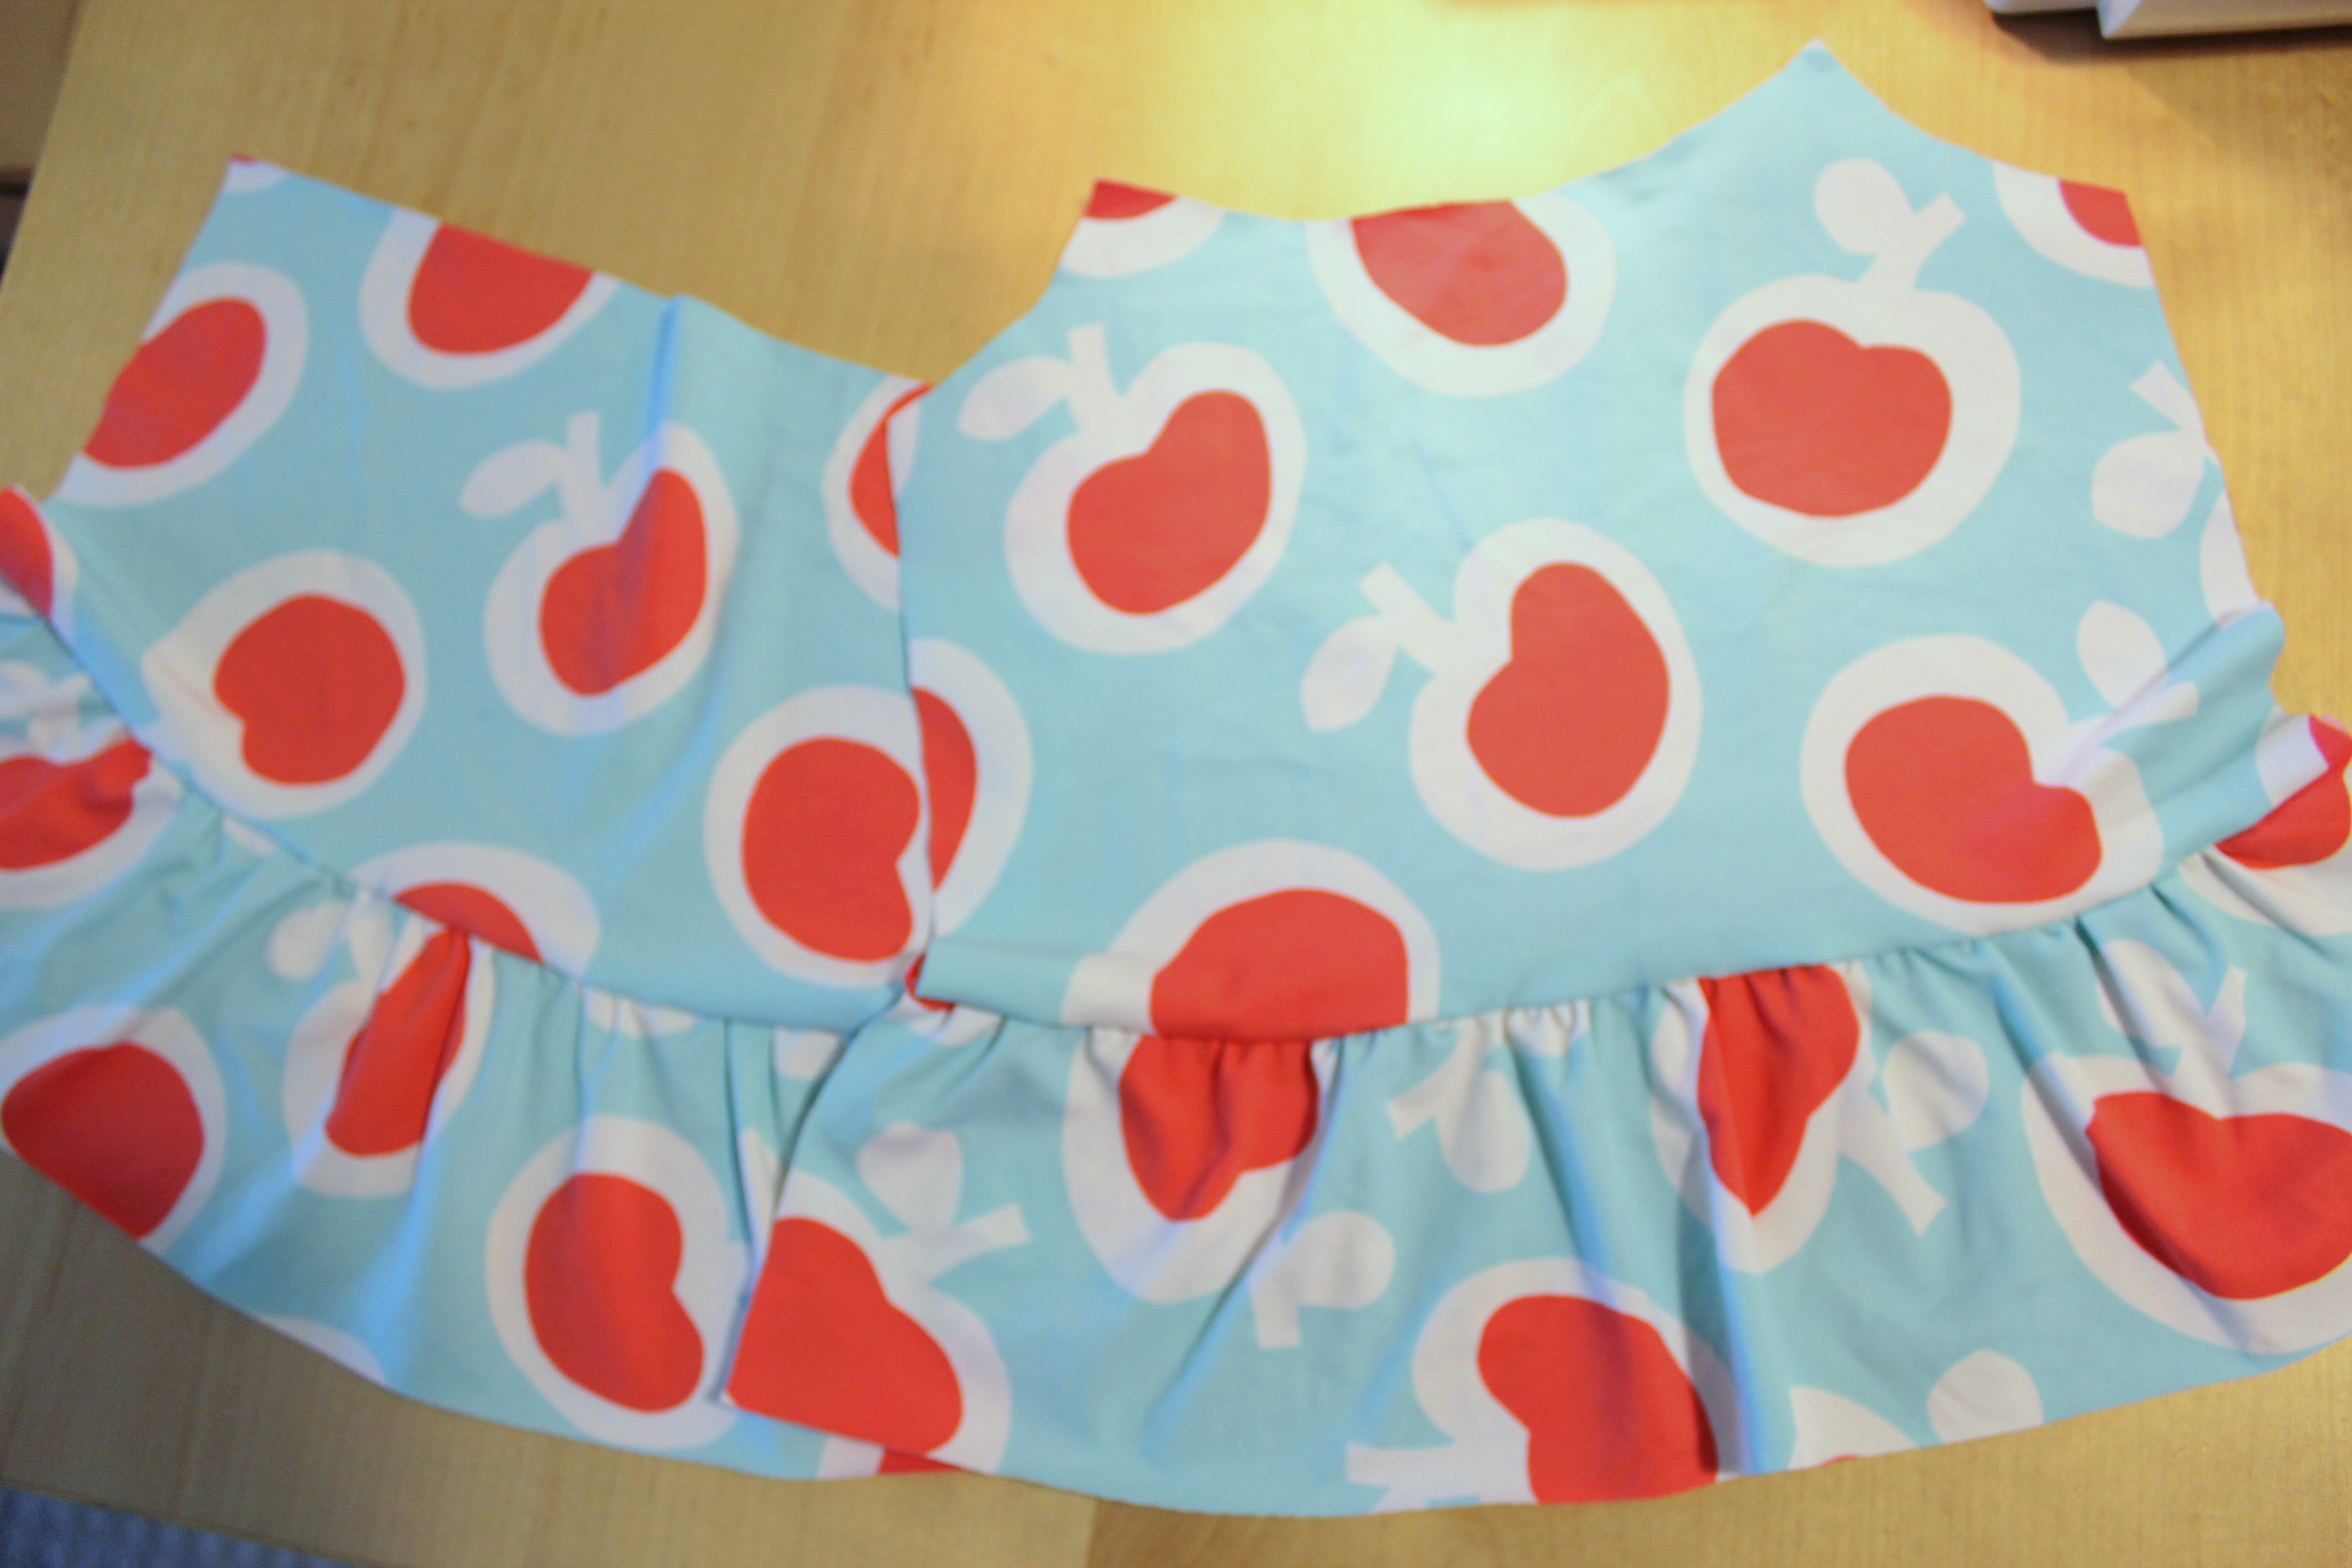
attach skirt to bodice front and back. Skirts are still two separate pieces.

Pin the two skirt pieces separately onto the bodice front and the bodice back with rights sides facing.  Then stitch in place.  Zigzag stitch raw edges.

IMG_0706

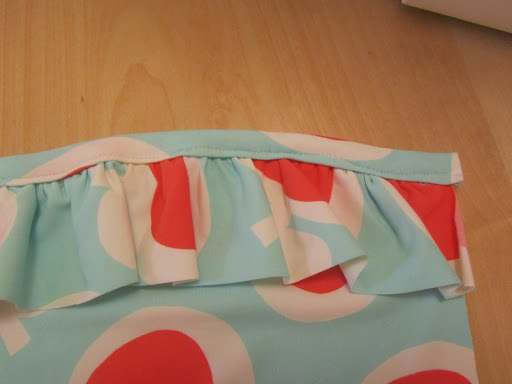
topstitch skirt seam to bodice.

Iron the seam up towards the bodice then topstitch along the edge of the bodice close to the skirt.

IMG_0710

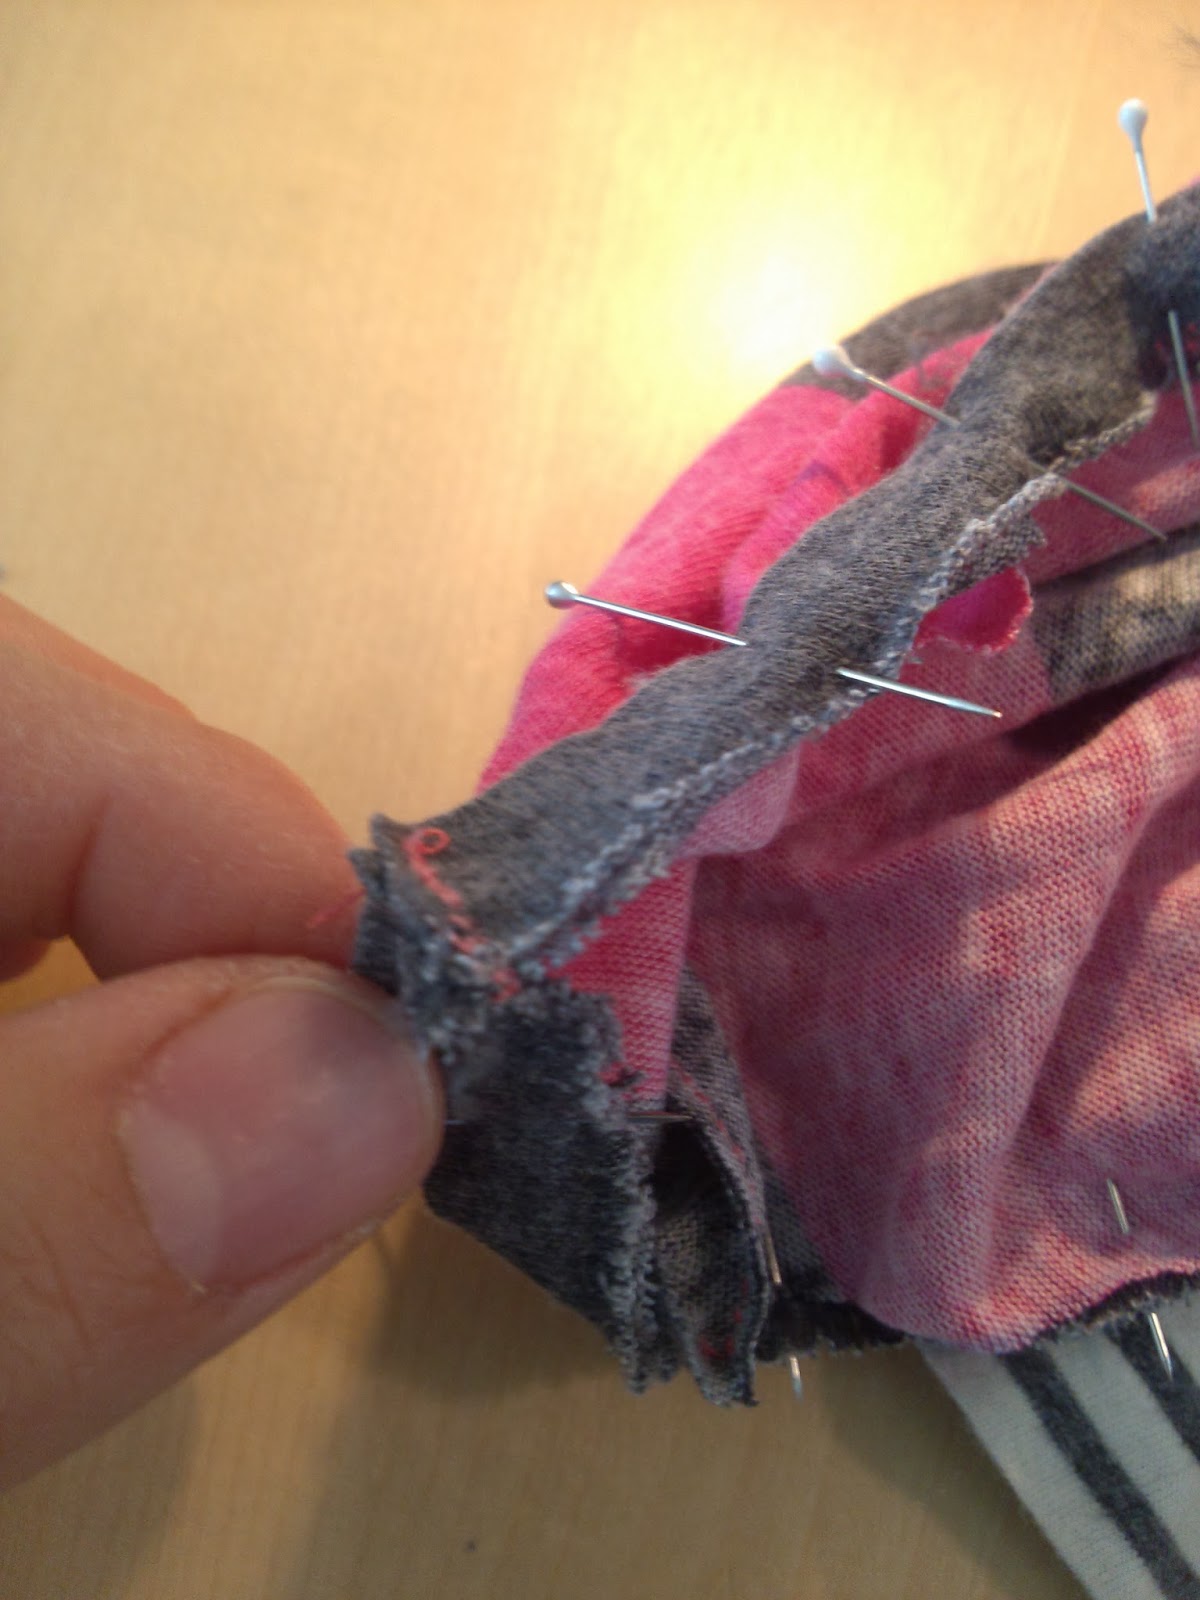
attach sleeves to armholes.

Pin your sleeves onto the armhole curve and stitch in place.  Zigzag stitch raw edges.

IMG_0708

prepare pockets

Prepare you pockets by ironing your raw edges onto the wrong side of the pocket.  You can baste the edges if you want to.  I added elastic to the top of the pocket to create gathers and also to give it stretch when the hand goes into the pocket.  Forgot to take pictures of that step.  Basically, cut a thing strip of elastic to the width you want the pocket top to be, pin the elastic to both top ends of the pocket, pin the middle of the elastic to match the middle of the pocket top, then stretch the elastic as you sew it onto the pocket top.  Here’s an example tutorial by Indiesew.  They use it on knits, but basically the same thing I’m doing here.

IMG_0712

prepare pockets and attach to skirt. I did it at the end, but it may be easier while two skirts are not attached.

Find where you want to place your pockets on the front of your skirt, pin it on, and stitch in place.  Think where their hands would naturally fall.

IMG_0711

sew on the pockets

Backstitch a small triangle into the top corners of the pocket for added durability.
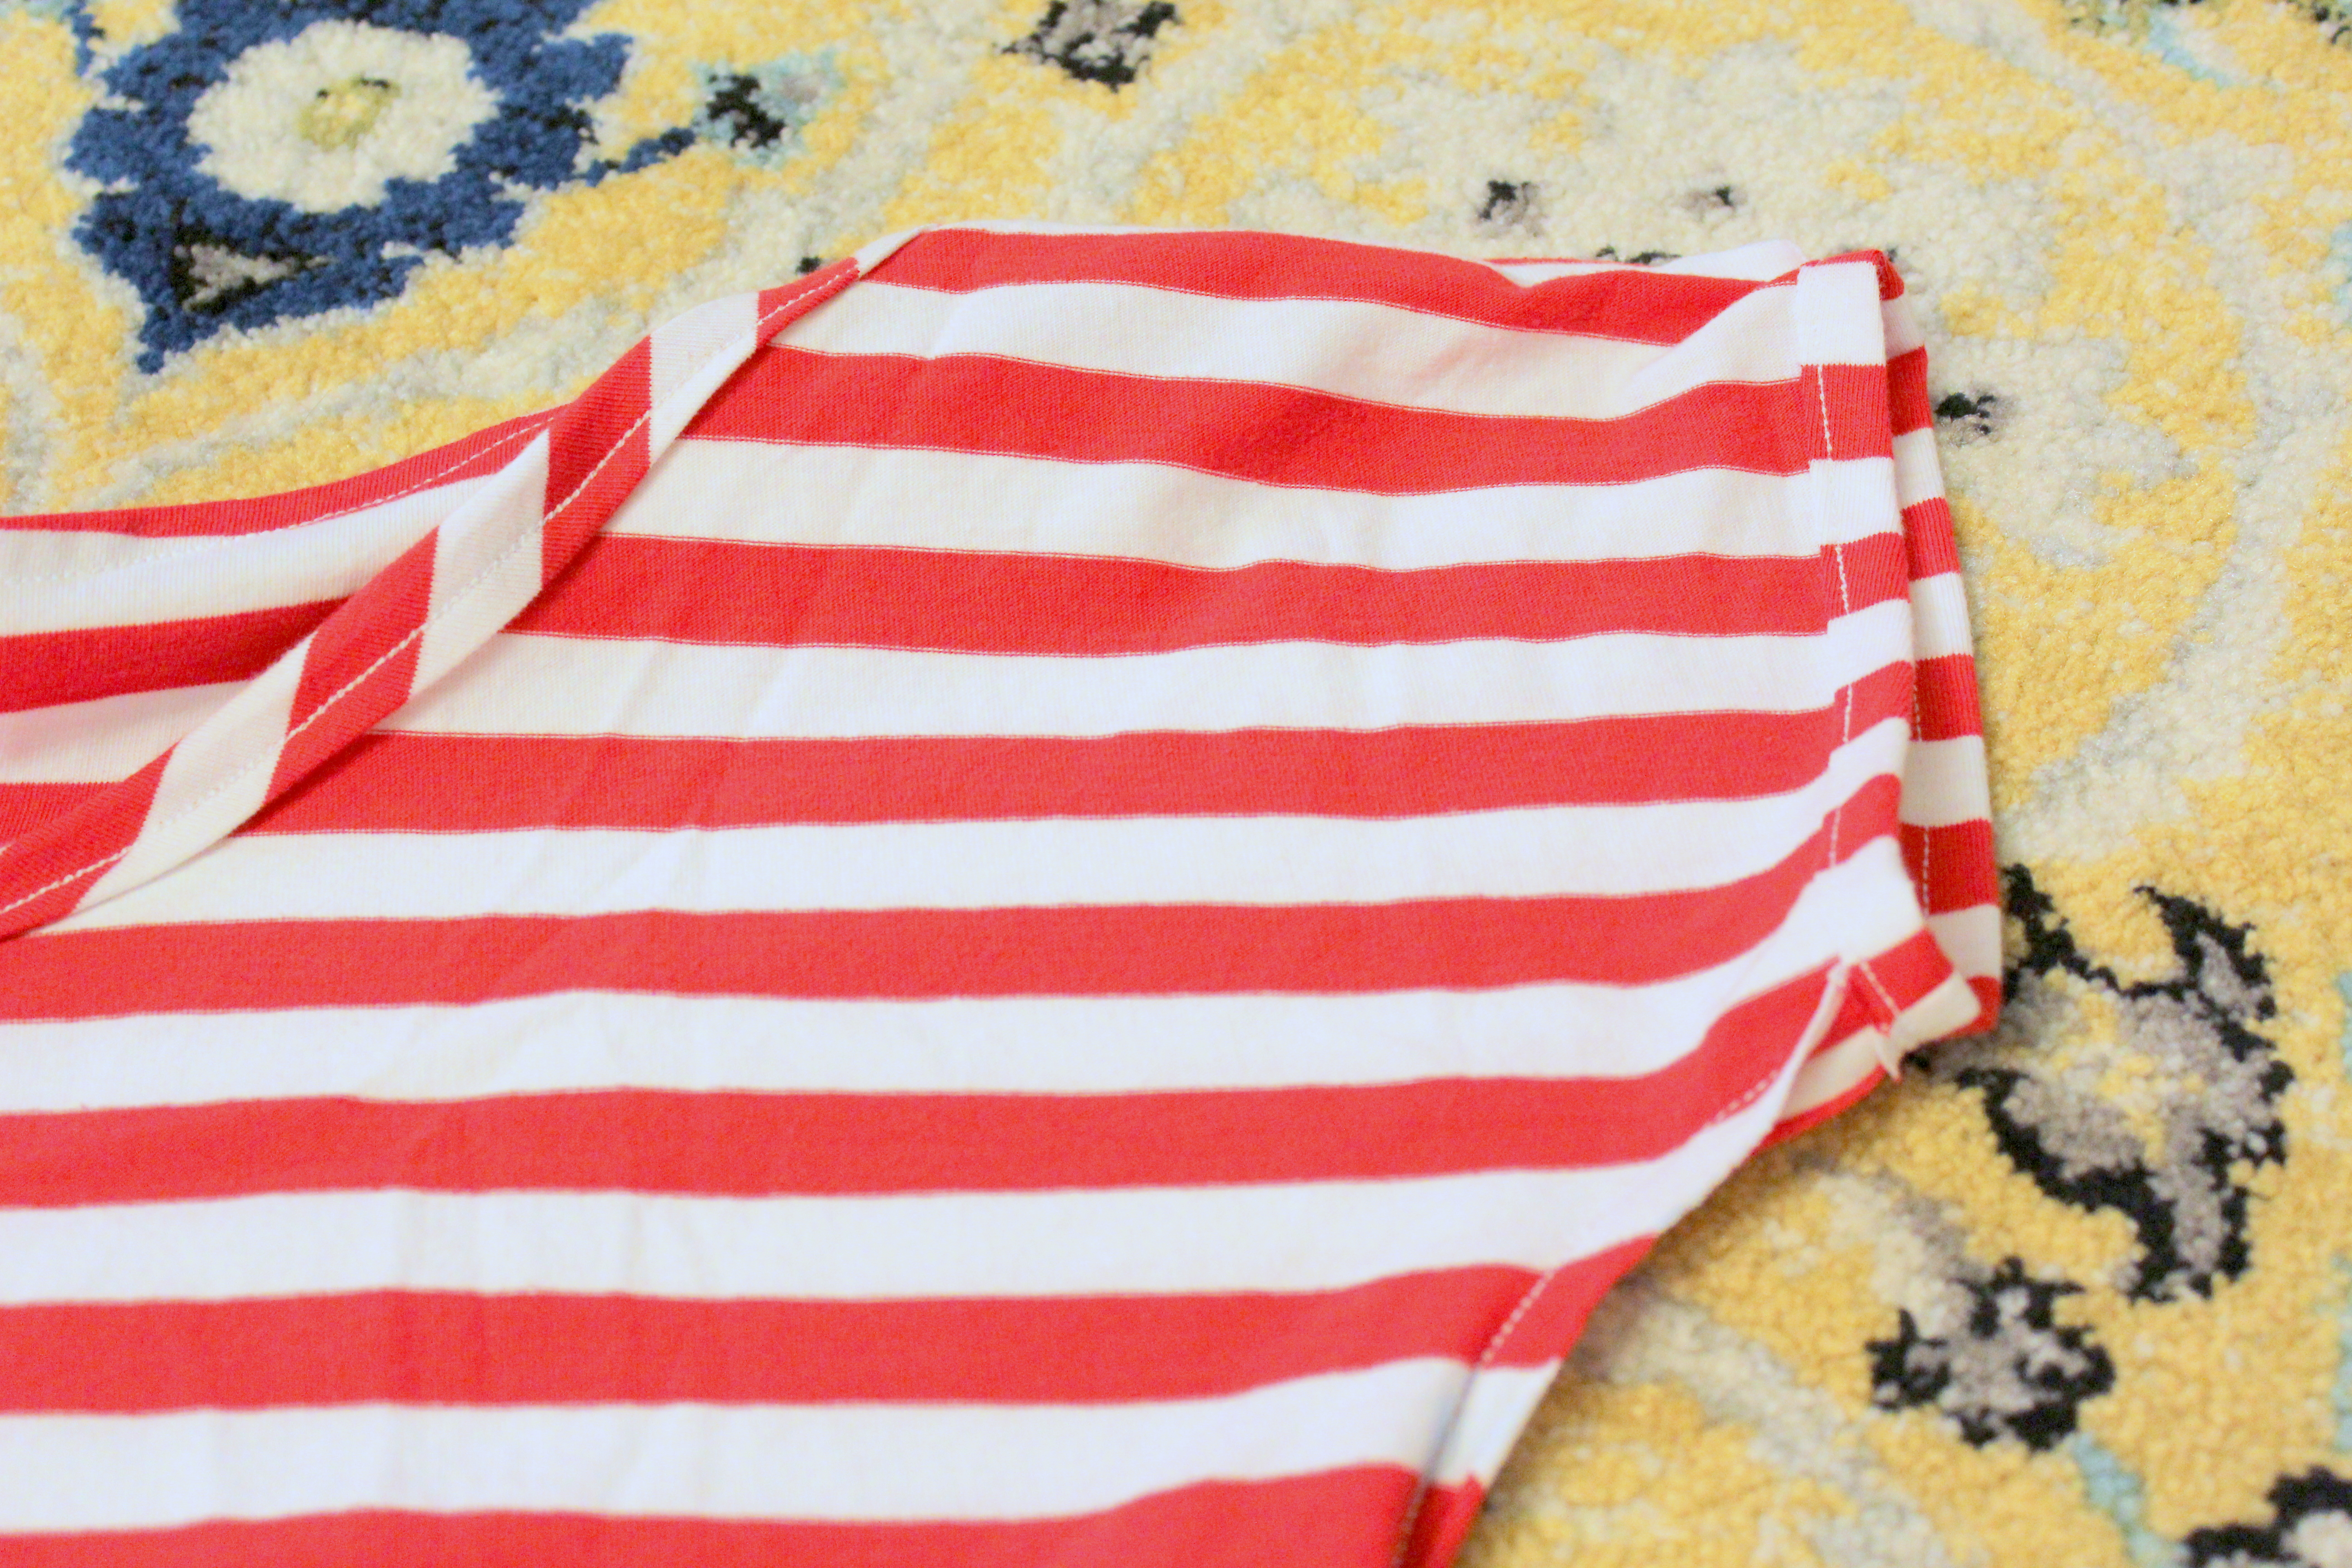
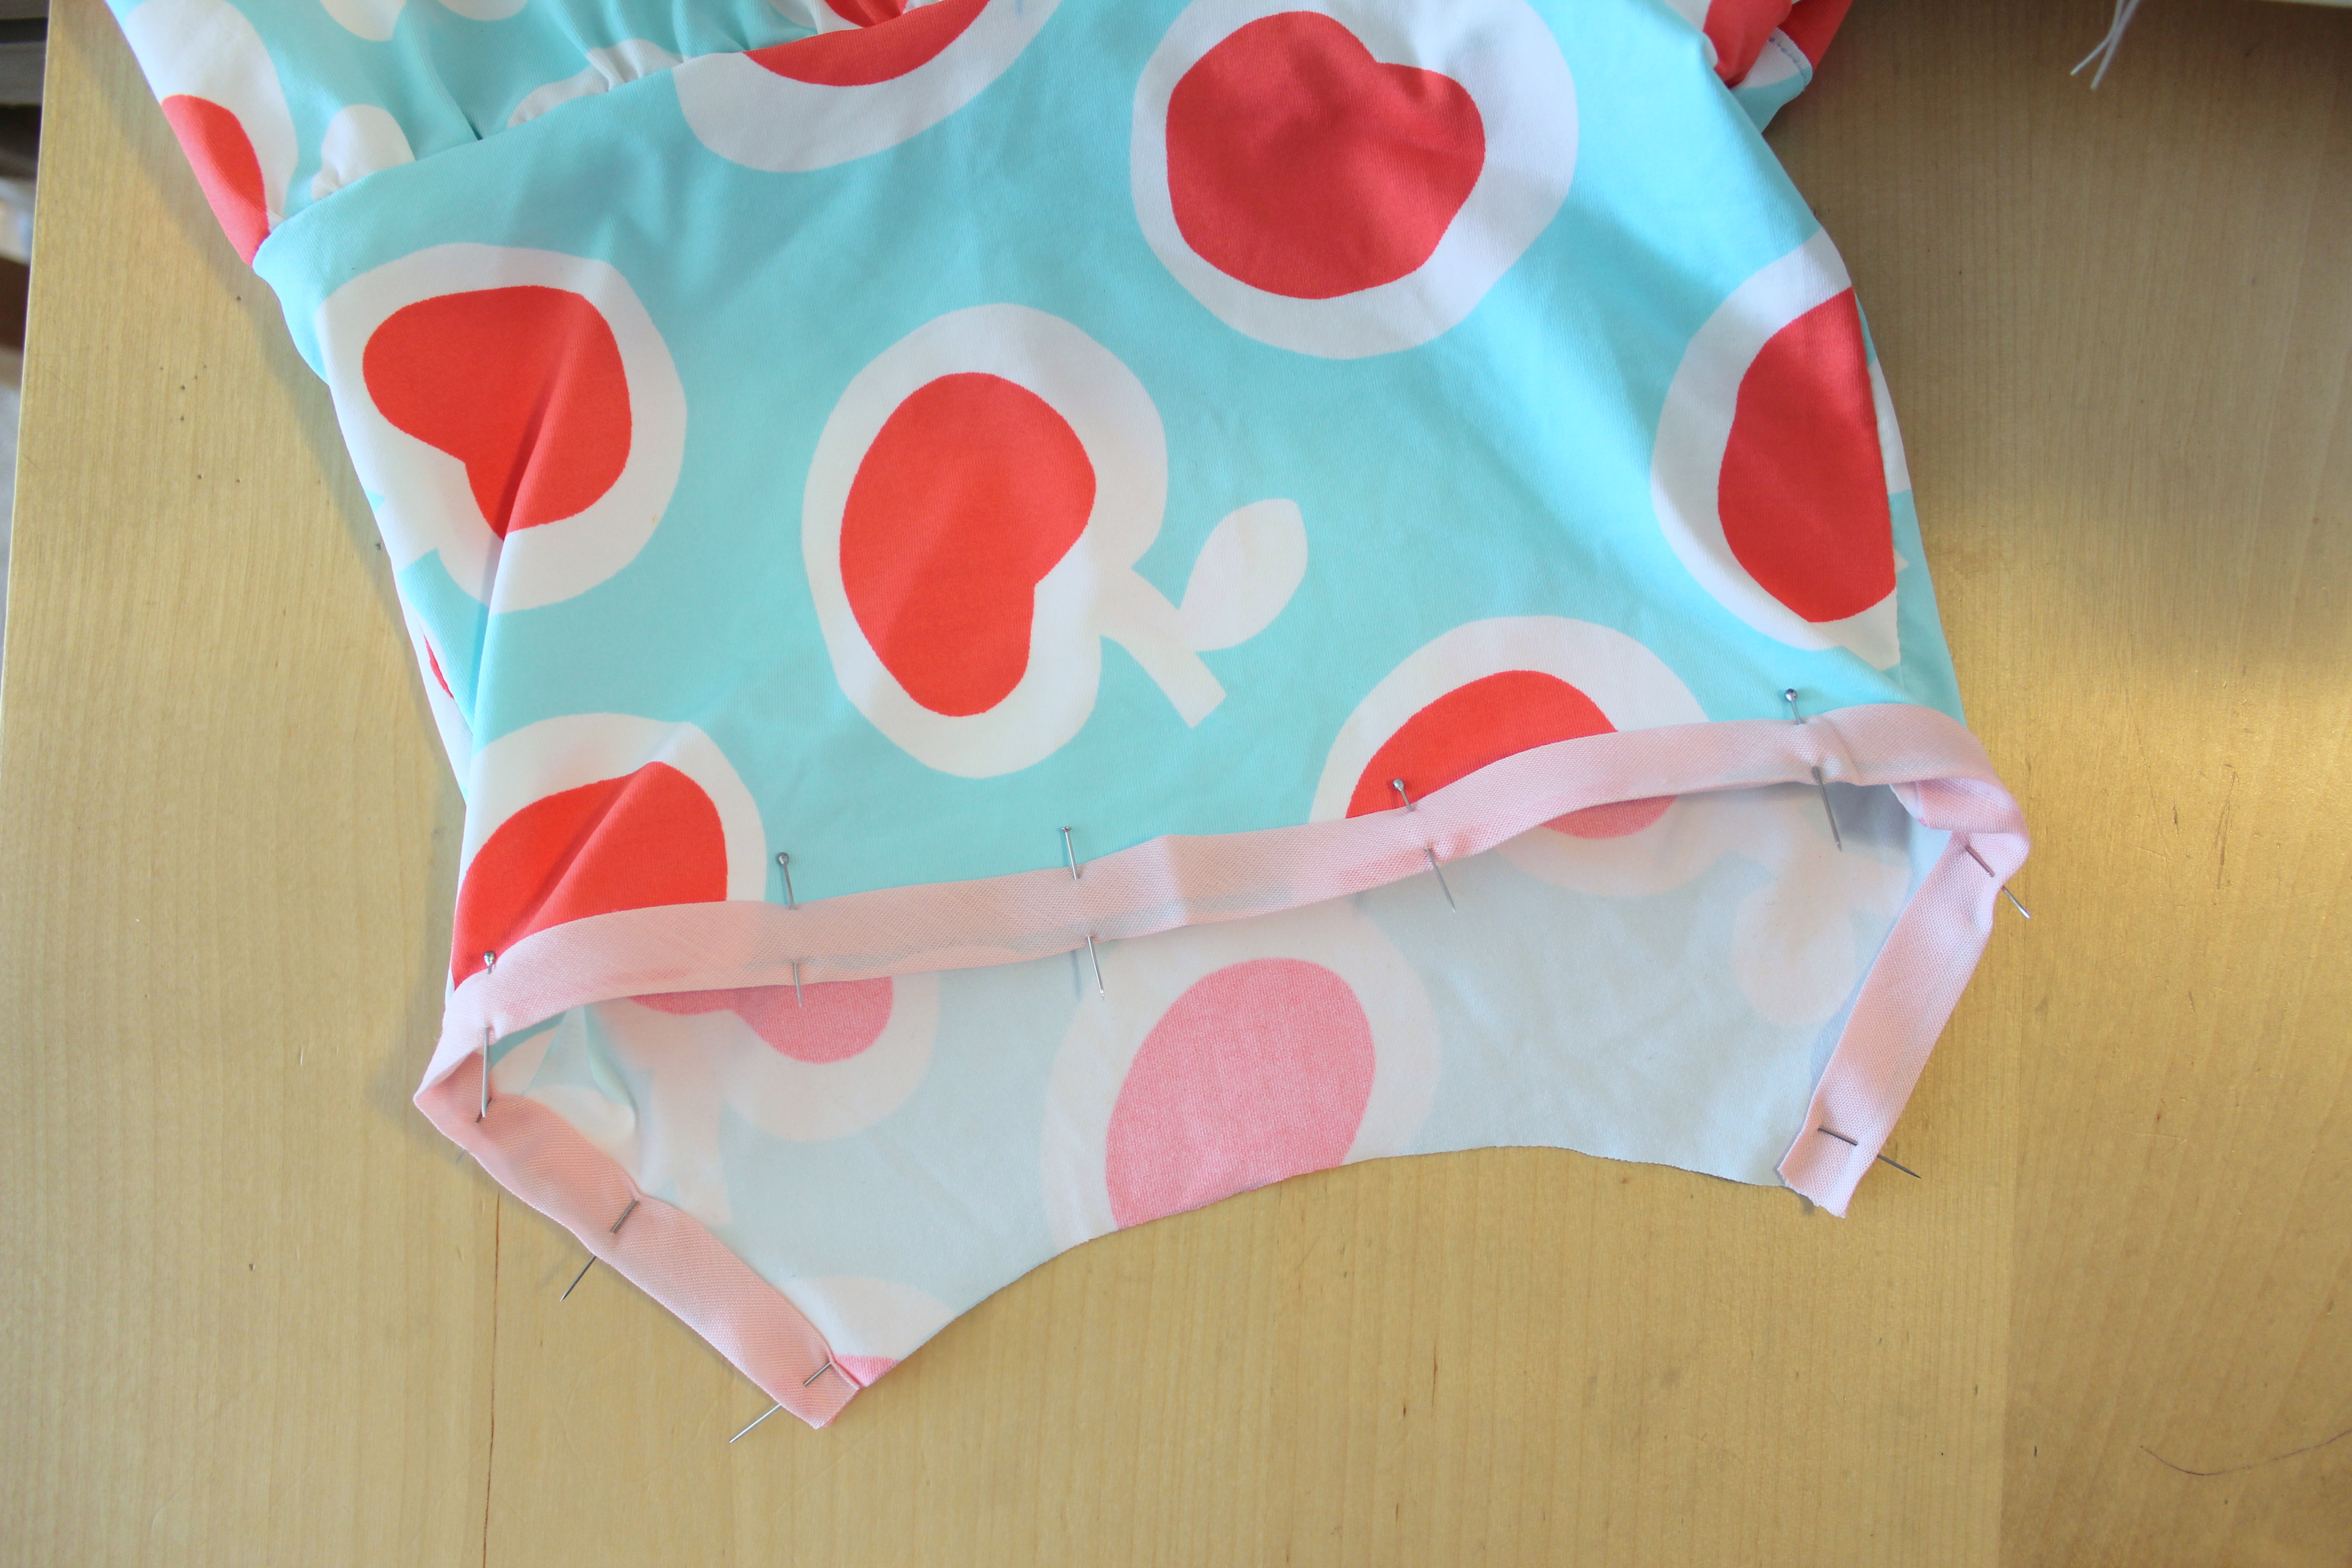
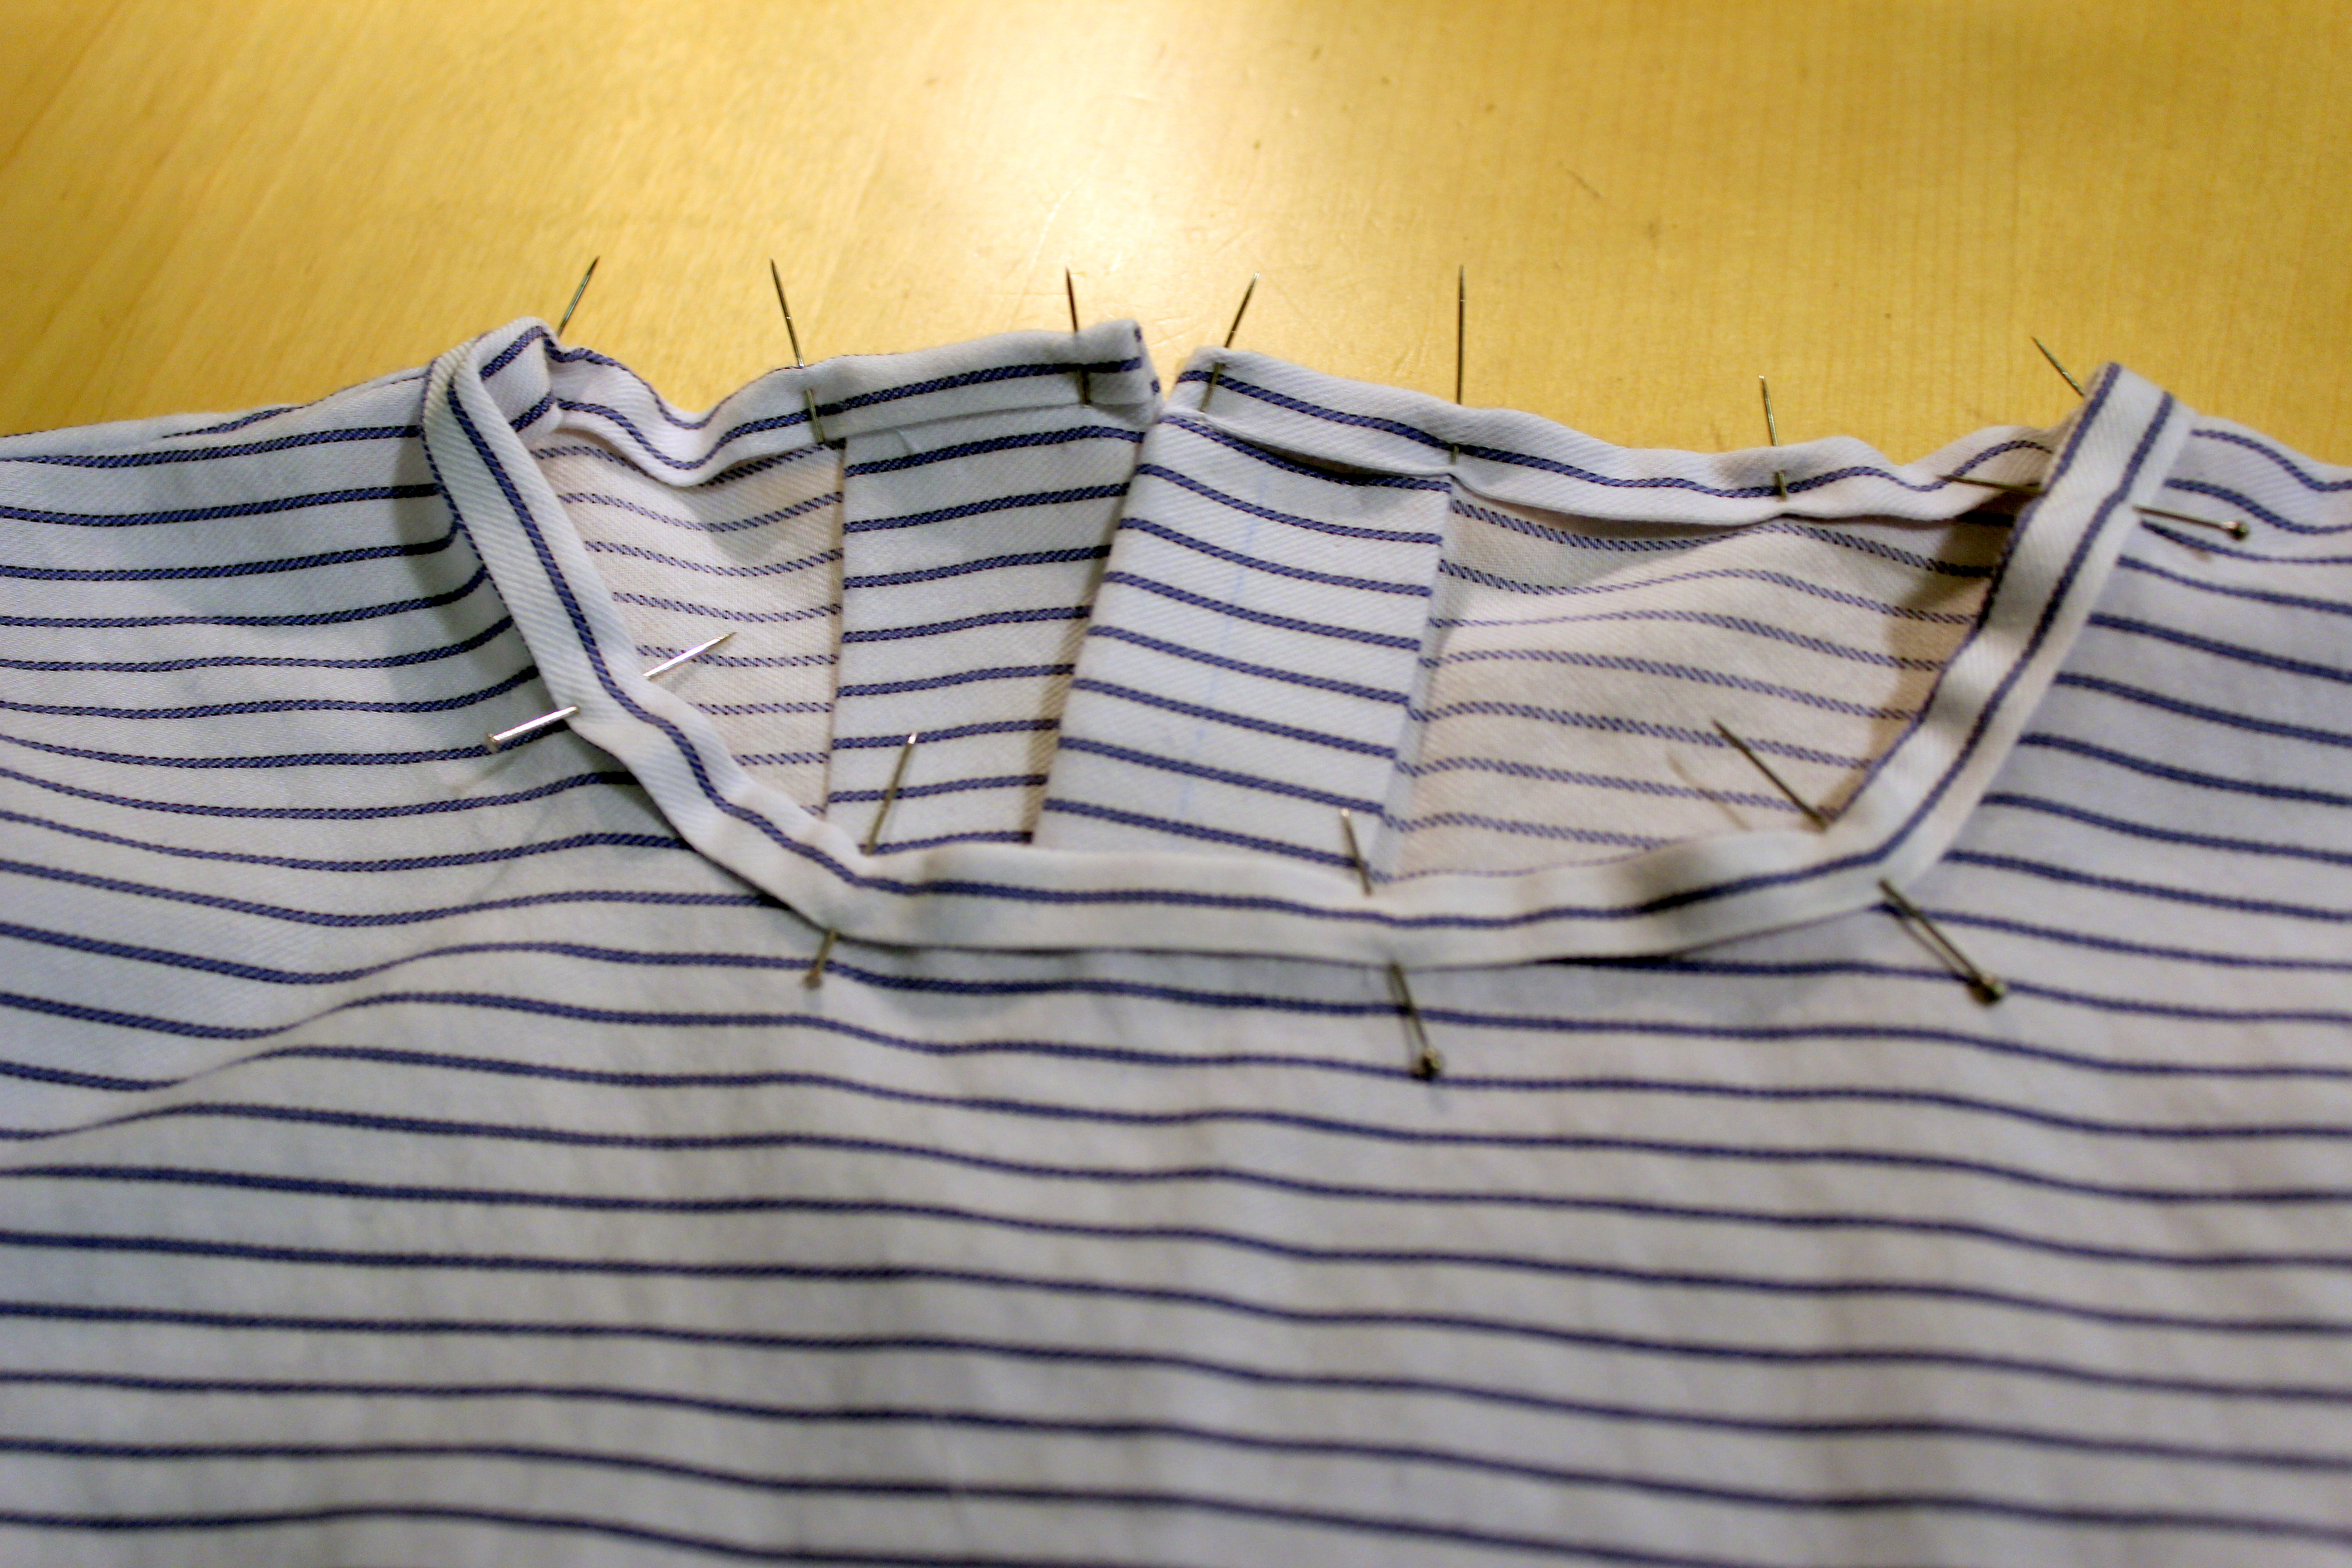
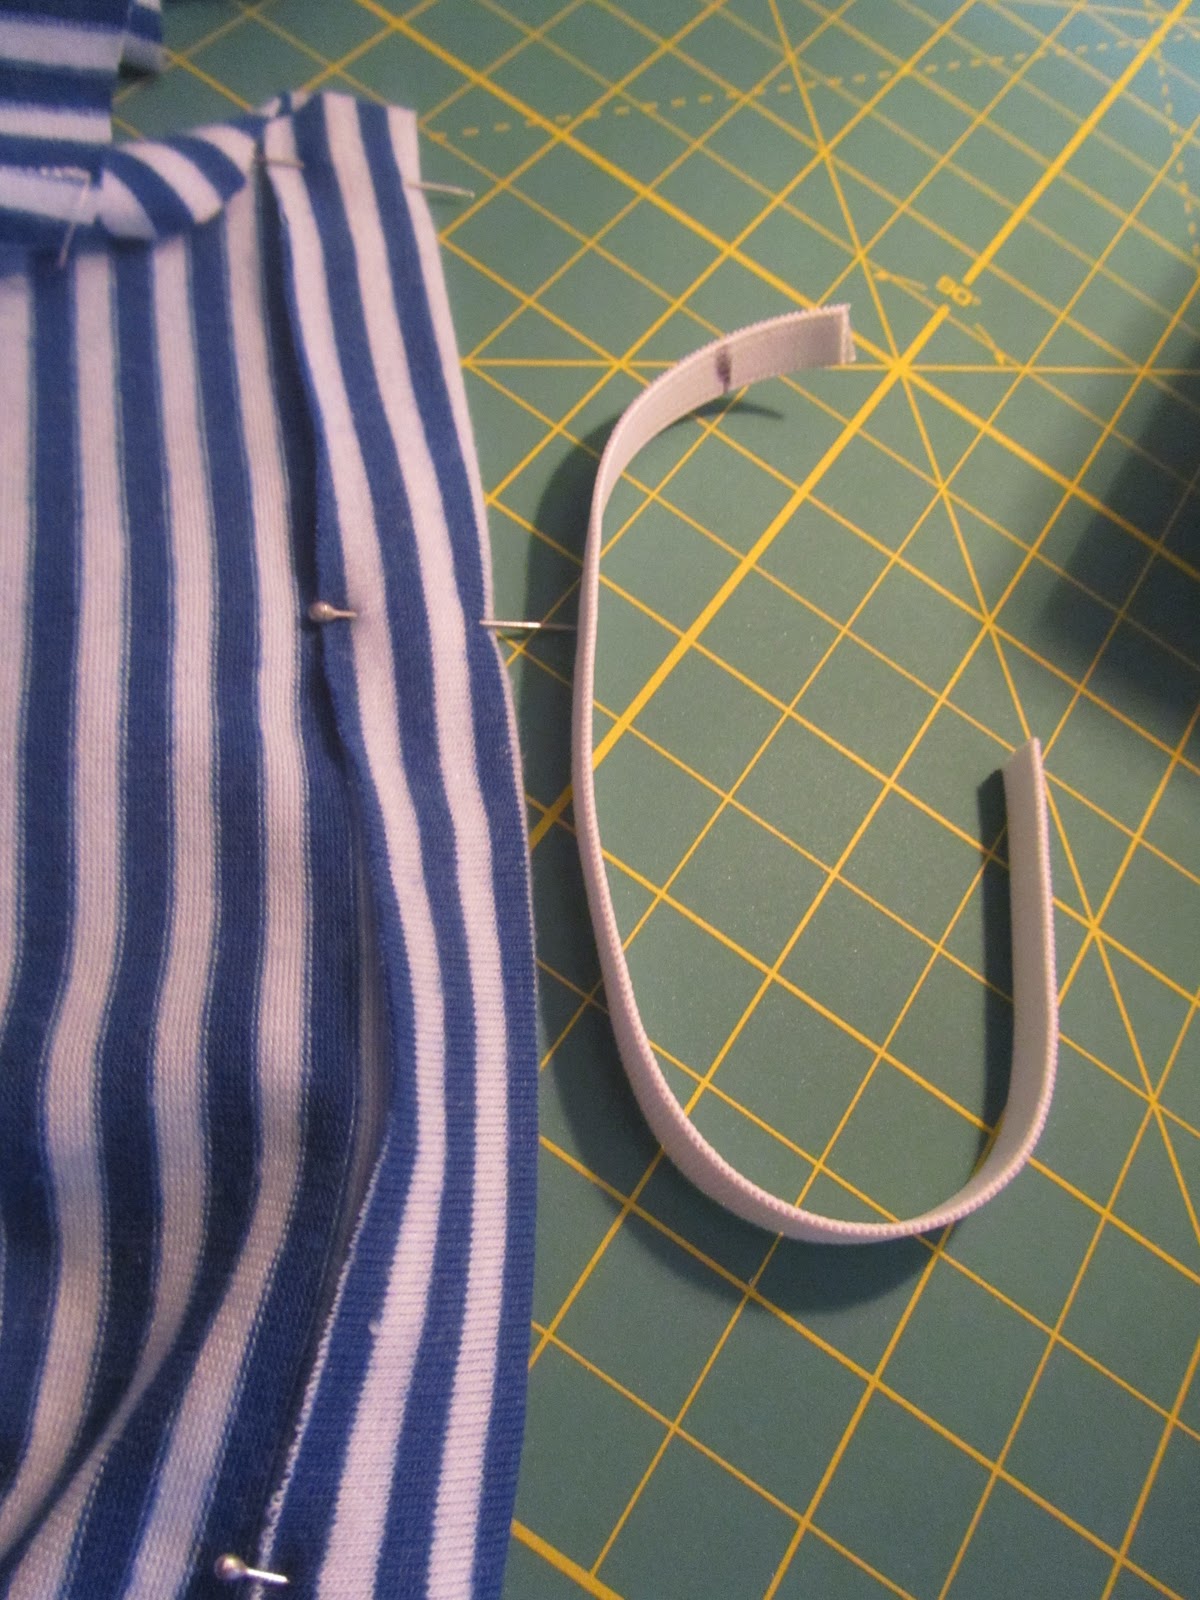
IMG_0716

Finish neckline

Cut out a strip of 1.75″ wide fabric and make your double fold bias tape then pin and stitch in place.

IMG_0709

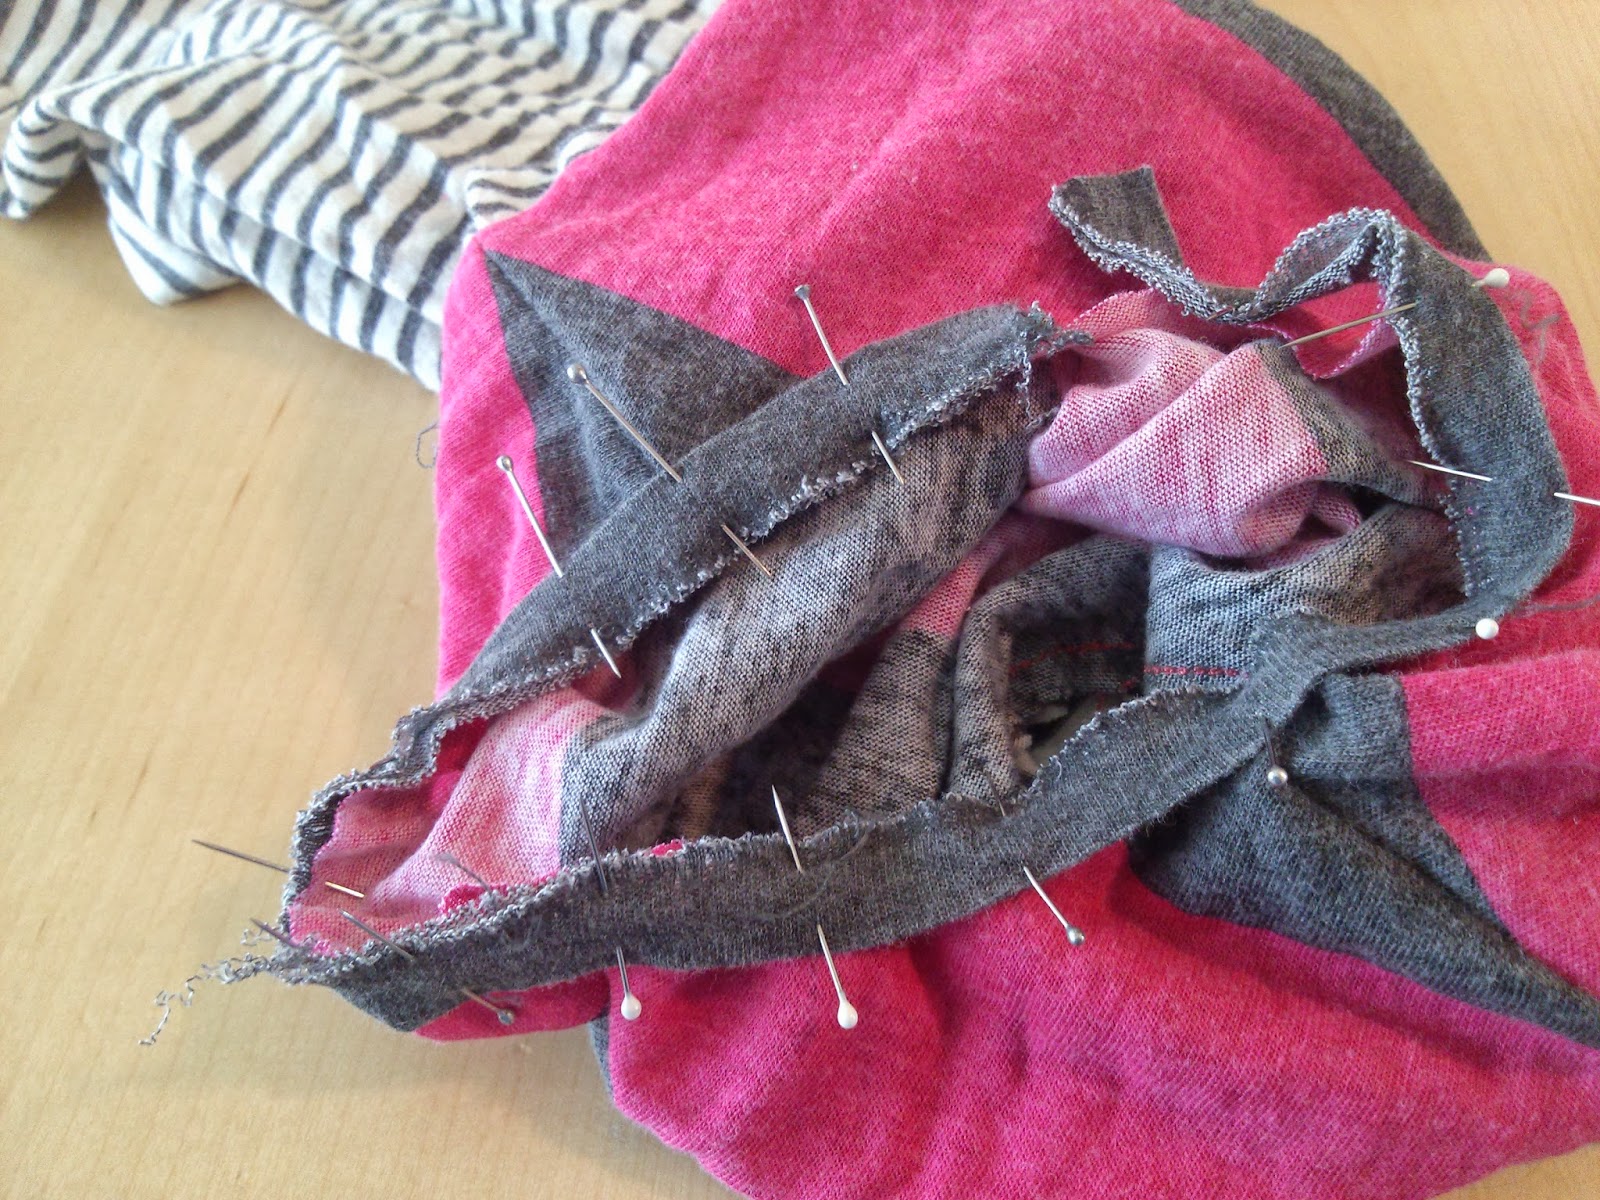
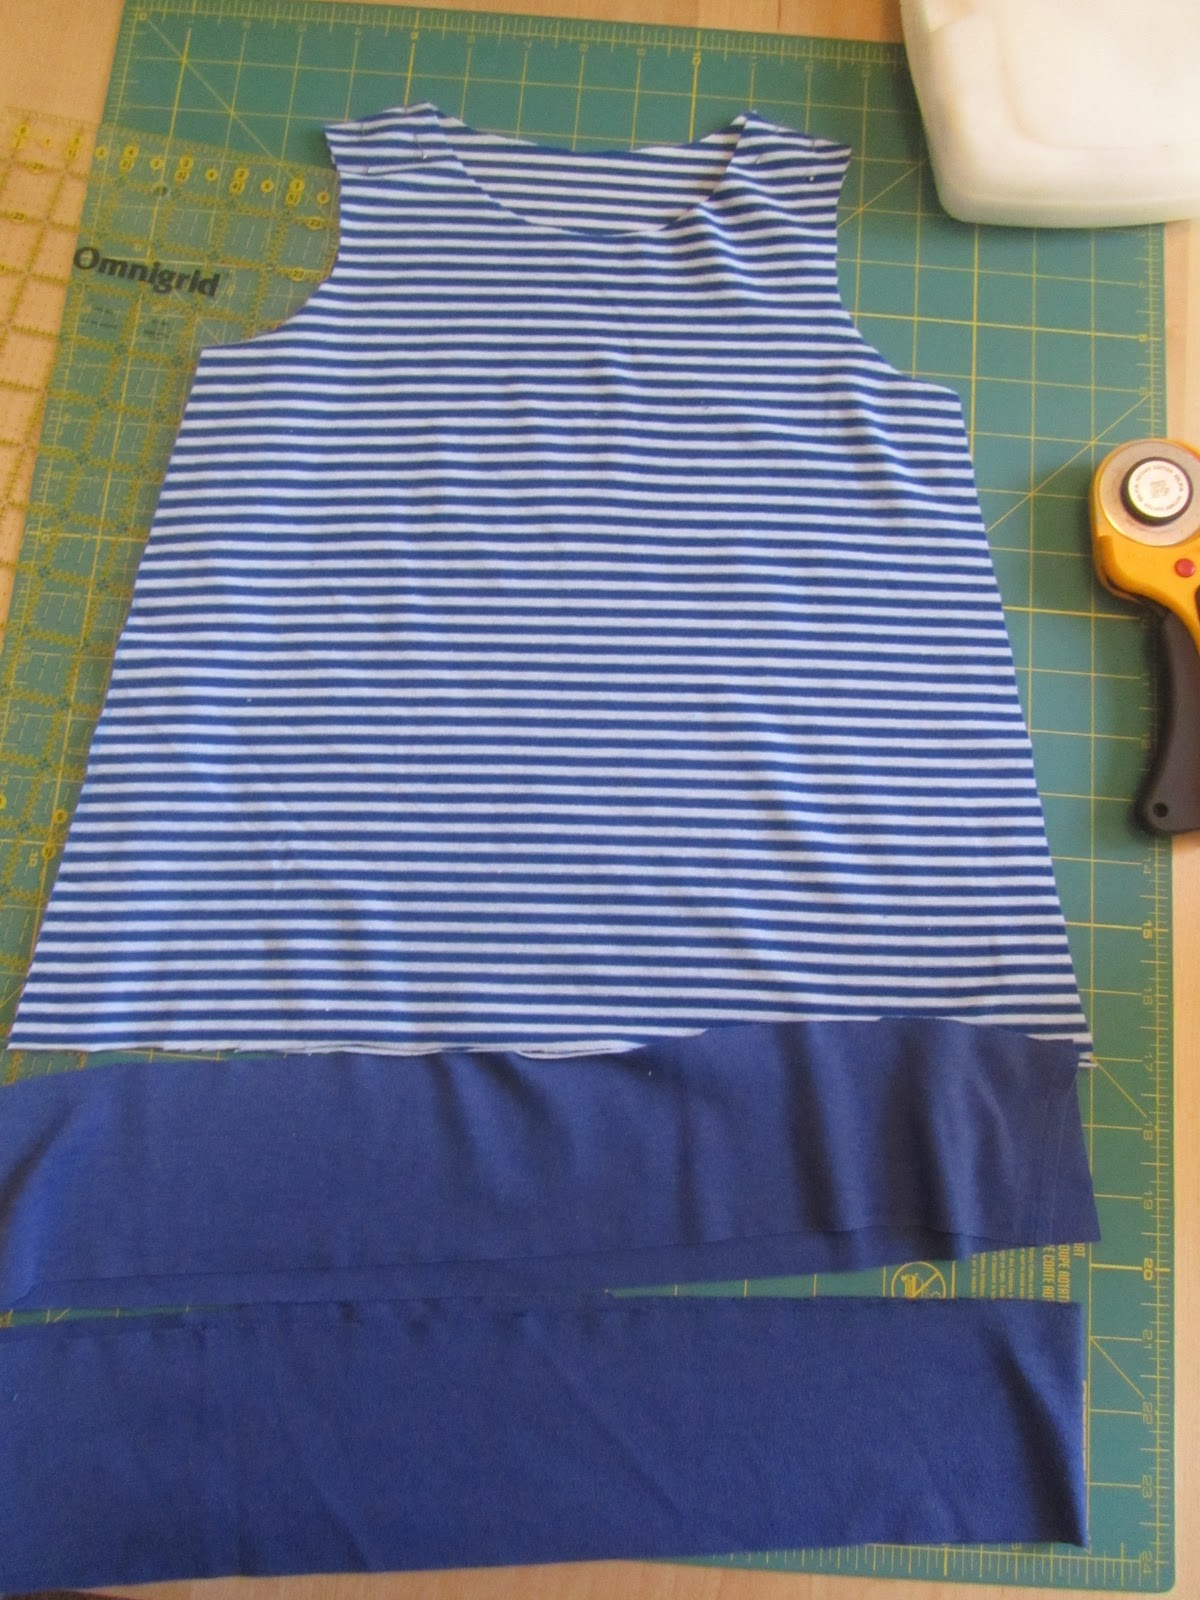
sew sides of skirt all the way to the bottom of the sleeves. I wasn’t going to do sleeves but changed my mind later so this picture doesn’t show sleeves.

Sew the skirt sides and the lower sleeves together with right sides facing.  Zigzag stitch raw edges.

IMG_0717

sew on the “hem” part of skirt.

I cut out about a 2″ strip of fabric to match the width of the skirt to hem the bottom for a cleaner look.

IMG_0718

finish the hem

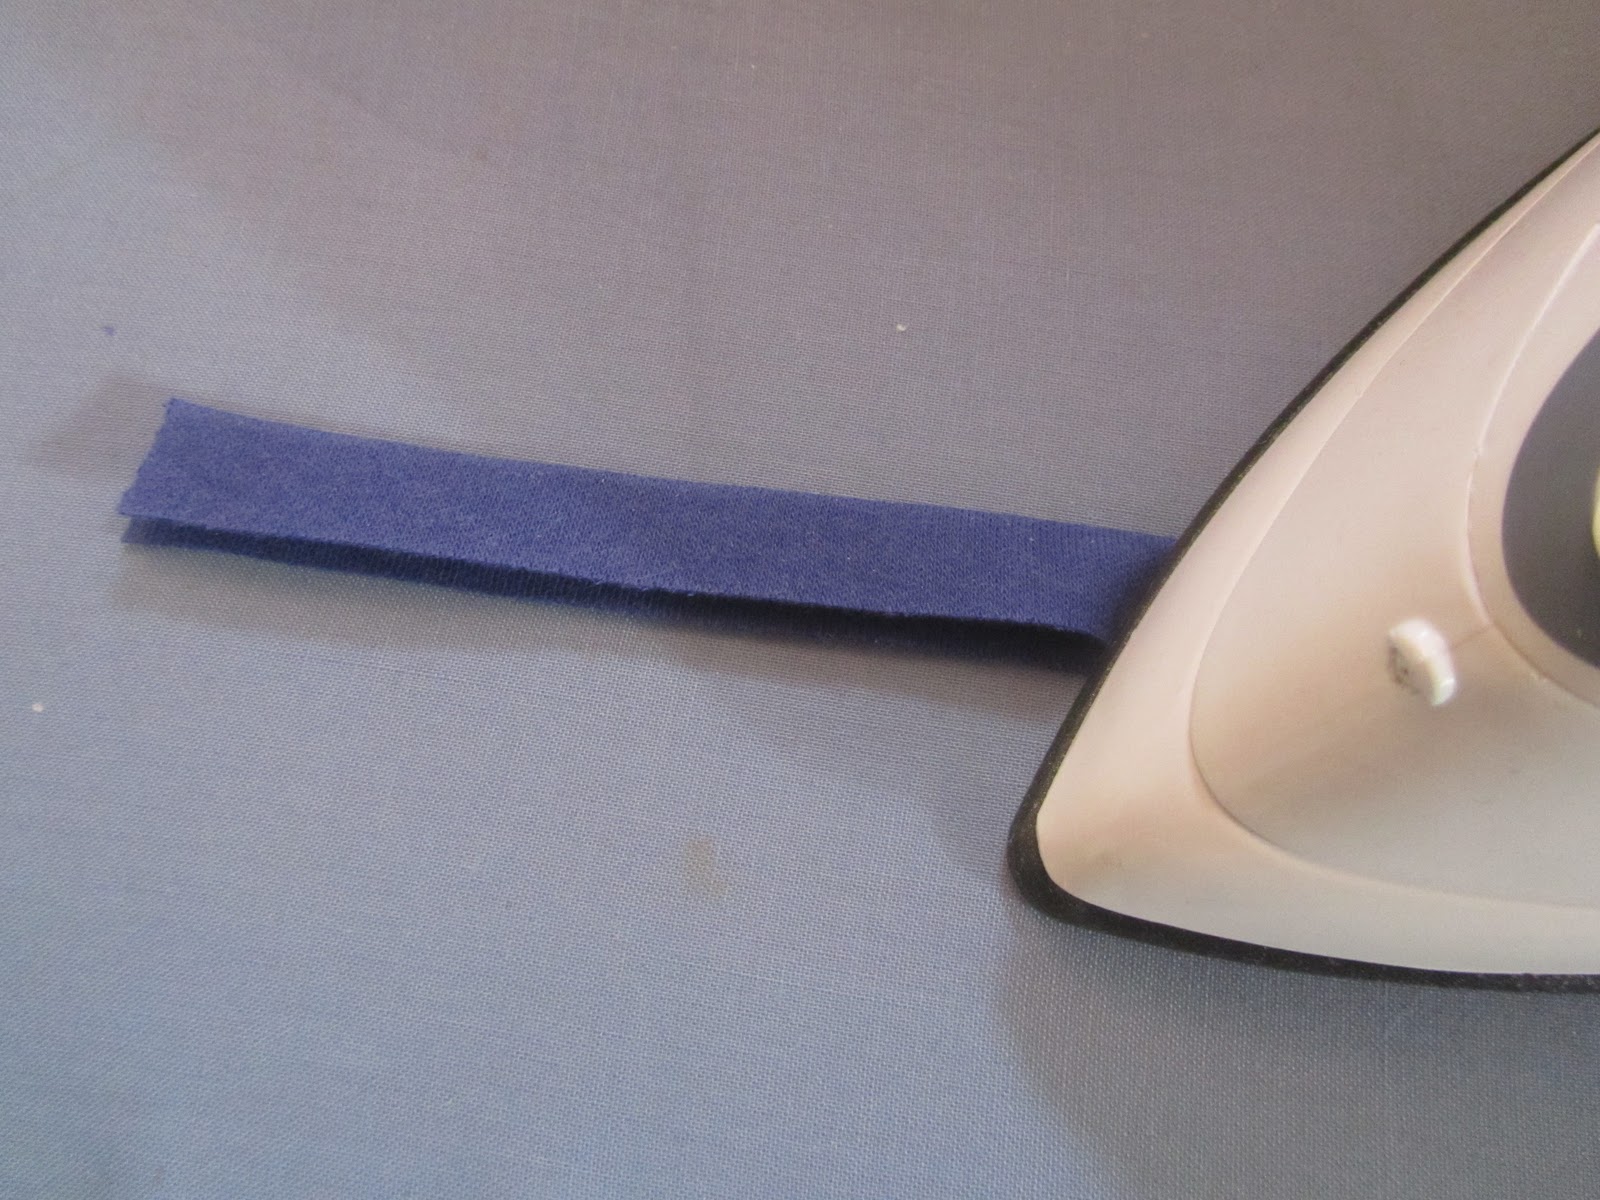
Fold and iron at the seam then iron the raw edge onto the wrong side, pin, and sew.  Hem your sleeve as well by folding in and ironing about 1/4″ of the raw edge onto the wrong side then folding in and ironing again about 1/2″, pin and sew.

IMG_0719

find desired button placement

Now figure out how many buttons you want and place them on the back bodice.

IMG_0720

mark where you want your button holes

Carefully mark where the buttonholes need to go, make you button holes, and sew on your buttons.

IMG_0721

Finish buttonholes and add buttons!

Finished buttons and buttonholes always leaves me with such a sense of accomplishment!  Perhaps because I was afraid to buttonholes for the looooongest time.
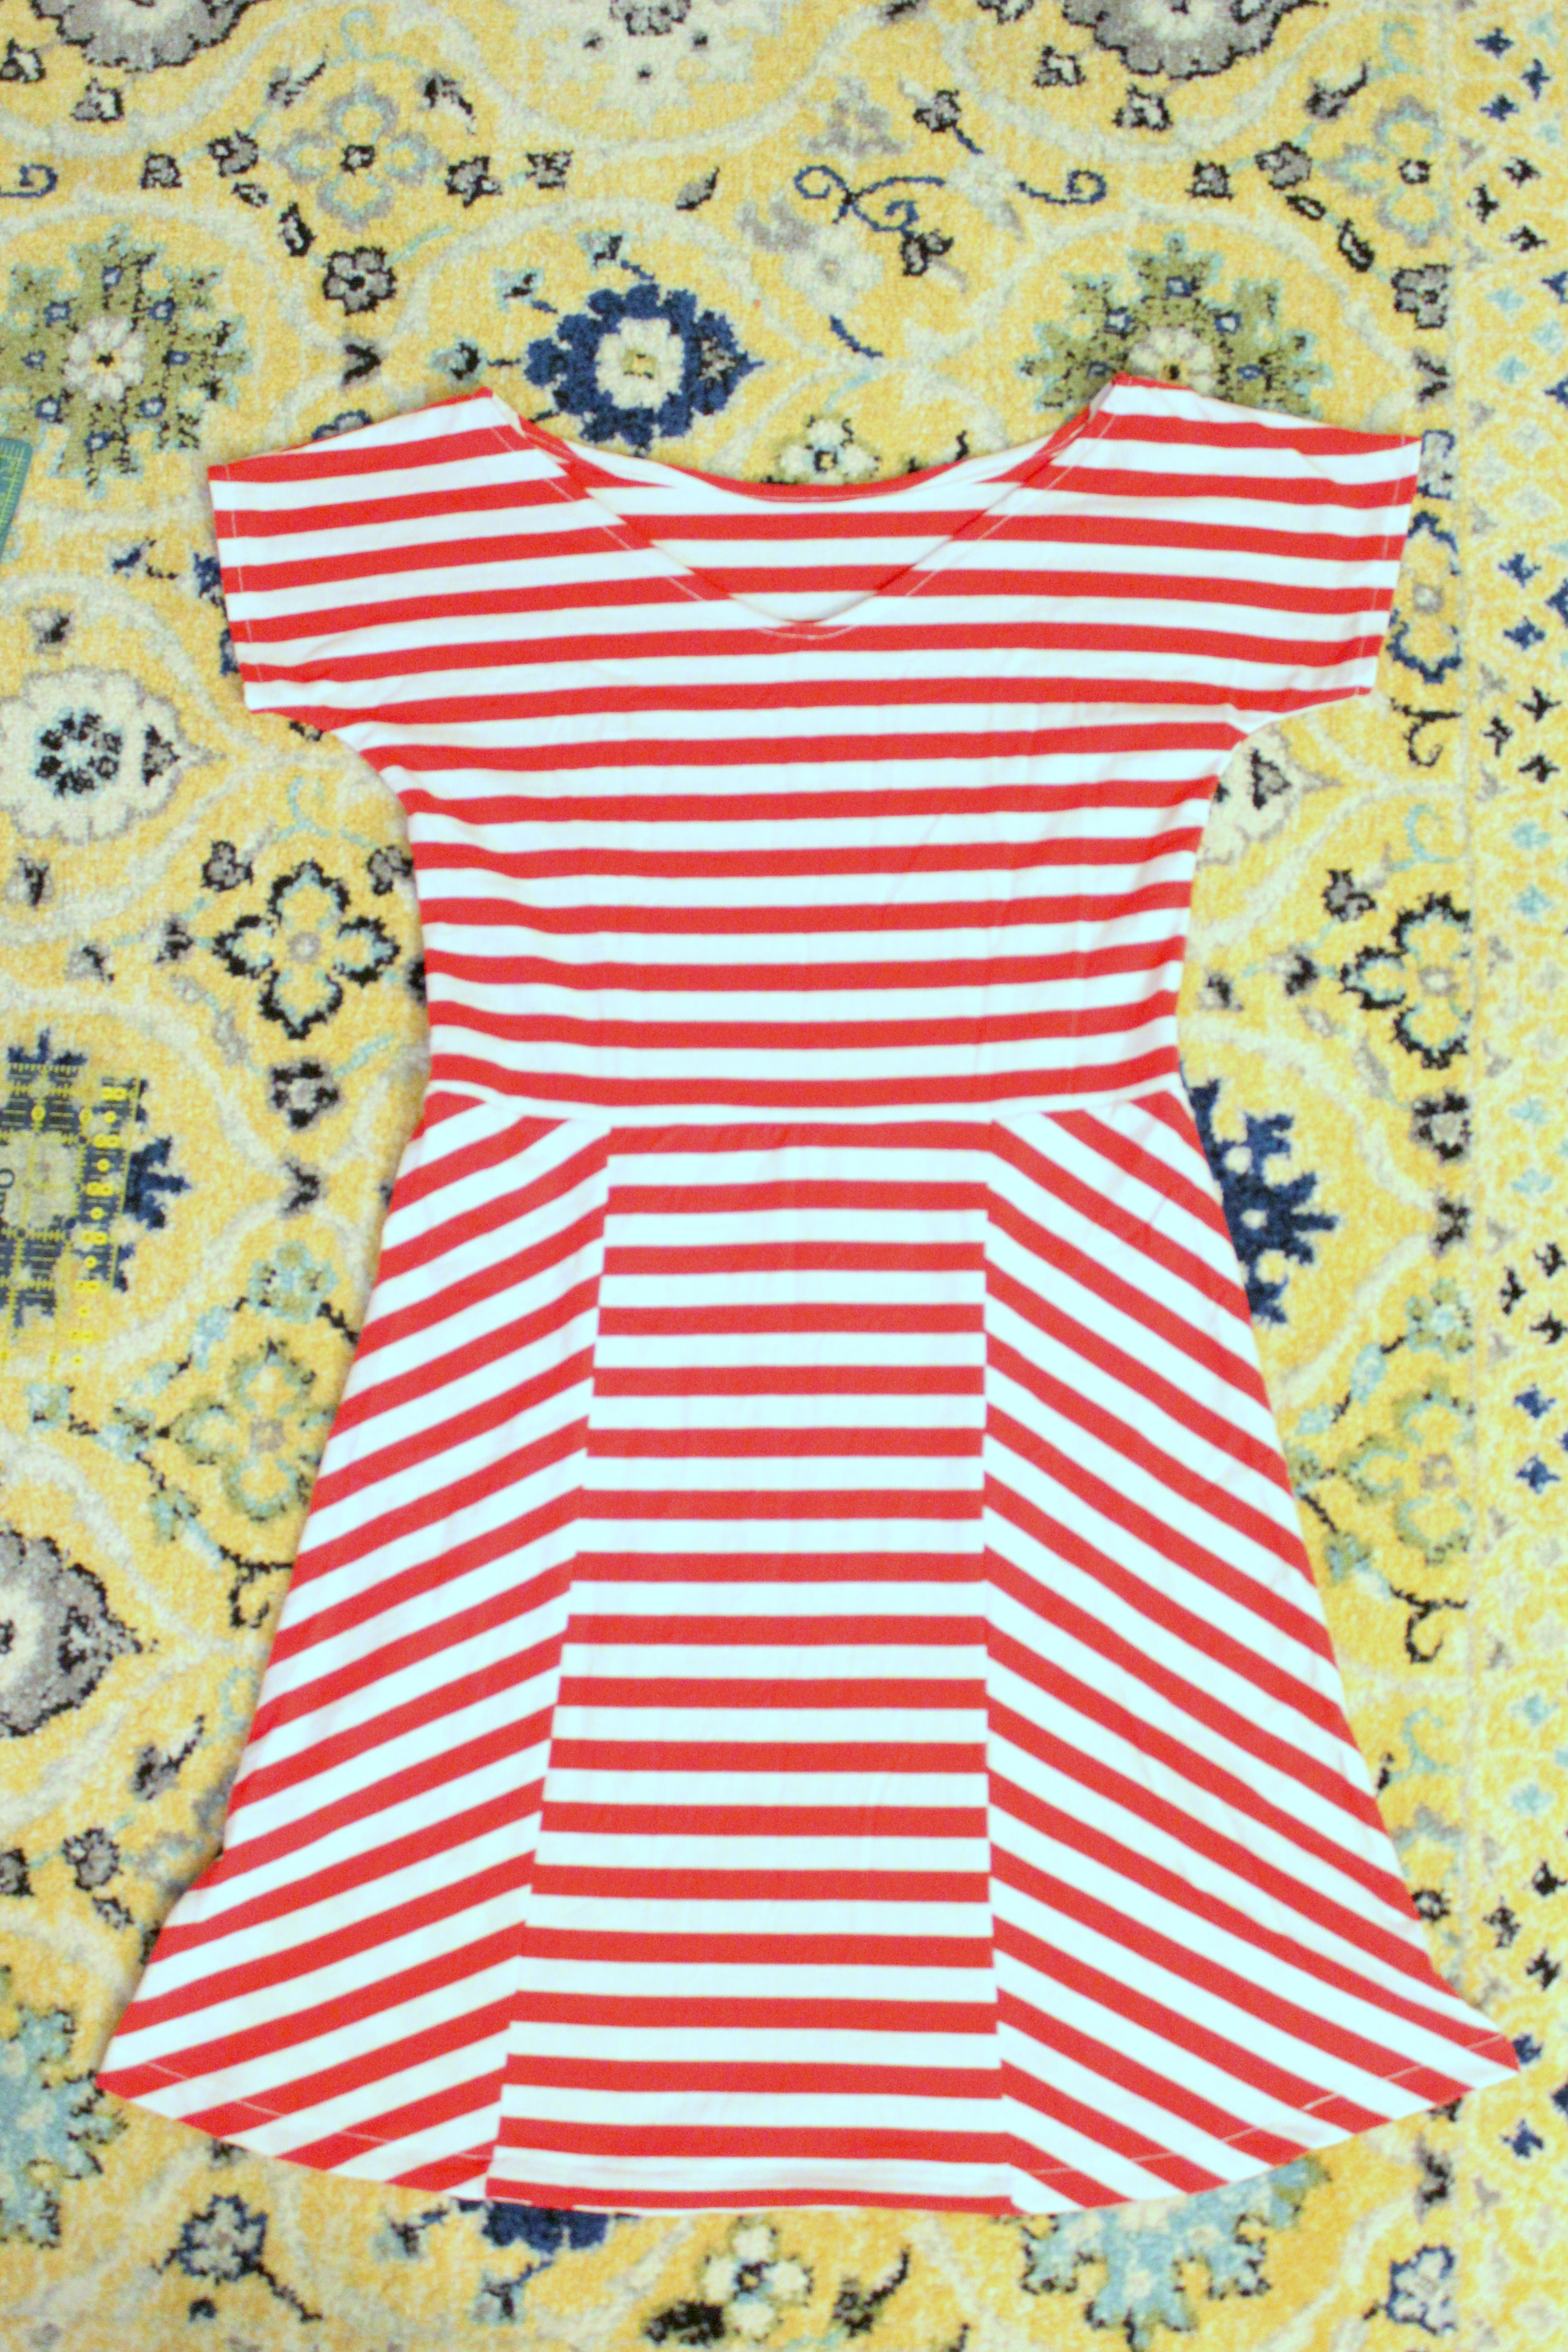
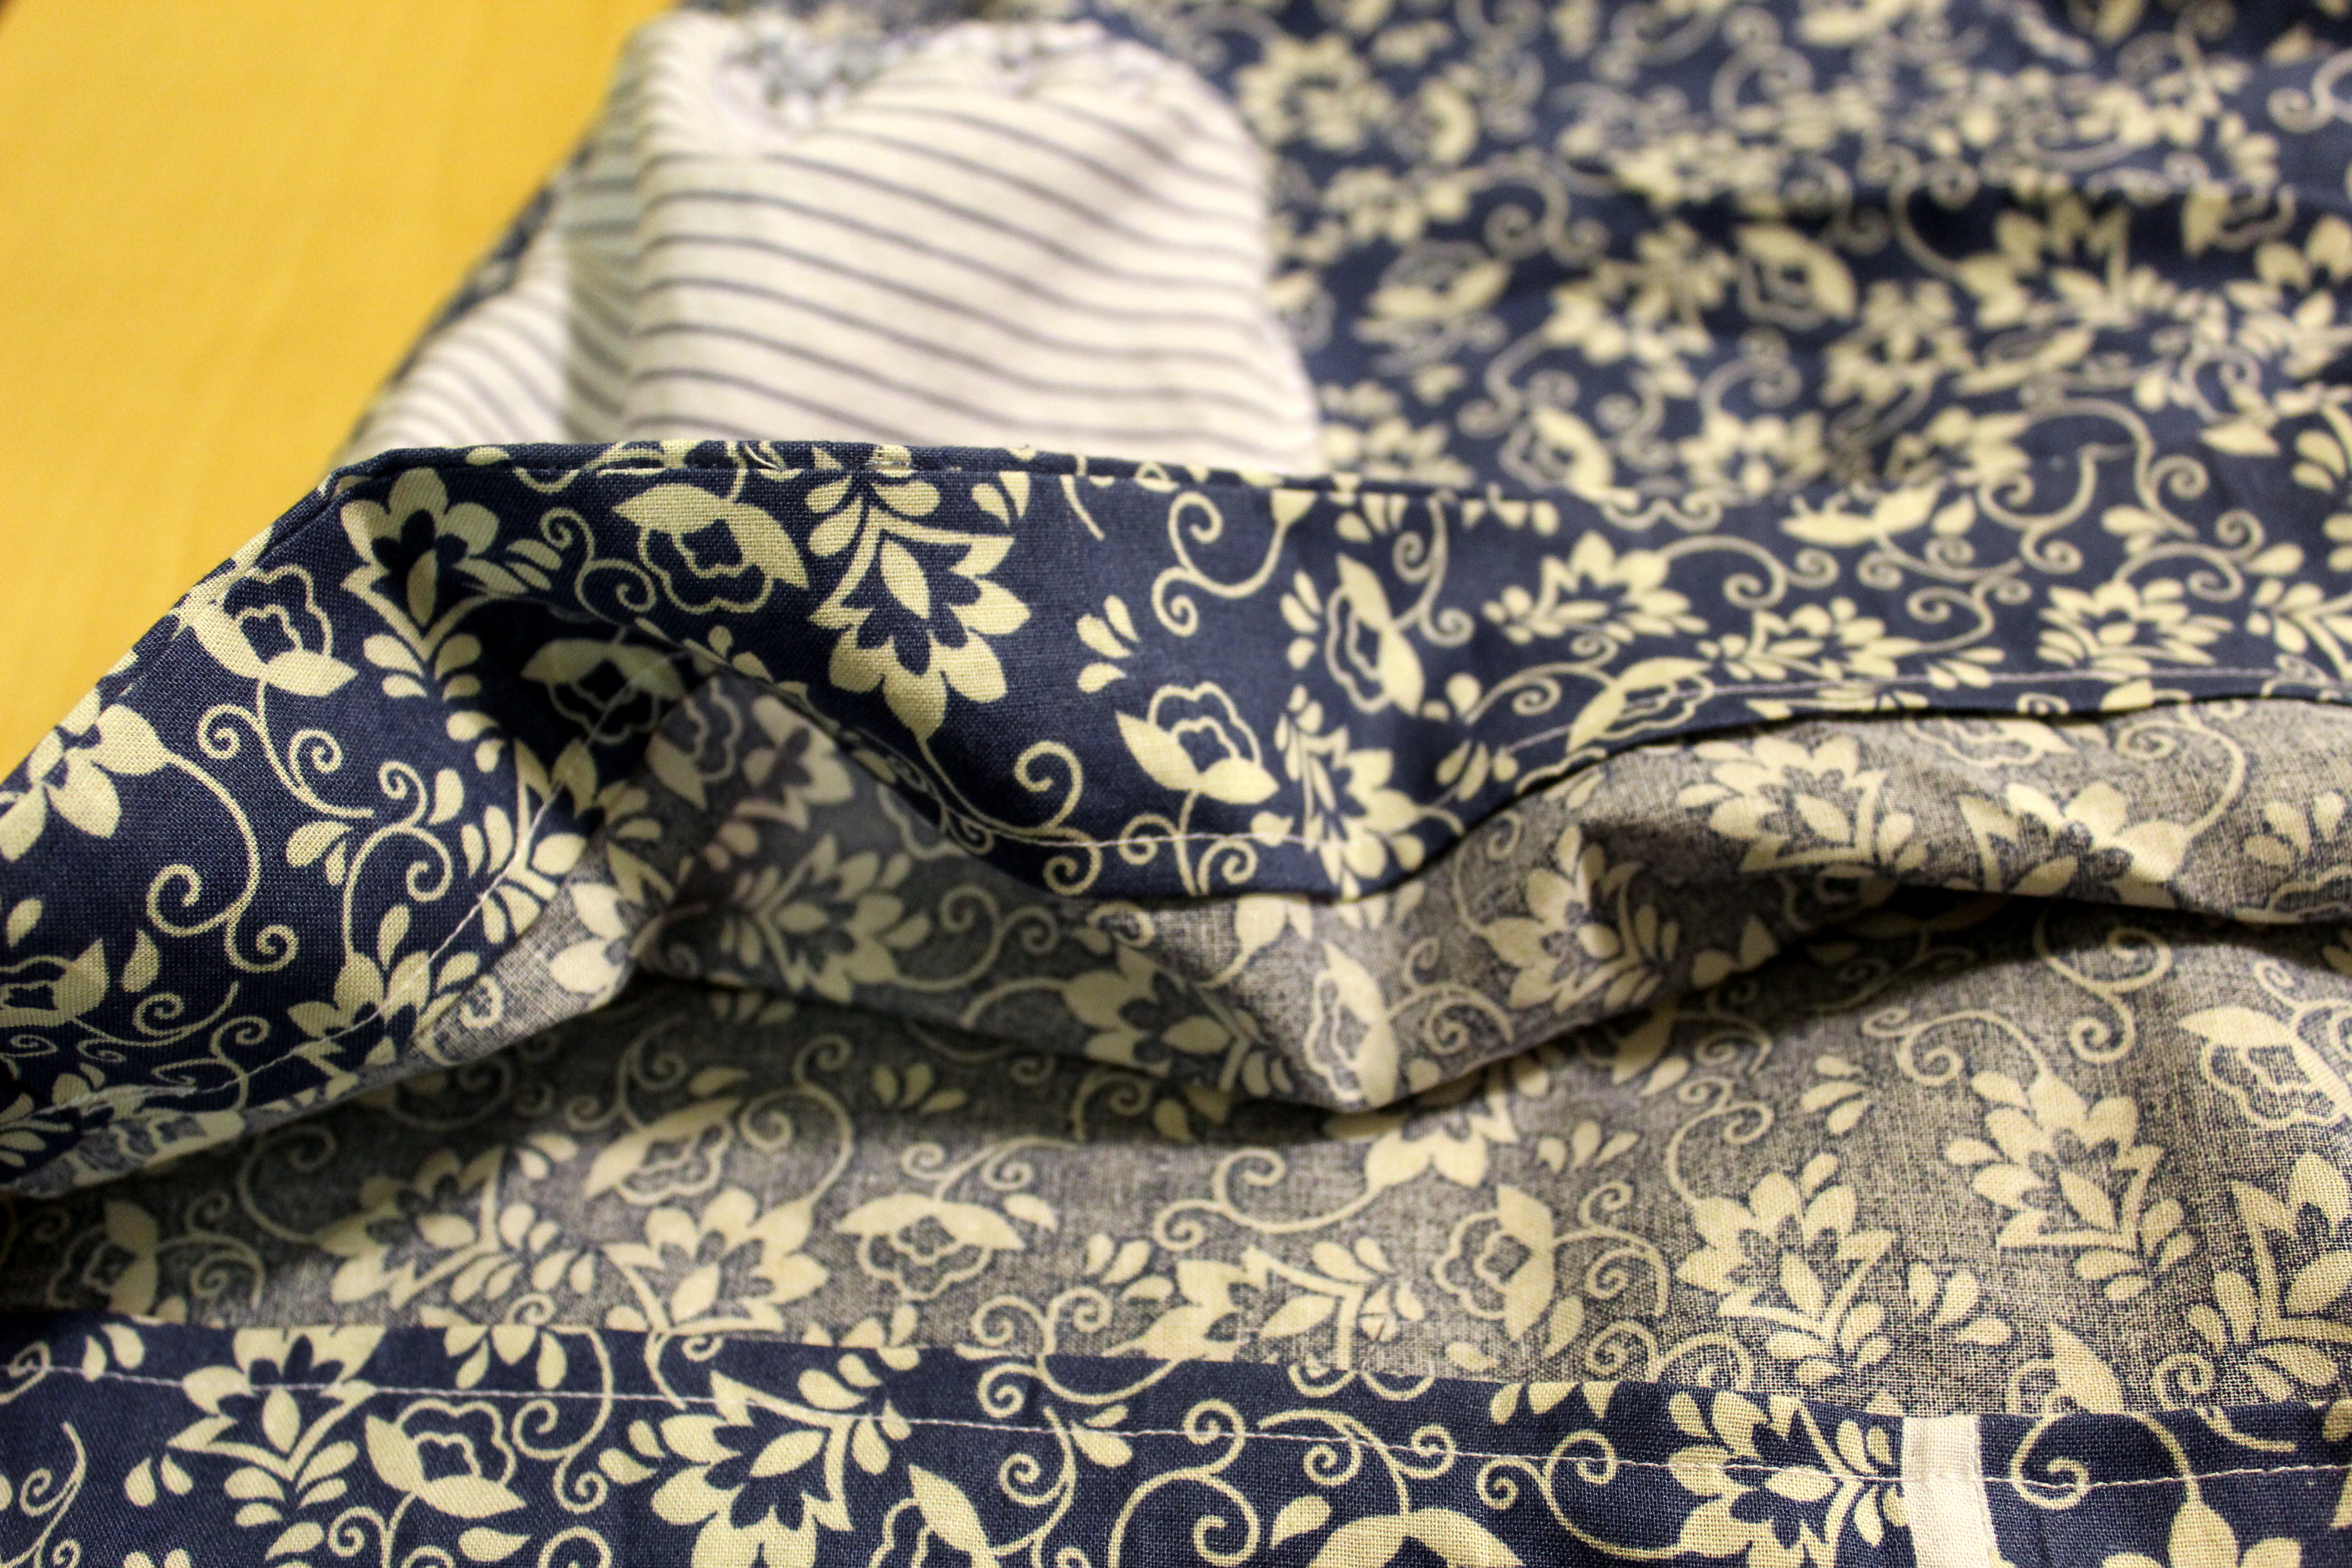
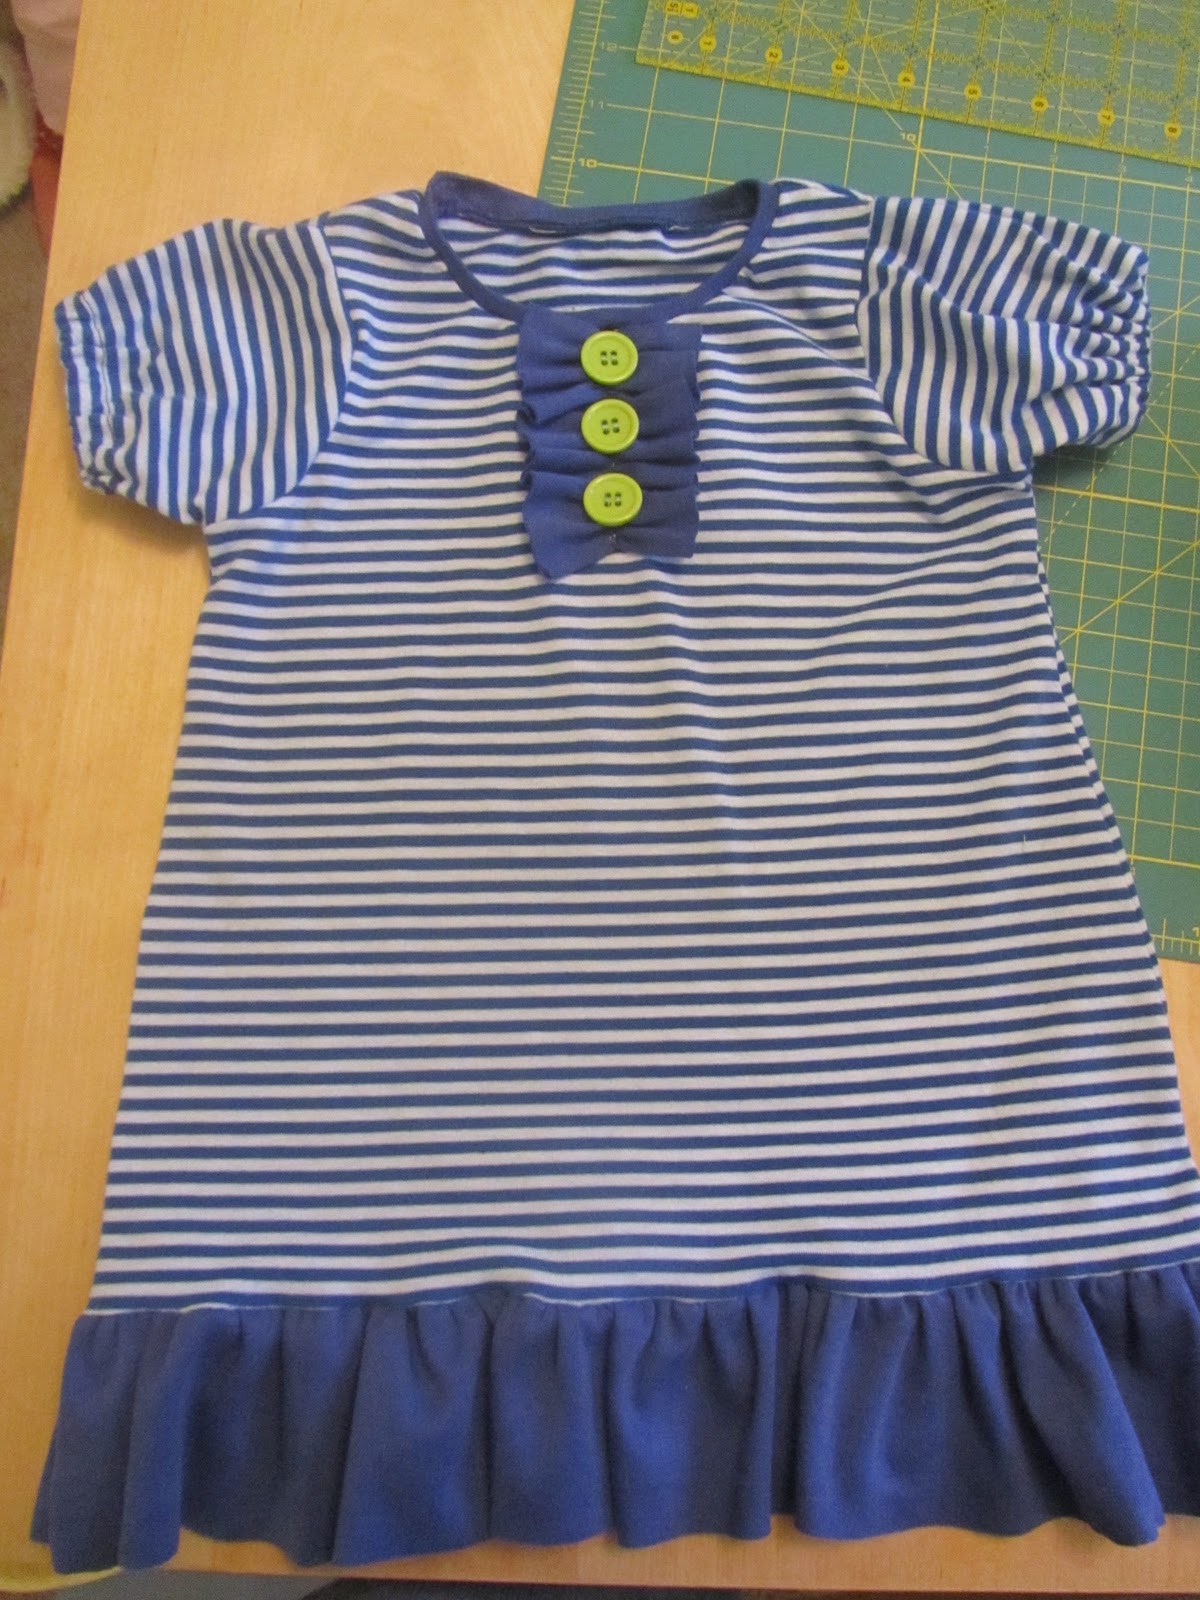
IMG_0725

Voila~ Done!

IMG_0729

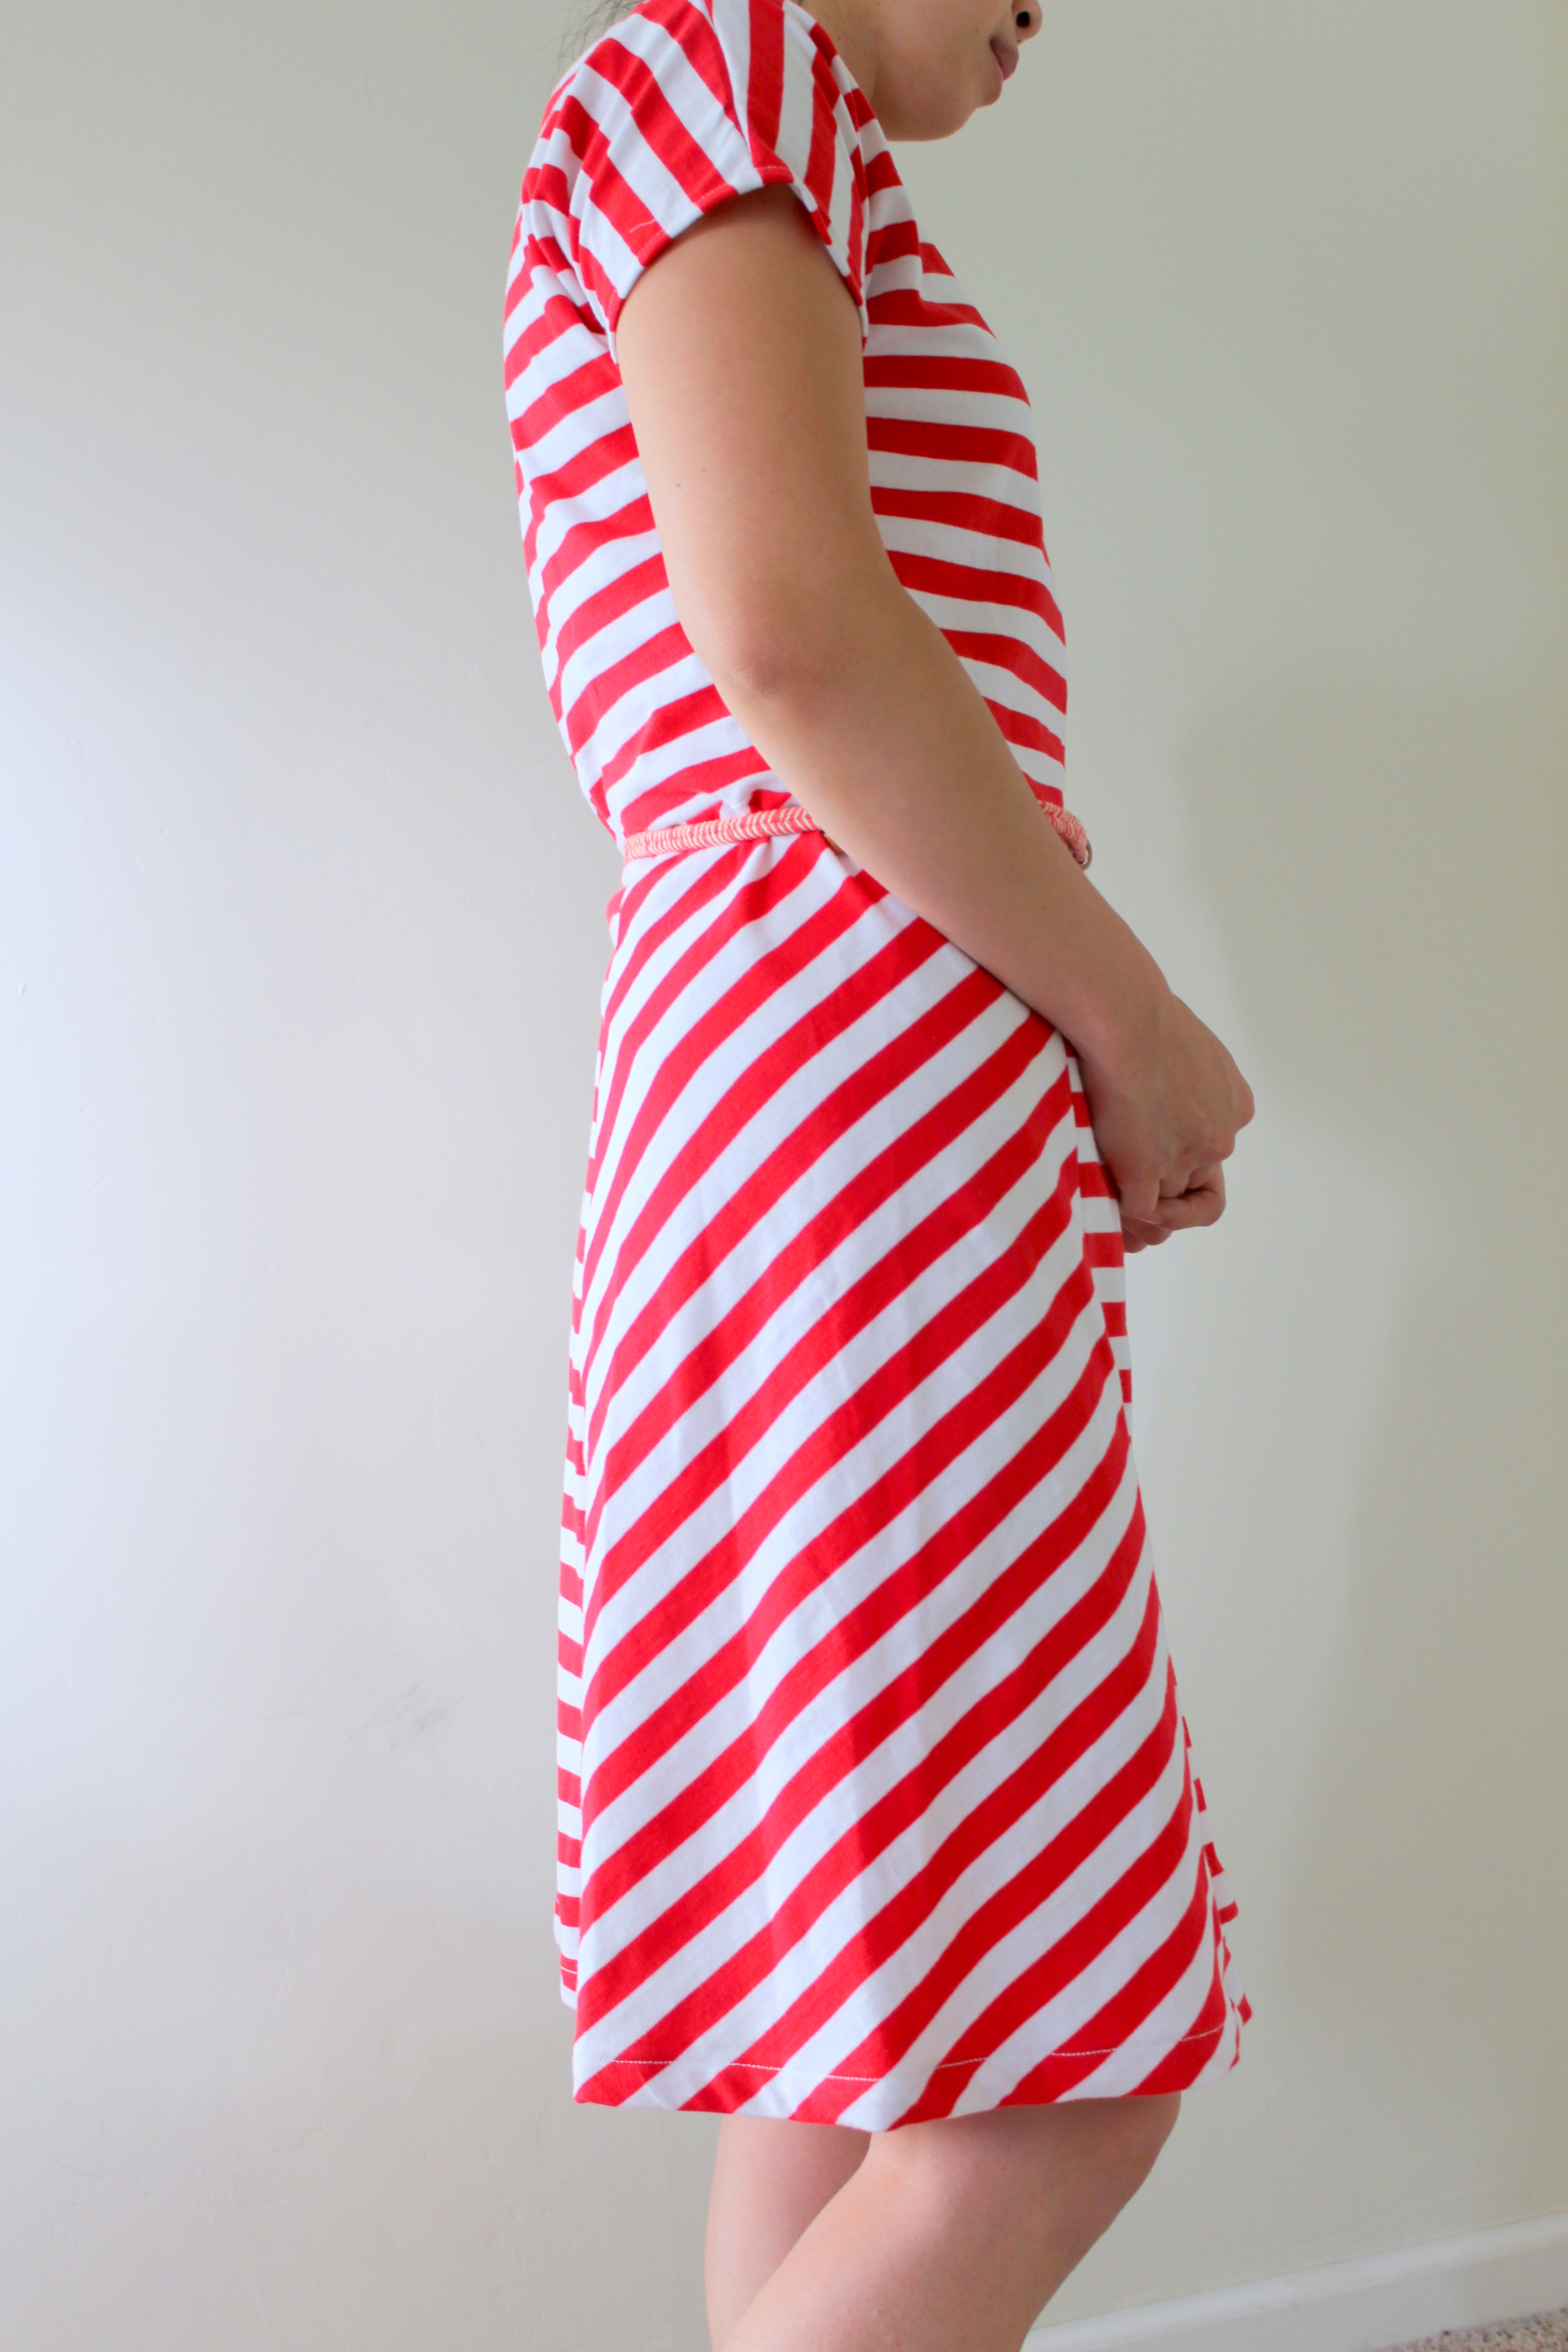
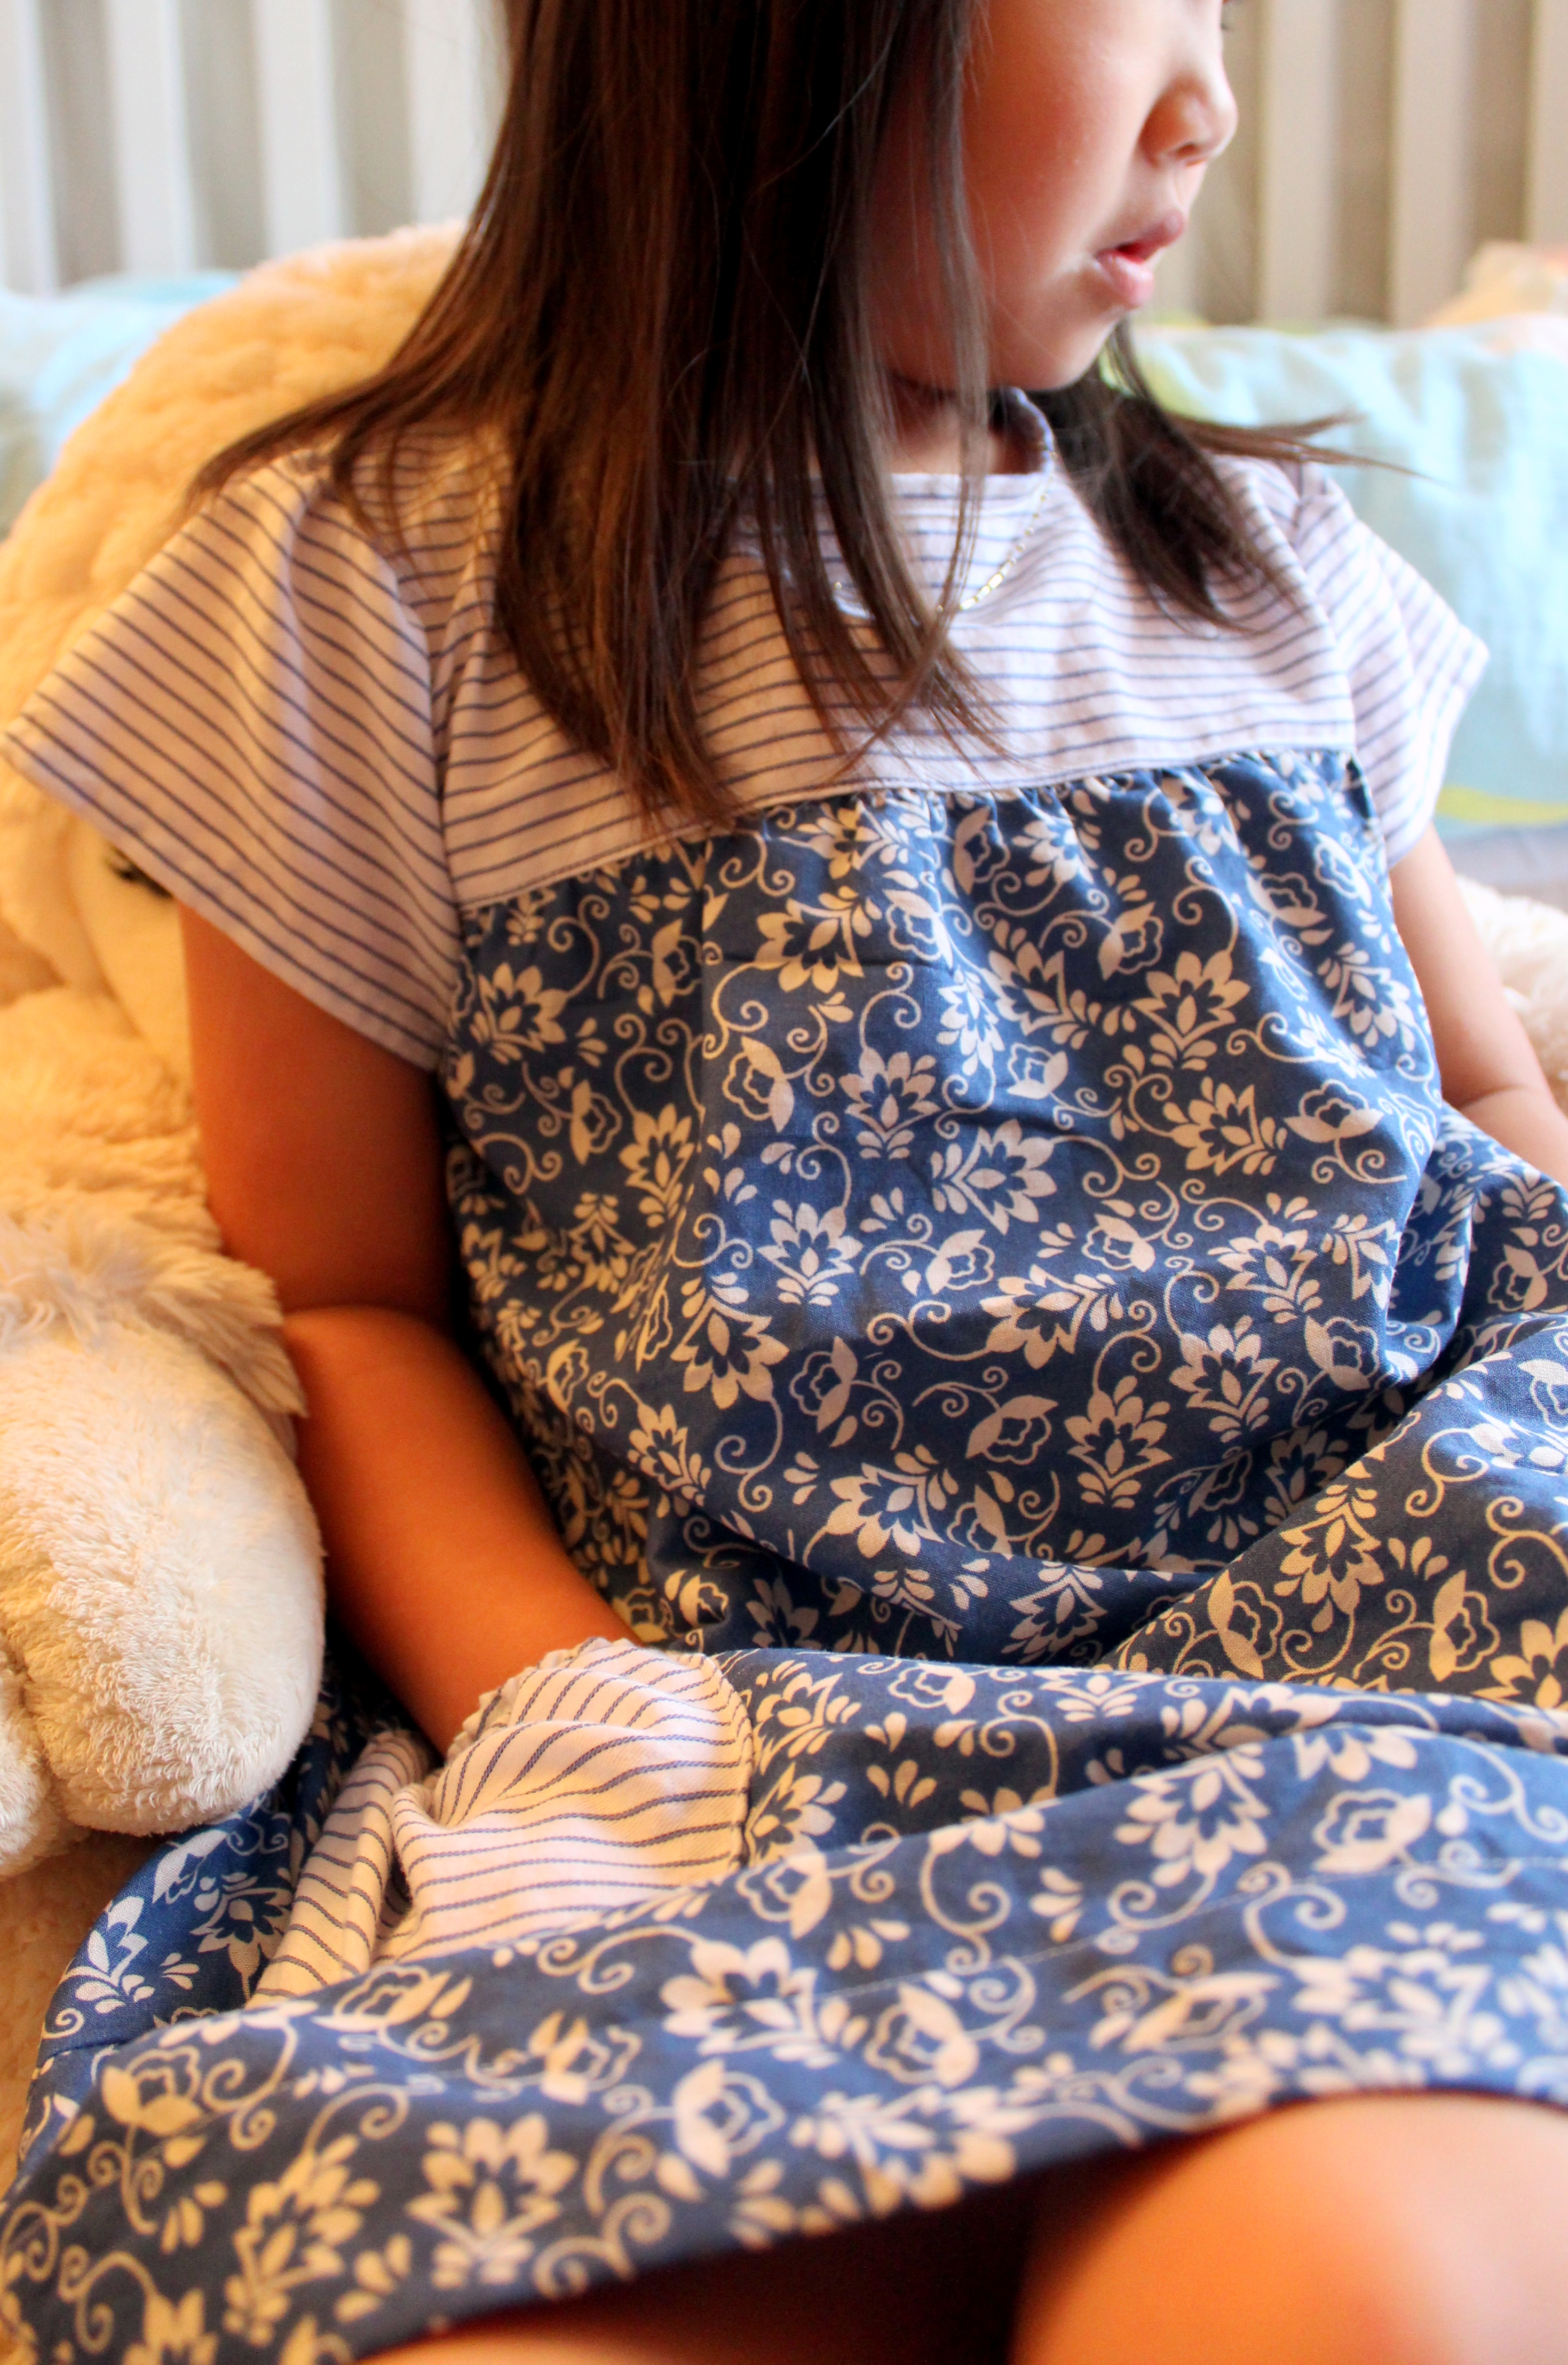
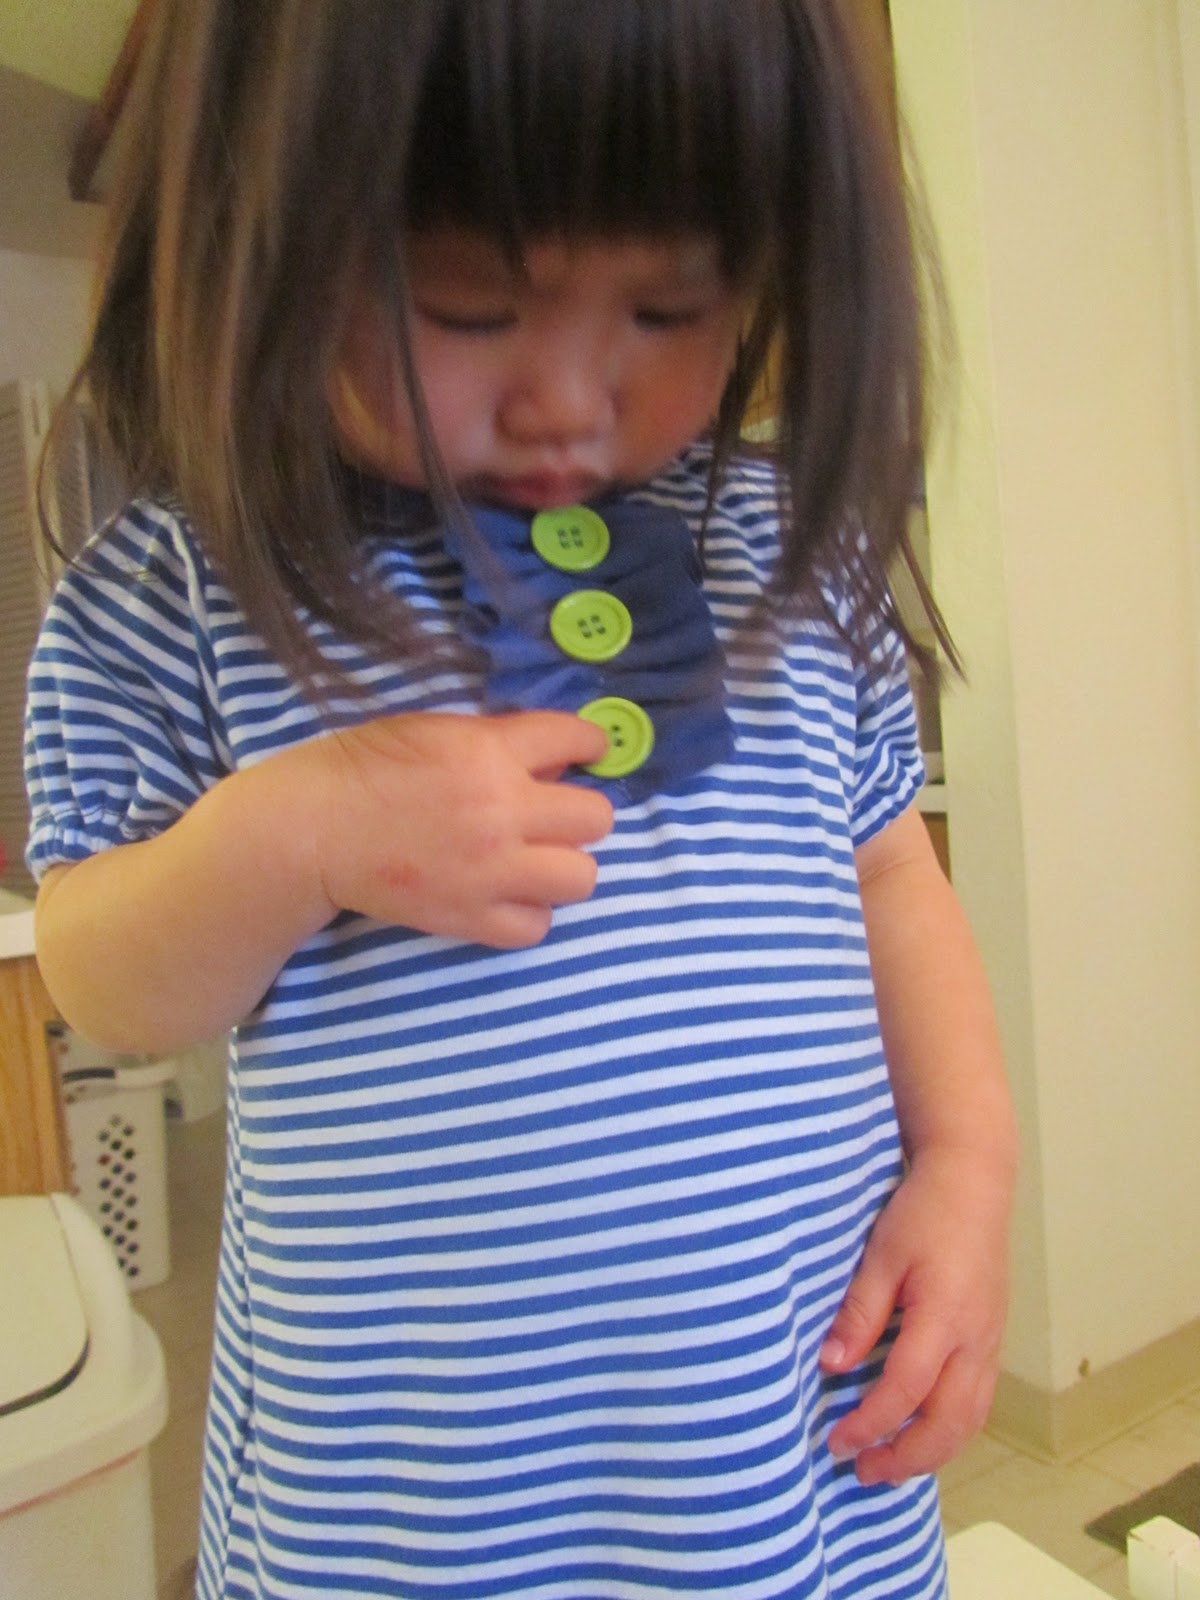
My little girl wanted to wear it to school the next day and I couldn’t say no when she was so willing to wear her denim leggings under them and put on her cardigan.  Good thing I took pictures of her in the dress before school because when I picked her up, she had pink glittery paint all over her dress.  I started to worry the paint wouldn’t wash off and couldn’t get my mind off of the paint the entire drive home.  Needless to say, I hand-washed the dress right when we got home and the paint did come off with a bit of scrubbing.  Don’t worry, I won’t freak out next time.  It’s just the day after I finished it, so I was a bit sensitive (and sleep-deprived).  🙂

Go ransack your hubby, brother, whoever’s closet and there’s bound to be shirts they don’t wear that have perfectly good fabric for making children’s clothes.

Until next time… Have a great week and thanks for reading!

-Flora

Contrast Stripes² Girl’s Knit Shirt *upcycle*

The mornings and evenings are starting to become sweater weather and before we know it, I’ll be turning our rooms upside down looking for the cold weather clothes I had packed away hurriedly at the beginning of summer.  So this week, I have decided to get a leg up on some cold weather clothes by making some from fabric and old clothes I had on hand.  I made a couple leggings with leftover fleece from the kids’ Halloween costumes I made (which I will post soon), and saw these two old-but-perfectly-good shirts that would coordinate perfectly together to make a cute little shirt for my not-so-little-anymore girl.

These are the two shirts that I had kept in the hopes of using them one day to make something cute since the fabric is still in great condition.  The pink and gray shirt is a maternity shirt that ended up with a little hole on the shoulder area and the gray and white stripe shirt has beading that was unraveling around the neckline.

So first off, I got a 4T size shirt that fits A but is just a tad loose on her since she’s 3 yrs old and on the smaller side.  I folded in half vertically then traced a pattern for the front and back adding a little seam allowance.

I like to make one pattern piece for both the front and back and just draw another neckline which I find is easy to trace by lifting the paper a bit.

And made a rough pattern piece for the long sleeve, note how I drew above the shoulder line for the sleeve so I can gather it a bit and fit it into the armhole. *the sleeve ended up being a bit too fat/wide, so I sewed it thinner later*

Cut out your front and back pieces and sew at the shoulder and side seams with right side of fabric facing each other.  *I cut the fabric to use the already hemmed bottom portion of the shirt and the sleeve so I don’t have to hem later. *

Prepare your sleeves by folding in half and sewing up the open, long side.

See how the sleeve is a lot “bigger” than the armhole?  I made a blue mark on both sides of the sleeve then made a gather stitch between those two blue marks.

Stitch a gather stitch then pull the thread to make gathers. (You stitch on the longest stitch setting, which on my sewing machine is a 4)

Line up the seam line of the sleeve and your side seam then ease and pin the sleeve together with right sides of fabric together.  Repeat for the other sleeve and you can do serge or use a zigzag stitch to neaten the exposed seam.

Now for the neckline, I just cut off the neckband from my pink and gray shirt, roughly stretched it across the neckline to see how long it needed to be, then sewed the ends together to make a circle of the neckband.

THEN, I pinned the neckband into the neckline and remember when adding neckbands with knit fabric, you need to stretch the fabric while you pin it so it doesn’t hang loosely around the neckline later.  

Patiently pin and sew and there you have it!  My girl’s shirt is done!  I didn’t even have to hem bottom of the shirt or the wrist portion of the sleeve!  

I think it turned out cute and is a nice fall weather piece.  And the fabric I used was really soft knit fabric that is sort of loose and drapey.

Diapers and Wipes UNSTASHED

 I hate opening up my purse and seeing the spare diaper that is squished and wrinkled from my wallet and other very important stuff being jammed on top of it.  It makes me wonder if the diaper is even clean.  SO, I found a cute table runner at TJ Maxx in the clearance section for only $5 and bought it because the design of the fabric was beautiful and the weight of the fabric was really nice.  

I borrowed a book from the library: “Tilda’s Studio: over 50 fresh projects…” and saw a laptop case with this scalloped flap and edge-stitched design that I wanted to use for a diaper clutch.  I used my diaper, wipes case, and baby changing mat as a guide to cut out a long rectangle and modified the scalloped design for the flap found in the pattern section of the book.  Then I just did a tight zigzag stitch all along the edges which means I don’t have to worry about hiding a seam, flipping it right side out, and whatnot.  I then added a large snap button by hand.  By the way, I used up a whole spool of thread (although it was a small spool and thicker thread)  It does look like a large, flat envelope, but I think the design of the fabric and the stitching all along the edges makes it look nice.  

*UPDATE: Cut out a 10.75″ x 21.25″ rectangle of main, fabric, lining, and interfacing (if your fabric is lightweight).  Then fold it in half, lengthwise and cut out the scalloped flap on one end.  Fold up the straight end to match up with the flap and sew around the edges.  Here’s the pattern for the scalloped flap.  (When you print the pattern, make sure it doesn’t “reduce to fit” or the pattern will be off scale)

Fits diapers, wipes case and a baby changing mat with room to spare.  And it still fits in my purse!  yay!  No more ugly, misshapen diapers scrunched up in the bottom of my bag.

I can see this being a ipad/tablet case as well.

DIY Girl’s Bathing Suit

2/21/2013-I HAVE REMOVED PICTURES OF MY DAUGHTER MODELING HER NEW BATHING SUIT DUE TO UNWANTED TRAFFIC FROM ADULT SITES!!! 

Wanna make your own little girl’s bathing suit?
It’s doable~ I’m seriously new to this whole sewing thing.  I’ve learned through DIY blogs/tutorials and although I’m sure I take a lot longer than most sewers, I’ve learned that you can do it.

So I first started with Avie’s bathing suit which is an 12-18m size and she’s definitely wearing 2T’s right now.  I traced the front and the back, but just half of it so you’d cut it on a fold later

See what I mean by just trace half?  Next time, I’m going to leave more fabric on the back bottom cuz after I assembled it, it seemed like it would barely fit a swim diaper

Cut 1 front, 1 back on fold, cut strips (double the width of the top) for the ruffles, and cut another strip for bias trim along the top front and back

use a loose stitch to gather the ruffles then 

pit it on and stitch it onto the front
then add the bias trim and pin it on/sew it on

do the same for the back minus the ruffles

*you will need to stretch the bias trim a bit in the back when you pin it so it doesn’t stretch loose*
*don’t need to stretch it for the front since it’s curved upwards and not inwards*

after sewing front 

I got a little to stretch happy with the back bias trim, but I think it just adds more character to it… ha ha

pin and sew the sides together

also do the same for the bottom crotch part

now the fun part… I should’ve been more generous w/ my seam allowance here at the leg openings where I need to add the elastic.  So I used regular elastic… since I didn’t feel like she was going to be wearing it in chlorine water too much that I’d worry about the elastic getting loose.  I measured it against the elastic I was going to use and folded and pinned the leg openings.  By the way, it’d be smart to measure your girl’s thigh/leg so it’ll be a good fit.

After you sew it very close to the edge (leaving enough room to pull the elastic and safety pin through), leave an opening to slip in the elastic and safety pin then pull it through and stitch it into place.

so there’s the after for the leg openings… see what I mean about the back bottom needing to be a bit wider to accommodate more booty
 
Now, for the strap around the neck, I tried to iron it in place but the spandex type material didn’t cooperate so I used tiny dots of liquid stitch to close it and make a nice strap.  Then sewed 2 lines at the middle edges.

attached!!!
added a bra/swimsuit clasp thing

Striped Henley-type knit dress

I have a folder on my comp where I save pics of kids’ clothes that I like for future reference, and I decided to try this dress out from GAP.

 I know the dress I made doesn’t exactly look like this henley dress from GAP, but this is what I got my inspiration from.  
First off, I used the pattern I had for my daughter (which I made from tracing her shirt, add seam allowance), then cut out sleeves, and cut out two strips of fabric double the width of the bottom of the dress for the ruffles.

You can see I folded the solid color fabric so it’s double the width of the bottom.

Then sew the shoulders together with right sides of fabric facing each other.

Then get your sleeves and do a gather stitch and gather until it fits your armhole

Pin the sleeves onto the armhole then sew it together (again, right sides of fabric together)

This is what it should look like after you sewed on the sleeves

Now take the long strips you made for the ruffles, gather stitch them, then pin them onto the bottom of the dress w/ right sides together.  Sew it together

Now, this is another strip of fabric I cut to make the ruffles in the middle of the dress w/ the buttons.  I just eyed the measurements to what I thought would look good after gathering it.  Sew a gathering stitch in the middle and gather it.

Pin it onto the front, middle of the bodice and pin it in place.  

Sew it down with matching color thread then remove the loose gathering stitches so it looks neat.

Now for the neckline.  Take a good amount of solid fabric and iron it in half like so.

Then pin it onto the neckline while pulling the bias strip around the curves of the neckline.  So when you go to sew it on, you’ll have to stretch the bias strip.  That way your neckline isn’t stretched out and loose and ugly.

Now we’re going to add the elastic to the bottom of the sleeves, so iron and pin the bottom of the sleeve.  Make sure you leave enough room to pull the elastic and safety pin through.

After you sew the bottom of the sleeve, pull the elastic (with the help of a safety pin) through the sleeve to the opposite end, make sure you hold onto the other end of the elastic so it doesn’t get lost inside the sleeve. (I’m lazy and just stick the other end in my mouth…)

Then sew the sides of the dress and the bottom sides of the sleeve together with right sides of fabric together, and you’re done!!!  Oh, and just hand sew on the buttons.

I know the buttons look neon green, but they’re really not.  It’s a pretty combo w/ the navy blue.

Boy’s shorts and Necktie

Finally made something for Brayden.  I used the boy’s pants/shorts pattern from http://www.danamadeit.com/2011/05/tutorial-kid-shorts.html .  This is the flat front pattern so it looks nice and not scrunched up from the elastic on the front.  I added a little airplane iron-on that I had for him and he loves it!  He likes to wear it at home since it’s too cold to wear it out just yet.

This is a boy’s necktie that I made w/ a pattern from Purl Soho  http://purlbee.squarespace.com/little-boys-tie/.  The tie is definitely for boys at least 3 yrs and older.  It’s too long for little baby boys.  My son’s 3 and it fits him just right so the smaller end in the back doesn’t hang out longer than the front, if that makes any sense…  He’ll be able to wear it for a few years and more.